Rough Country RC800 User Manual
Page 5
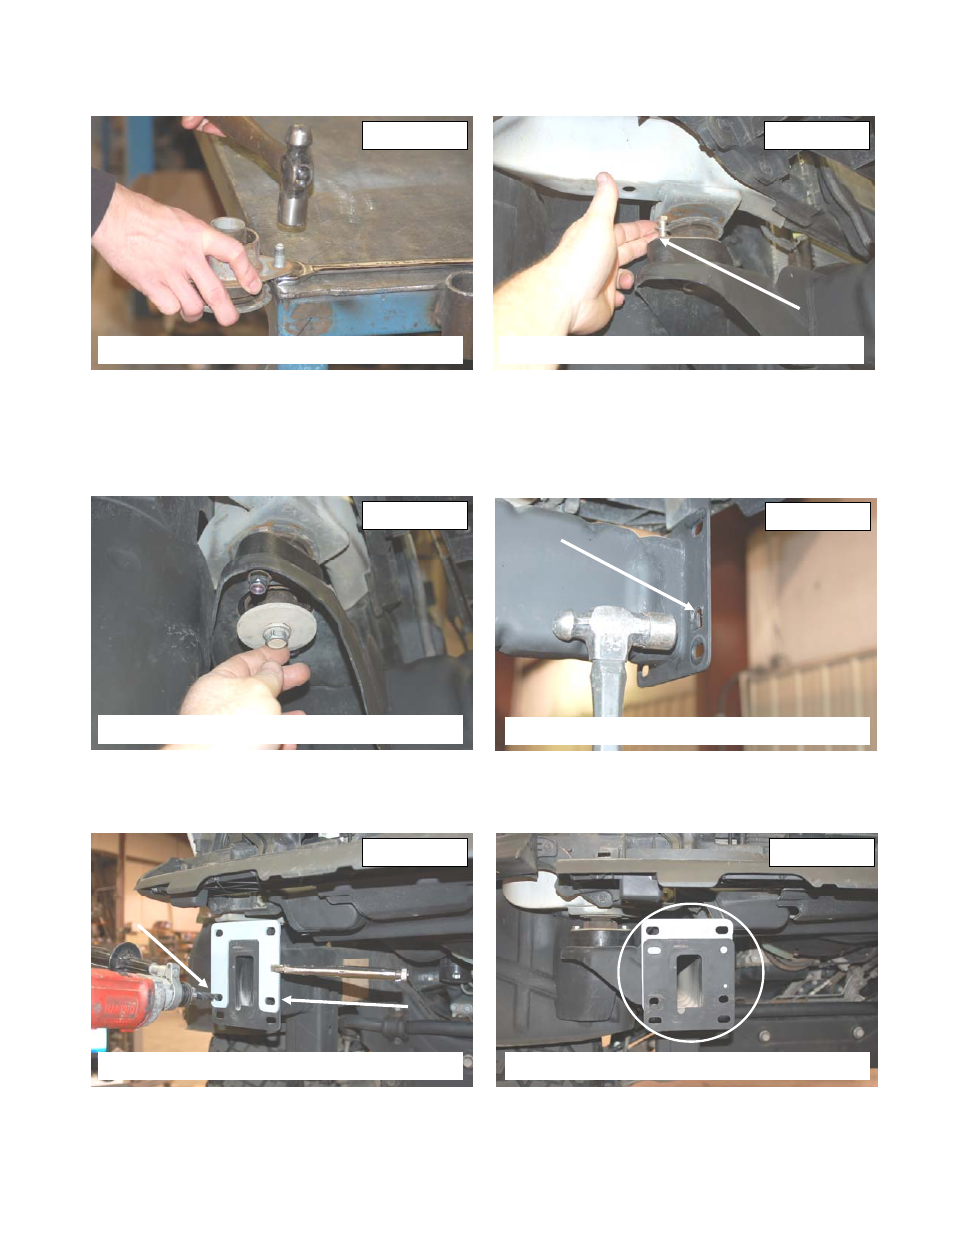
15. Remove body mounts from one side of the vehicle.
16. Remove studs from them using a hammer and a wrench. See Photo 19. Retain two for reuse on rear.
17. Install new body spacers using supplied 3/8” x 2 1/4” bolts, washers and nuts. 2 per mount. See Photo 20.
18. Reinstall body bolts as shown in Photo 21 and lower body back down on frame.
19. Proceed to opposite side and install body spacers. Do not tighten until both sides are finished.
20. Using 14mm wrench and socket tighten new 3/8” bolts then tighten stock body bolts using 18mm socket.
21. After all body bolts a tight reinstall ground wire on driver side using 10mm wrench.
22. On the factory bumper frame mount flatten the metal tab with hammer until its flush with outside. This is done be-
cause you will be drilling into it. See Photo 22.
23. Using new bumper mount as a guide, clamp in place and drill new 1/2” holes. See Photo 23. If needed use smaller
drill bit to make a pilot hole first. Test fit bumper to make sure holes line up.
24. After holes are drilled, install new bumper mount behind frame mount and install bumper into new holes. Install fac-
tory nuts using 18mm wrench. See Photo 24.
25. Reattach fog light harness on driver side.
26. Install painted bumper cover using 8 and 10mm wrenches with factory hardware, making sure bumper fits properly .
27. Install all clips then install headlamps. Pull down on clip inside fender well to lock headlamp in place. Install factory
bolts.
28. Reinstall grill and then radiator bezel.
PHOTO 19
PHOTO 20
PHOTO 21
PHOTO 22
PHOTO 23
PHOTO 24
REMOVE THE STOCK STUDS
INSTALL SPACERS WITH 3/8” 2 1/4” BOLTS
REINSTALL STOCK CAB MOUNT BOLTS
FLATTEN TABS WITH HAMMER
CLAMP BRACKET IN PLACE AND DRILL
INSTALL BRACKET BEHIND MOUNT