Rough Country 170P User Manual
Page 5
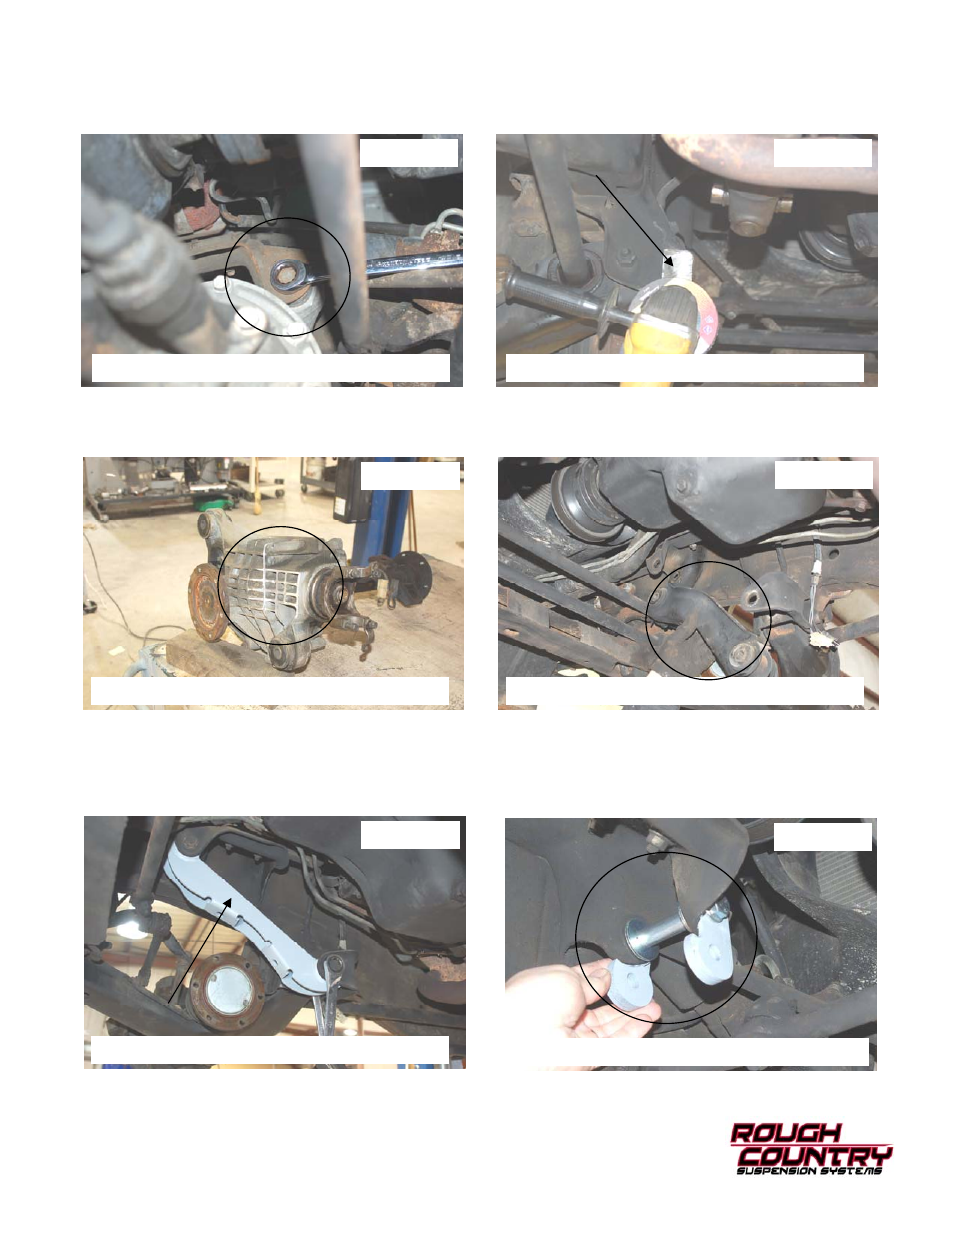
26. Remove the driver side upper differential hardware using a 21mm socket / wrench. See Photo 19. Retain the factory
hardware.
27. Remove the differential from the truck and grind the driver side mount flat as shown in Photo 20 and coat with paint
to prevent rust.
28. With a hand grinder. Grind the cooling fins to clear the frame. See Photo 21.
29. Remove the passenger side frame bracket using a 21mm socket / wrench. See Photo 22. Retain the stock hard-
ware.
30. Install the supplied bushings and sleeves in the passenger side drop bracket and install in the factory mount as
shown in Photo 23 with the factory hardware. Short end of bracket to the rear. Tighten using a 21mm socket /
wrench.
31. Install the driver side upper brackets with the crush sleeve and flat washers as shown Photo 23 with the supplied
9/16” x 5” bolt, washers and nut. Do not tighten at this time. The thick part of the new brackets will be on the bottom.
PHOTO 19
PHOTO 20
PHOTO 21
PHOTO 22
PHOTO 23
PHOTO 24
REMOVE THE DR UPPER DIFF HARDWARE
GRIND FLAT THE LOWER DIFF MOUNT
GRIND THE COOLING FINS
REMOVE THE PASS SIDE DIFF BRACKET
INSTALL THE NEW PASS SIDE DIFF BRKT
INSTALL THE DRIVER UPPER DIFF BRKTS