Rough Country 170P User Manual
Page 2
FRONT INSTALLATION INSTRUCTIONS
1. Chock the rear wheels to prevent movement. Place a jack under the lower control arm and jack the vehicle up.
Place jack stands on the frame rails to support the vehicle. Remove tires and wheels.
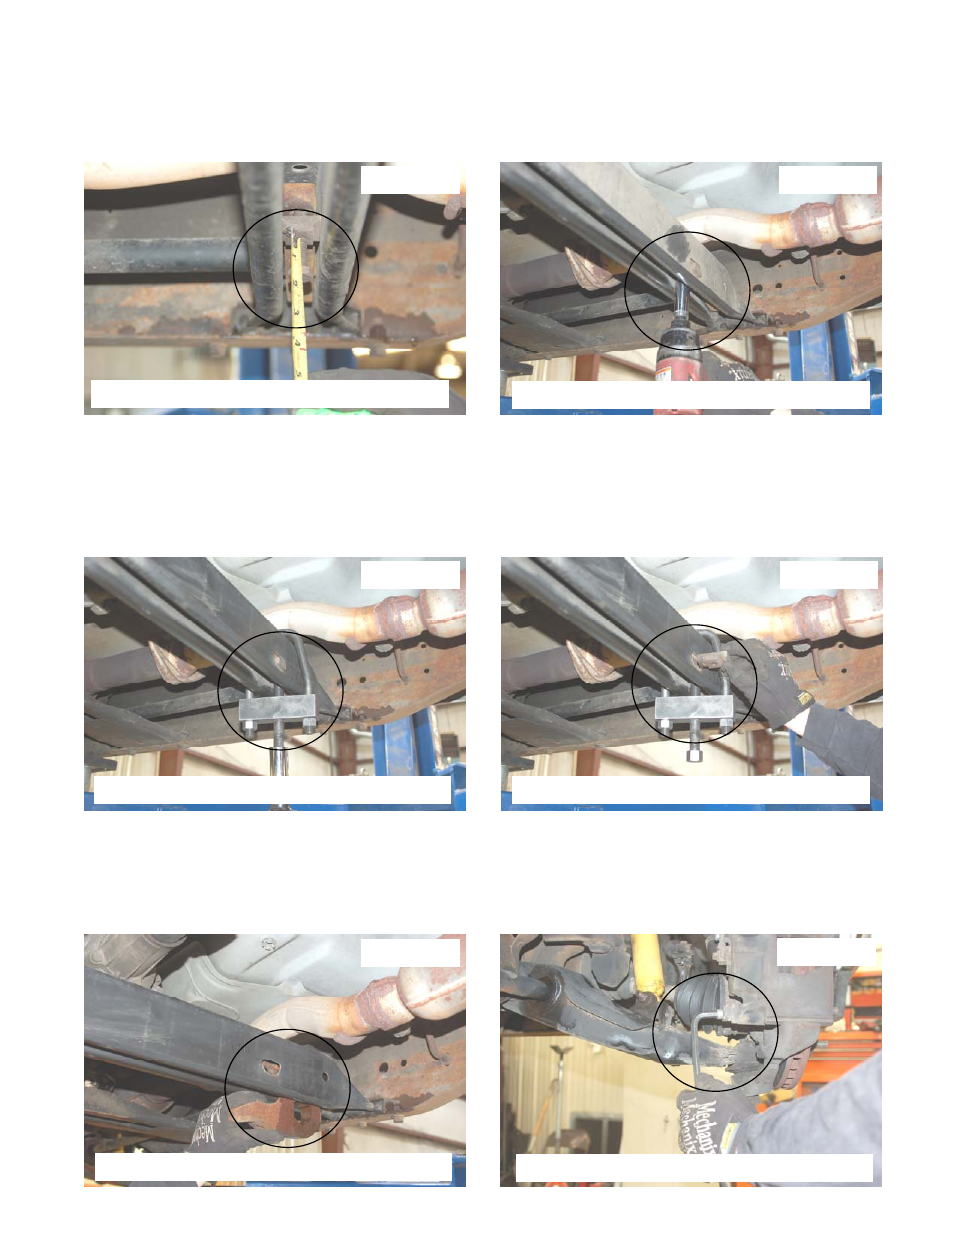
2. Measure the length of adjustment bolt for later reference. See Photo 1.
3. Remove the torsion bar adjuster bolt. See Photo 2.
4. The next step will require a torsion bar tool to safely unload the torsion bars . Part # 1067 is available from Rough
Country. Please Note the torsion bar is under extreme load. Substituting a tool for an actual torsion bar tool
may result in injury.
5. On either side of the vehicle, position unloading tool on cross member. See Photo 3. Apply light lubricating grease
to tool threads. Be sure to leave adequate clearance to remove the adjuster block from the cross member.
6. Tighten tool on torsion bar adjuster to relieve tension on the bolt .Loosen the adjuster bolt and remove the threaded
block from cross member. See Photo 4.
7. Slide the bar forward and the torsion bar adjuster will fall free. In the event the bar seems lodged, use a punch and
hammer routed through the hole in the back of the cross member to drive it forward. See Photo 5. Repeat on oppo-
site side.
8. The supplied torsion bar keys will installed in a later step.
9. Remove brake caliper as shown in Photo 6 using a 3/8” allen wrench and secure out of harms way.
10. Remove the rotor.
PHOTO 1
PHOTO 2
PHOTO 3
PHOTO 4
PHOTO 5
PHOTO 6
MEASURE BOLT
REMOVE THE ADJUSTER BOLT
UNLOAD KEY USING TORSION BAR TOOL
REMOVE THREADED ADJUSTER BLOCK
REMOVE THE TORSION BAR KEY
REMOVE THE BRAKE CALIPER