Rough Country 698S User Manual
Page 5
19. Install the new front coil spring using a coil spring compressor. On lower surface make sure coil end is rotated to
stop and on upper mount re-use stock rubber coil isolator.
20. Install the new shock absorbers using the supplied 5/16” x 1” bolts in bag 2, washers and nuts on the bottom bar pin
mount. Note: Shocks are to be installed piston down. Tighten using a 14mm wrench at the top using supplied stem
bushings, washers and nuts and a 13mm wrench on the bottom.
21. Install the tires and wheels and tighten to factory specifications.
22. Jack up the vehicle and remove the jack stands.
23. Repeat steps on opposite side of vehicle.
24. Lower the vehicle to the ground.
25. Reinstall the sway bar links on the axle using the factory hardware. Tighten using a 15mm & 18mm socket / wrench.
26. Tighten the lower control arm hardware using a 21mm socket/wrench to factory specifications
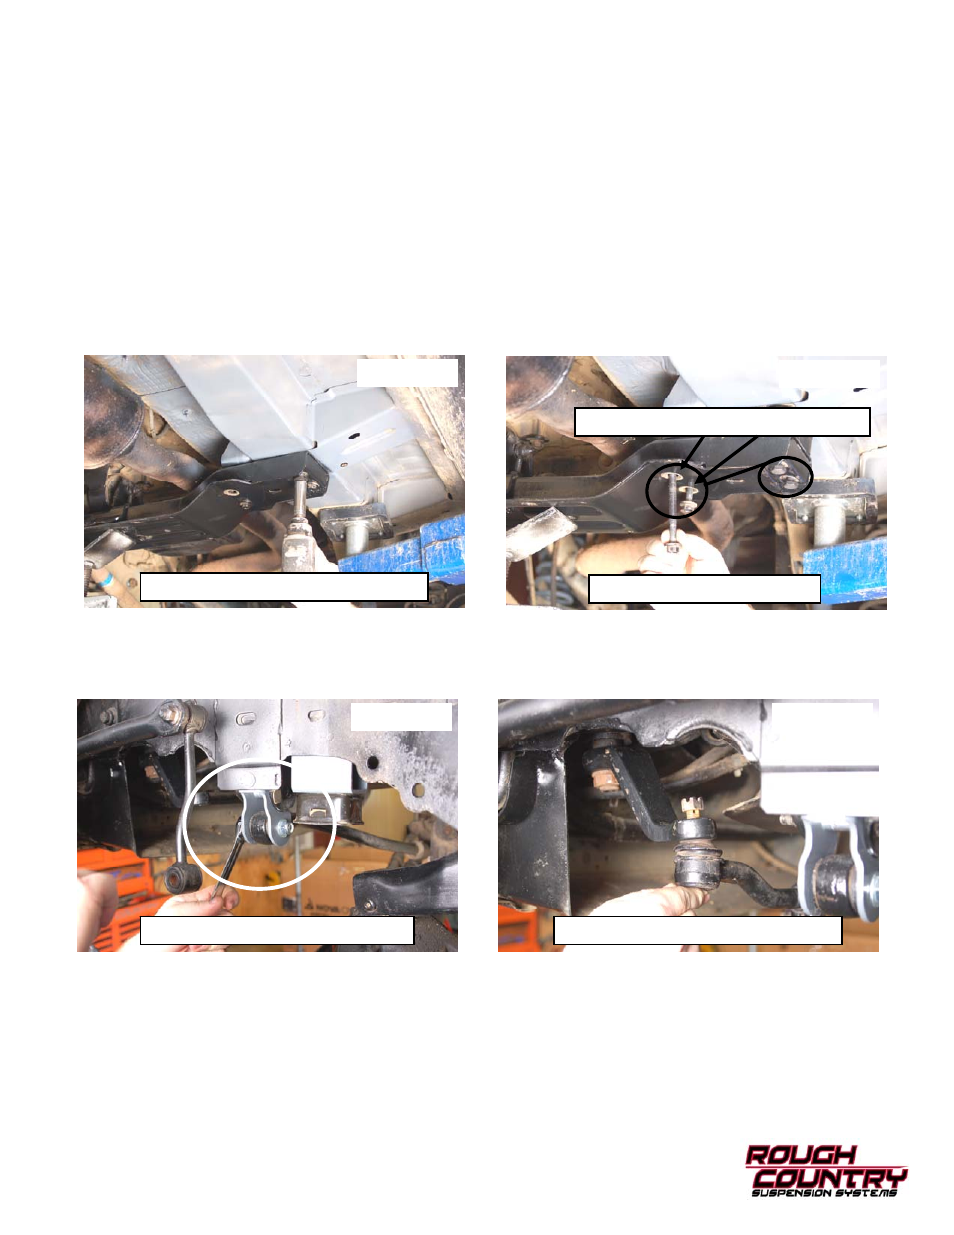
27. Support the transmission cross member using a floor jack and remove the 4 bolts on each side using a 15mm
socket. See Photo 13.
28. Lower cross member carefully leaving bolts installed but loose on one side. Install the transmission cross member
spacers as shown in Photo 14 and secure with the supplied 10mm x 140mm(approx. 5.5”) bolts and washers from
Bag2 and re-using the stock outside factory bolts on the inside mount.
29. Install the track bar with supplied 12mm x 65mm (approx 2.6”) bolt & flange locknut from Bag2,. Tighten using a
18mm / 19mm socket / wrench. Do not use a flat washer. See Photo 15.
30. Install the drag link in the new pitman arm with factory castle nut and tighten using a 19mm wrench to factory specifi-
cations. Install supplied cotter pin from Bag2. See Photo 16.
Photo 15
Photo 16
Photo 13
Photo 14
Re-Use Stock Outer Bolt On Inner Holes
Install the Track Rod in the Bracket
Install the Tie Rod in the Pitman Arm
Remove Bolts from Cross Member
Install Cross Member Spacers