Rough Country 698S User Manual
Page 3
FRONT INSTALLATION INSTRUCTIONS
1. Chock the rear wheels and jack up the front of the vehicle and support the vehicle with jack stands.
2. Support the front axle with a floor jack.
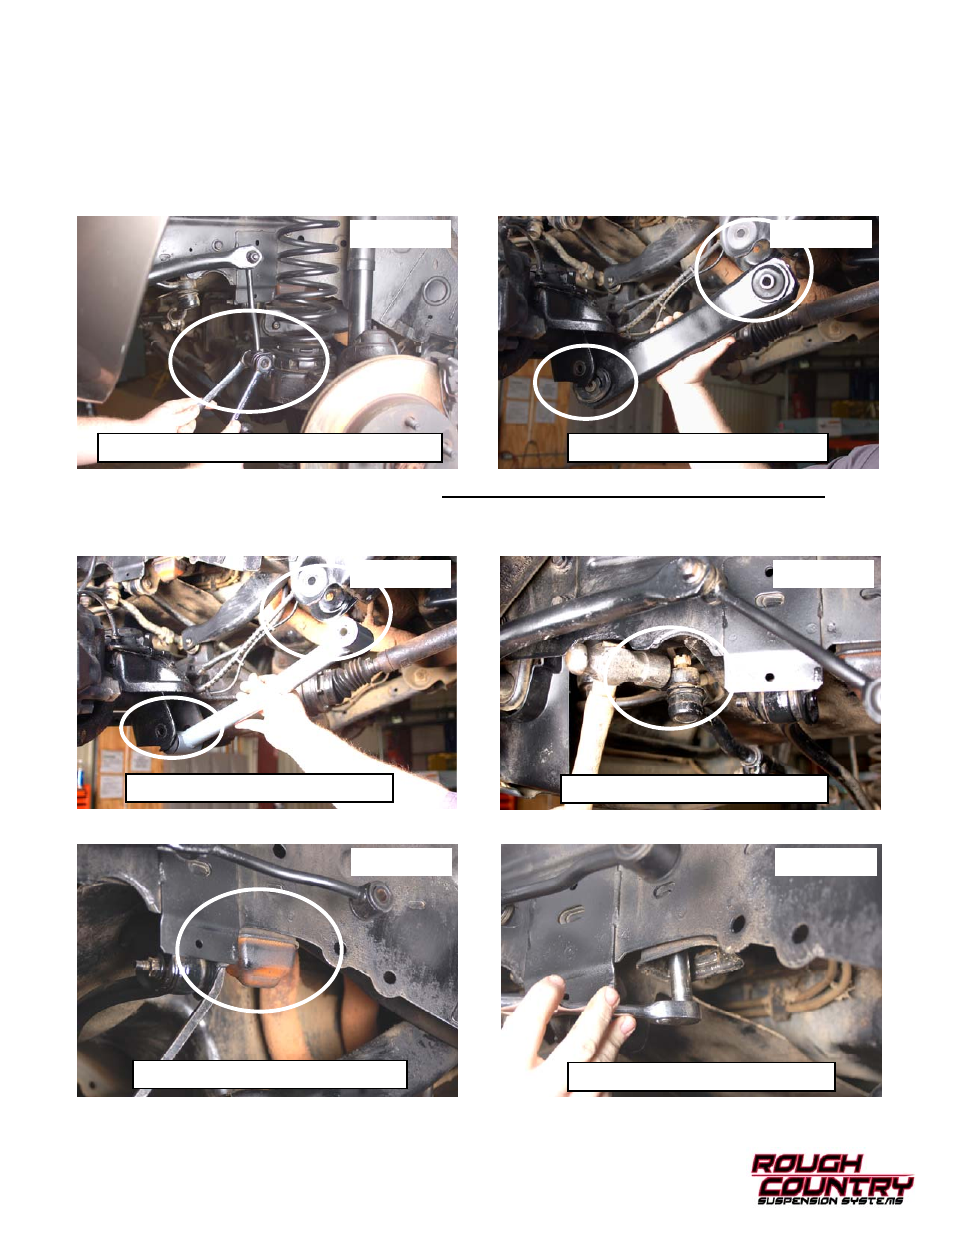
3. Remove the lower sway bar link bolt using a 15mm & 18mm wrench. See Photo 1. Retain hardware for reuse.
4. Remove the shocks using a 15mm wrench/socket for the top mount and a 13mm wrench/socket for the bottom
mount.
5. Lower the axle using the floor jack and remove the coil springs.
6. Remove the stock lower control arm using a 21mm wrench/socket. Retain factory hardware for re-use See Photo 2.
7.
8. Install the lower control arm on the vehicle with the larger end on the axle and the bend pointing inward. Secure
using the factory hardware. See Photo 3. Do not fully tighten at this time.
9. Remove the cotter pin and nut from the pitman arm using a 19mm wrench. Retain nut for reuse.
10. Strike the arm as shown in Photo 4 to dislodge the drag link.
11. Using a pry bar, remove the bump stop and remove the bump stop mounts using a 13mm wrench. See Photo 5 & 6.
Photo 1
Photo 4
Photo 5
Photo 6
Remove Lower Sway Bar Link from Axle Mount
Remove Lower Control Arm
Install New Lower Control Arm
Remove Tie Rod from Pitman Arm
Remove Front Factory Bump Stop
Remove Factory Bump Stop Mount
Photo 3
Photo 2