Rough Country 565.20 User Manual
Page 6
28. Lower the front axle enough to install the new coil springs. Position the coil springs in the lower coil buckets on the
axle and rotate as necessary to be sure that the pigtail of the coil in indexed properly in the bucket. Position the fac-
tory rubber isolator on top of each coil, then raise the axle enough to seat the coil springs in the upper spring buck-
ets.
29. Install the bushings and 9/16” ID sleeves on the front gas shock absorbers part # 658459.
30. Compress the front springs enough to install the front shocks. Bolt the lower end of the shock to the axle using the
stock hardware using a 18mm wrench. Attach the upper end of the shock with the stock hardware, using a 19mm
wrench. Tighten only enough to bulge the bushing
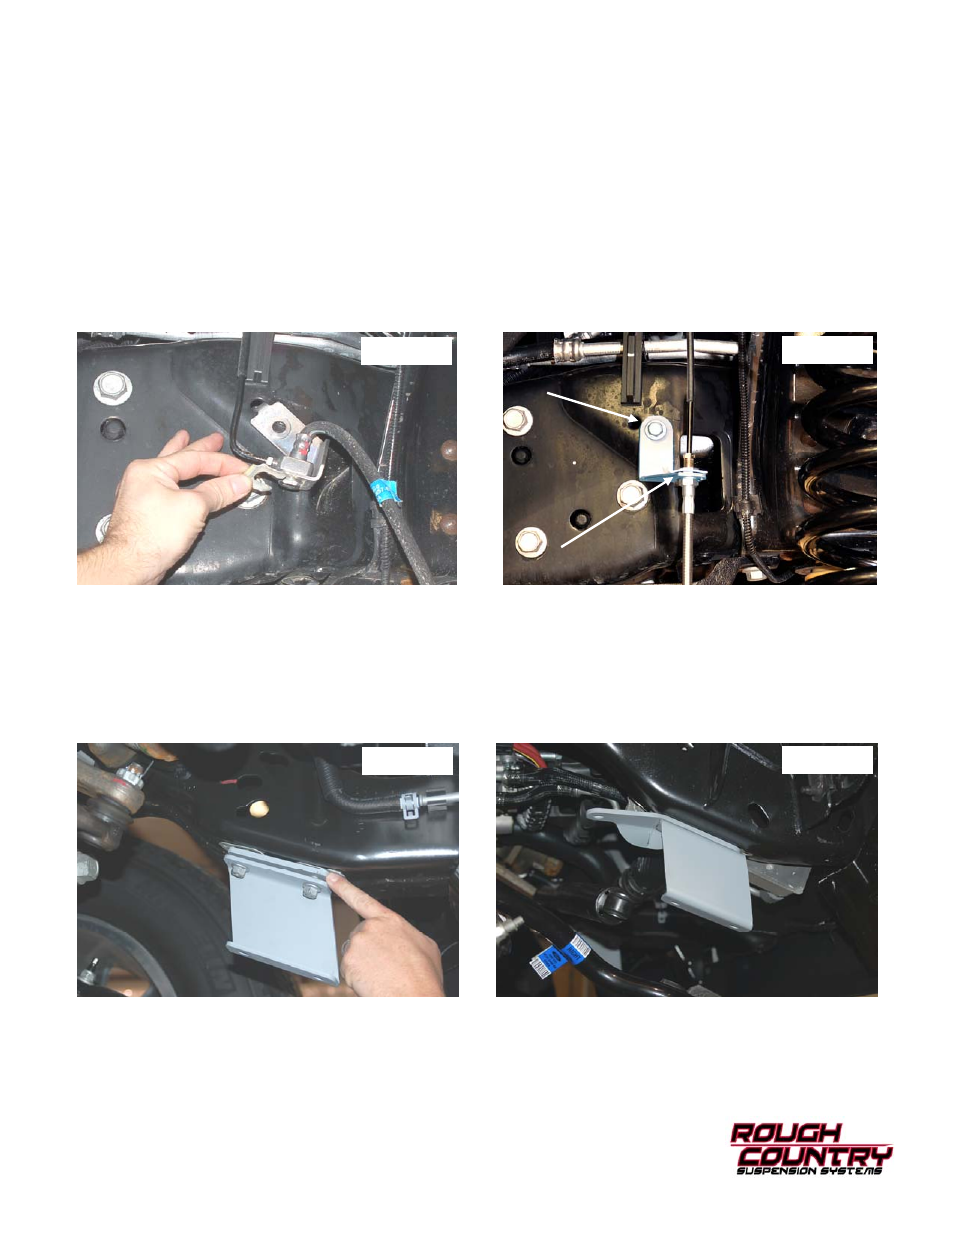
31. Remove the clip as shown from the brake line and remove the factory brake line bracket from the line. See Photo
18.
32. Loosen the hard line from the brake line block using a 10mm wrench and straighten out the metal brake line.
33. Remove the stock brake line from the caliper.
34. Secure the new bracket to the frame with the stock hardware. Tighten using a 10mm socket. See Photo 19.
35. Install the new supplied brake line to the steel line and tighten.
36. Install the supplied brake line clip to secure the line to the bracket. See Photo 19.
37. Reinstall the ABS and vacuum line.
38. Install the new sway bar link drop brackets and sway bar shim bracket if reusing the factory stabilizer as shown in
the drivers side factory frame location with the factory hardware. If the factory stabilizer will not be re-used or an
after market stabilizer will be installed, the stabilizer bracket will not be installed. Tighten using a 15mm
socket. See Photo 20.
39. Install the sway bar drop bracket and stabilizer relocation bracket if reusing the factory stabilizer on the passenger
side as shown with the factory hardware. If the factory stabilizer will not be re-used or an after market stabilizer
will be installed, the stabilizer bracket will not be installed. Tighten using a 15mm wrench. See Photo 21.
Photo 18
Photo 19
Photo 20
Photo 21