Rough Country 565.20 User Manual
Page 4
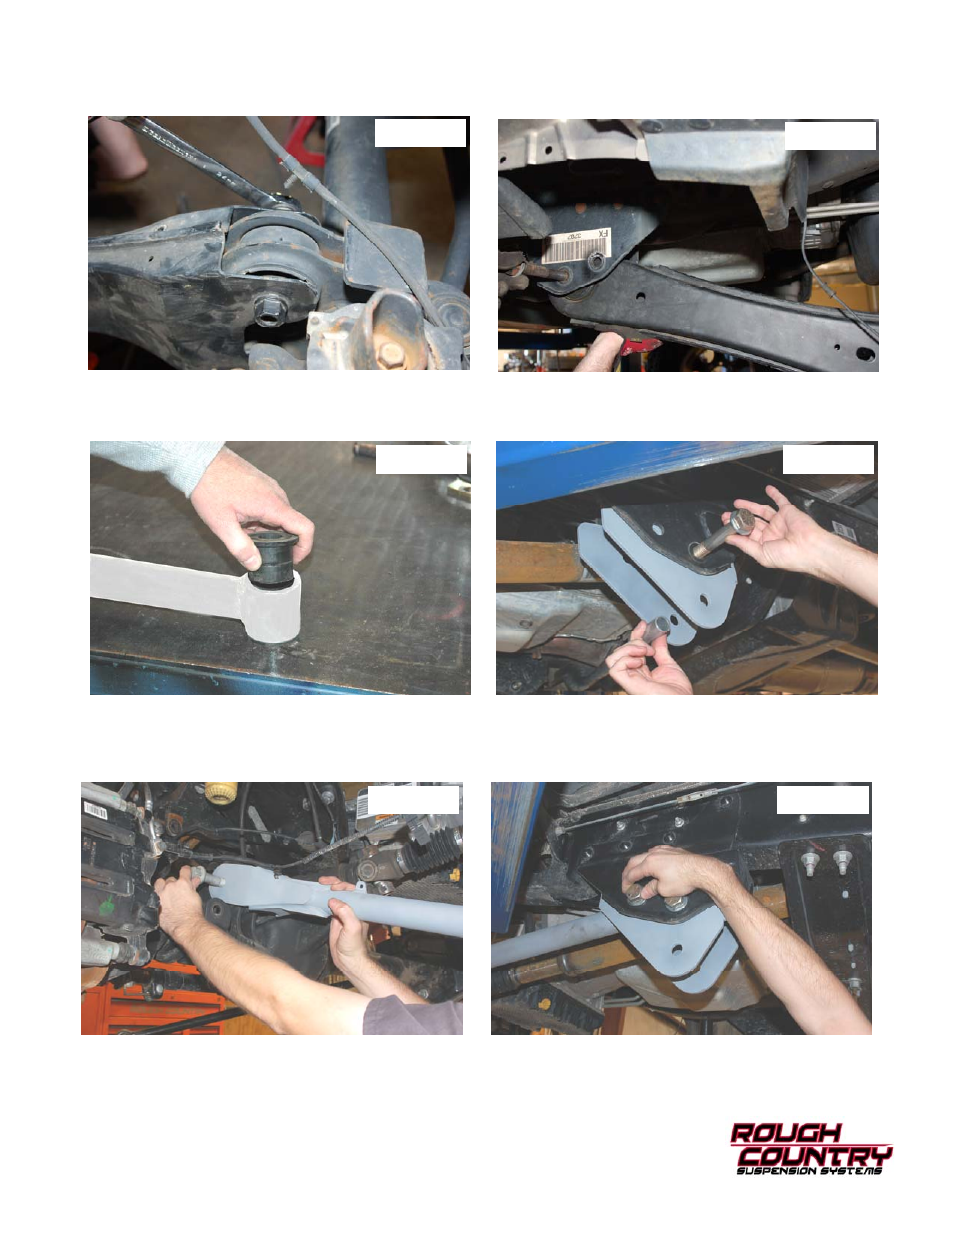
11. Support both driver and passenger radius arms with jack stands. Using a 24mm wrench, and socket remove the
bolts holding the radius arm to the axle. Retain stock hardware for re-use. See Photo 7.
12. Using a 24mm wrench, and socket remove the bolt holding the radius arm to the frame. See Photo 8.
13. Insert bushings, and sleeves from kit bag into the upper control arm. See Photo 9.
14. Insert the radius arm drop bracket into the stock location. Bolt into place using the supplied 3/4” x 4.75” bolt, crush
sleeve, nut and washer in the bracket. Do not tighten at this time. See Photo 10.
15. Attach the control arms to the axle using the stock hardware. See Photo 11. It may be necessary to use the rear
nut from the frame mount due to some models having the radius arm nut welded to the radius arm.
16. Attach the upper control arm to the radius arm bracket in the top hole. Bolt into place using the supplied 3/4” x 4.75”
bolt, nut and washer provided in the kit bag. Do not tighten at this time. See Photo 12.
Photo 7
Photo 8
Photo 9
Photo 10
Photo 11
Photo 12