Rough Country 682S User Manual
Page 7
29. On the rear of the vehicle remove the factory sway bar link using a 18mm socket and wrench on the lower. Remove
the upper hardware using a 18mm wrench and a 19mm wrench on the ball joint end.
30. Install the factory rear sway bar link in place of the factory front sway bar link. Attach the swivel end of the link to
the factory sway bar using the stock hardware. Line up the eye end of the link to the factory mount on the axle, at-
tach using the factory hardware. Tighten the upper using a 18mm and 19mm wrench, and lower using a 18mm
socket and wrench.
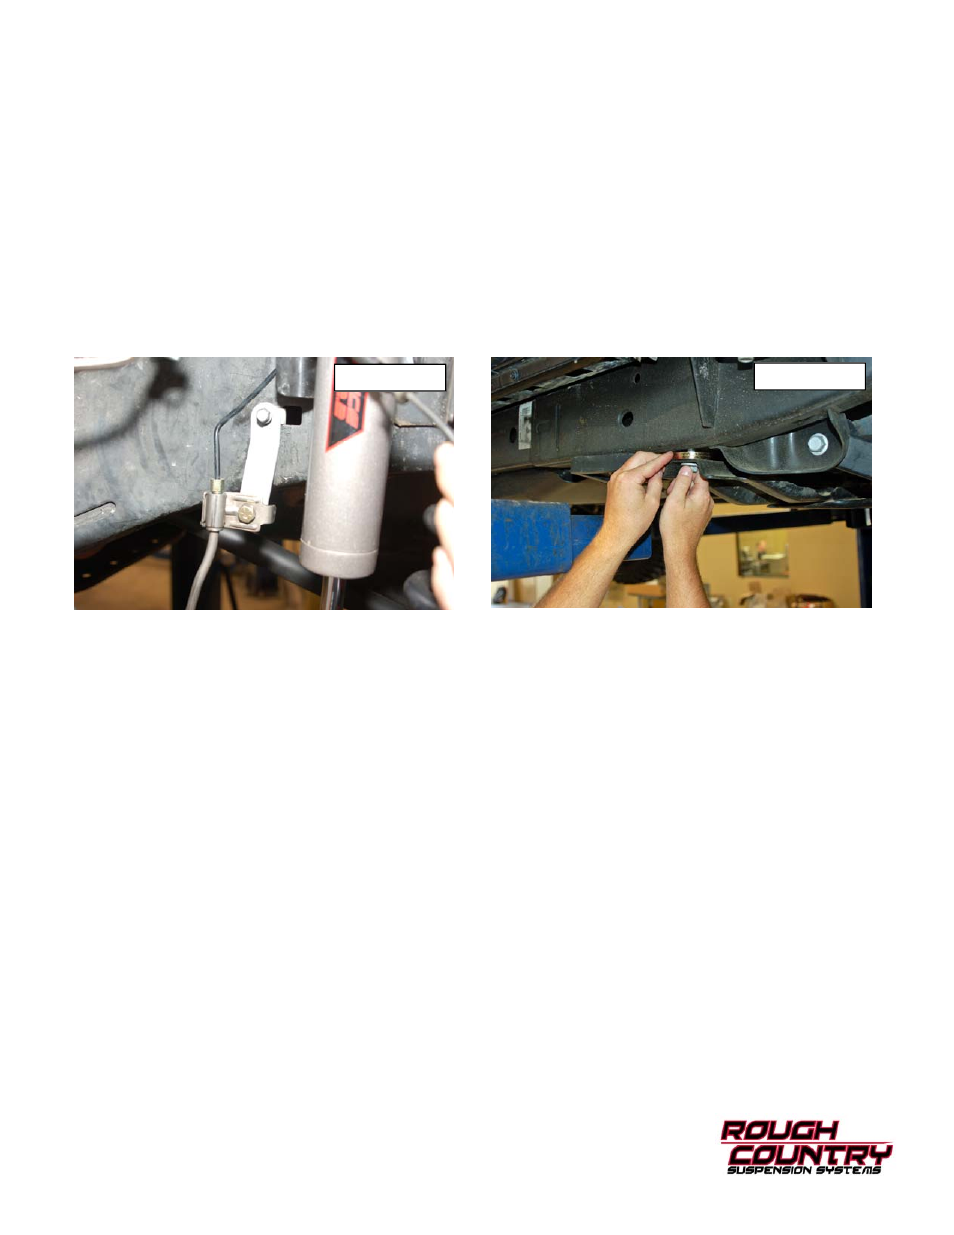
31. Locate the brake line bracket and install using the stock hardware. Install the stock brake line on the other end of the
bracket using the supplied 1/4” X 1” bolts. See PHOTO 17. Use caution when moving the brake line to not kink
the metal line.
32. This step will be performed on vehicles equipped with the optional front transmission skid plate only. One
side at a time, using a 18mm socket remove the bolt that holds the cross member to the frame in front of the rear
upper control arm. Insert 2 washers to each side supplied in 1681bag, between the frame and cross member as
shown in PHOTO 18. This will space the cross member down enough to allow driveshaft clearance at full flex.
Tighten using the stock bolt. Repeat on opposite side.
33. Reinstall the front tires/wheels
,
using a 19mm deep well socket.
34. Lower the vehicle to the floor.
PHOTO 18
PHOTO 17