Rough Country 682S User Manual
Page 5
12. Be sure the factory rubber isolators are in place and install the front coil springs. Insert the coil into the upper tower
first, followed by the lower seat. Be sure that the coils are rotated so that they seat properly. Raise the axle enough
to hold the coil springs in place.
13. Using a 21mm socket remove the tie rod end from the pitman arm. Remove the pitman arm nut using a 33mm
socket.
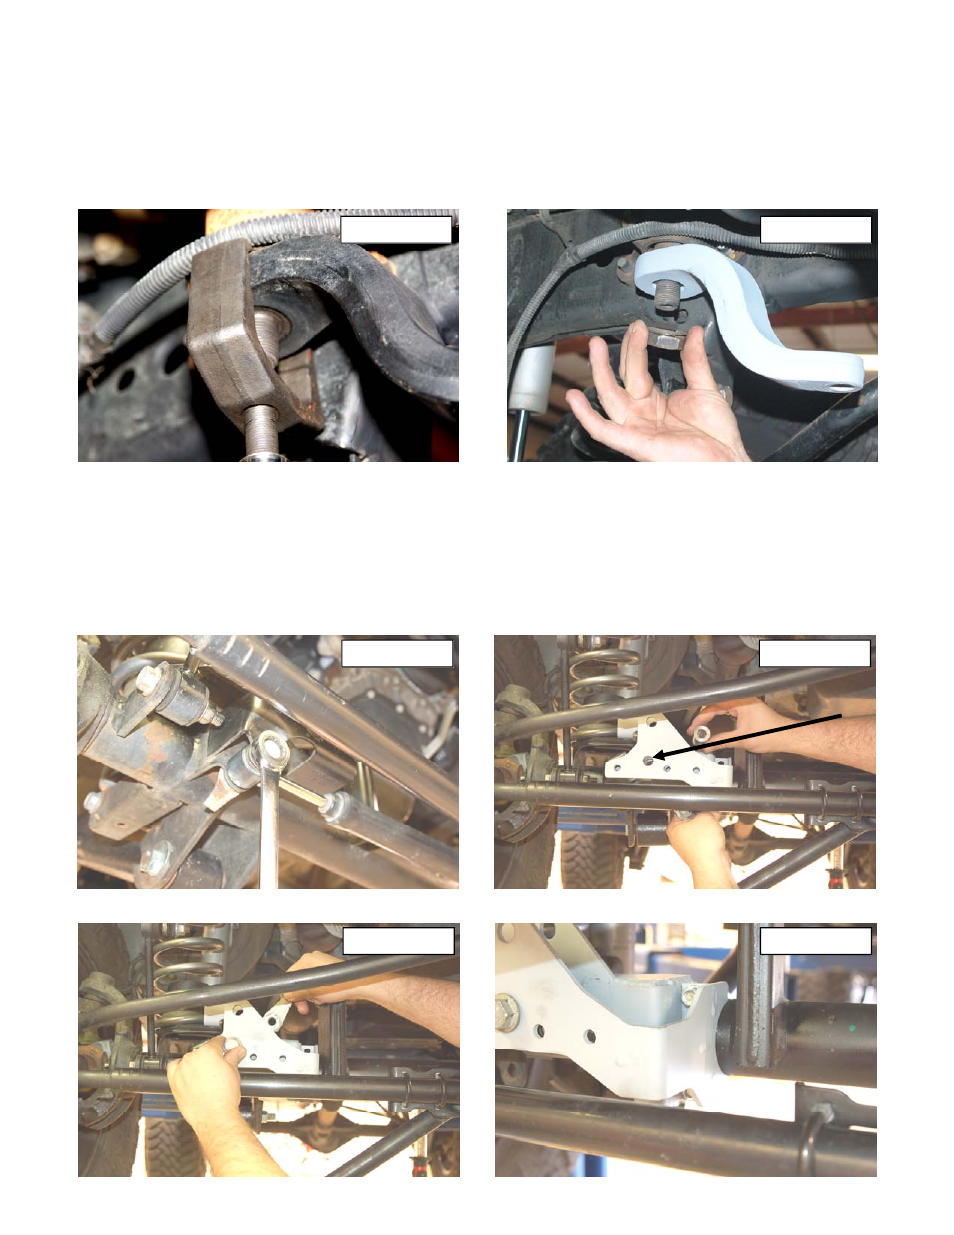
14. A pitman arm puller will be needed to remove factory pitman arm. See PHOTO 6.
15. Install the new pitman arm with the stock hardware and tighten using a 33mm socket. See PHOTO 7. Reinstall the
drag link on the new pitman arm with the stock nut and using a 21mm wrench.
16. Install the bushings and sleeves from 1681bag2 into part # 650585 front shock. Position the cup washer and stem
bushing on the stem end of the shock and insert the stem in the upper shock tower. Install the remaining bushing
and washer and loosely secure using the supplied nut. Tighten until the bushing swells slightly.
17. NOTE: The RC 2.2 Series shocks are built to run piston down and have a built in bump stop thus a
longer bump stop or bump stop extension is not needed with this kit.
18. Attach the lower end of the shock to the axle and secure using the stock hardware. Tighten to 80 ft.lbs.
19. Remove the stock stabilizer and bracket from the axle mount using a 18mm wrench See Photo 8.
20. Install the track rod bracket as shown on the stock mount. Install the crush sleeve and stock hardware as shown in
Photo 9 & 10. Do not tighten at this time.
21. Install the supplied u-bolt and nuts in the bracket as shown in Photo 11. Do not tighten at this time.
PHOTO 7
PHOTO 6
PHOTO 8
PHOTO 9
PHOTO 10
PHOTO 11