Rough Country PERF662X User Manual
Page 6
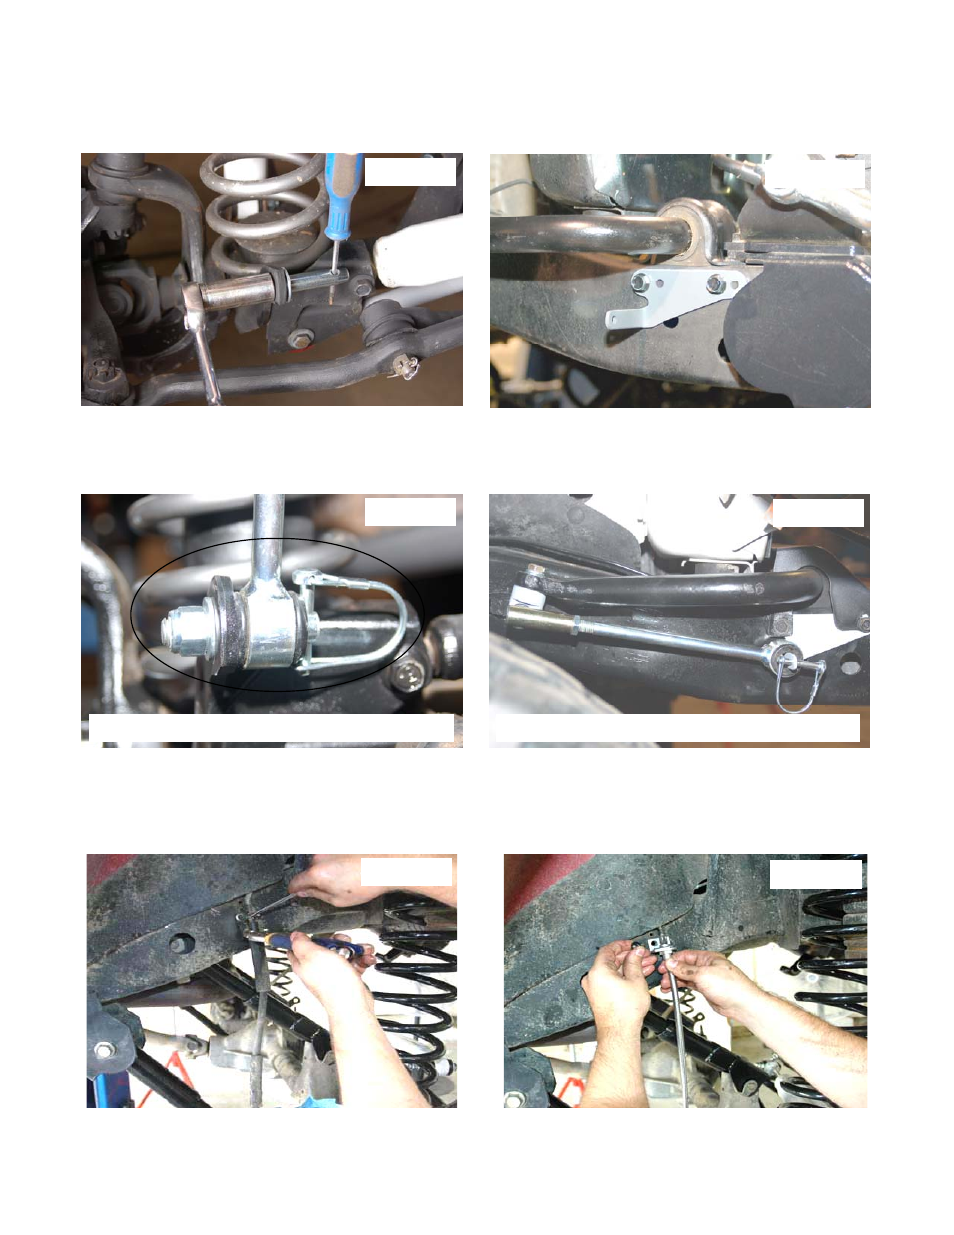
31.Install the supplied pin on the axle as shown in Photo 13 using a screwdriver as shown and a 3/4” wrench.
32.Remove the bolts securing the plastic shroud to the frame and install the driver and passenger side frame mount
brackets in the holes shown for the 4” disconnect kit using the factory holes and the supplied 1/4” x 3/4” bolts &
washers. See Photo 4. Tighten using a 7/16” wrench, be careful to not over tighten. Please note there is a pas-
senger and driver side bracket
33.Swing the sway bar link down and install on the lower axle mounting pin. Install the disconnect pin & washer on
the outside as shown. See Photo 15.
34.When disconnecting the sway bar, remove the sway bar link / washer and place it on the frame mount as shown in
Photo 16 to keep the sway bar link from interfering with front end components.
35.Remove the stock brake line from metal line at frame rail using a T40 torx bit and also on caliper. Retain stock
hardware to reinstall the brake line. A catch pan is recommended to contain fluid. See Photo 17.
36.Install the new brake line bracket on the frame rail as shown using a T40 torx bit with supplied brake line clip. In-
stall the new Rough Country brake line on the stock metal line and install on the caliper with stock caliper bolt and
brake line washers. See Photo 18.
37.The brake system will be bled after the rear components have been installed.
38.Tighten the upper suspension arms to 65 ft. lbs using a 21mm wrench & socket (both sides).
39.Align the reference marks on the adjustment cams and lower arm axle brackets and tighten to 85 ft. lbs using a
21mm wrench & socket.
PHOTO 17
PHOTO 18
PHOTO 13
PHOTO 15
Install the sway bar link on the axle with hitch pin
PHOTO 16
Sway bar link shown in up position
PHOTO 14