Rough Country 280N2 User Manual
Page 9
REAR INSTALLATION INSTRUCTIONS
1. Chock the front wheels and jack up the rear of the vehicle. Support the vehicle with jack stands.
2. Remove the tires/wheels using 7/8” deep well socket.
3. Lightly support the axle with a floor jack.
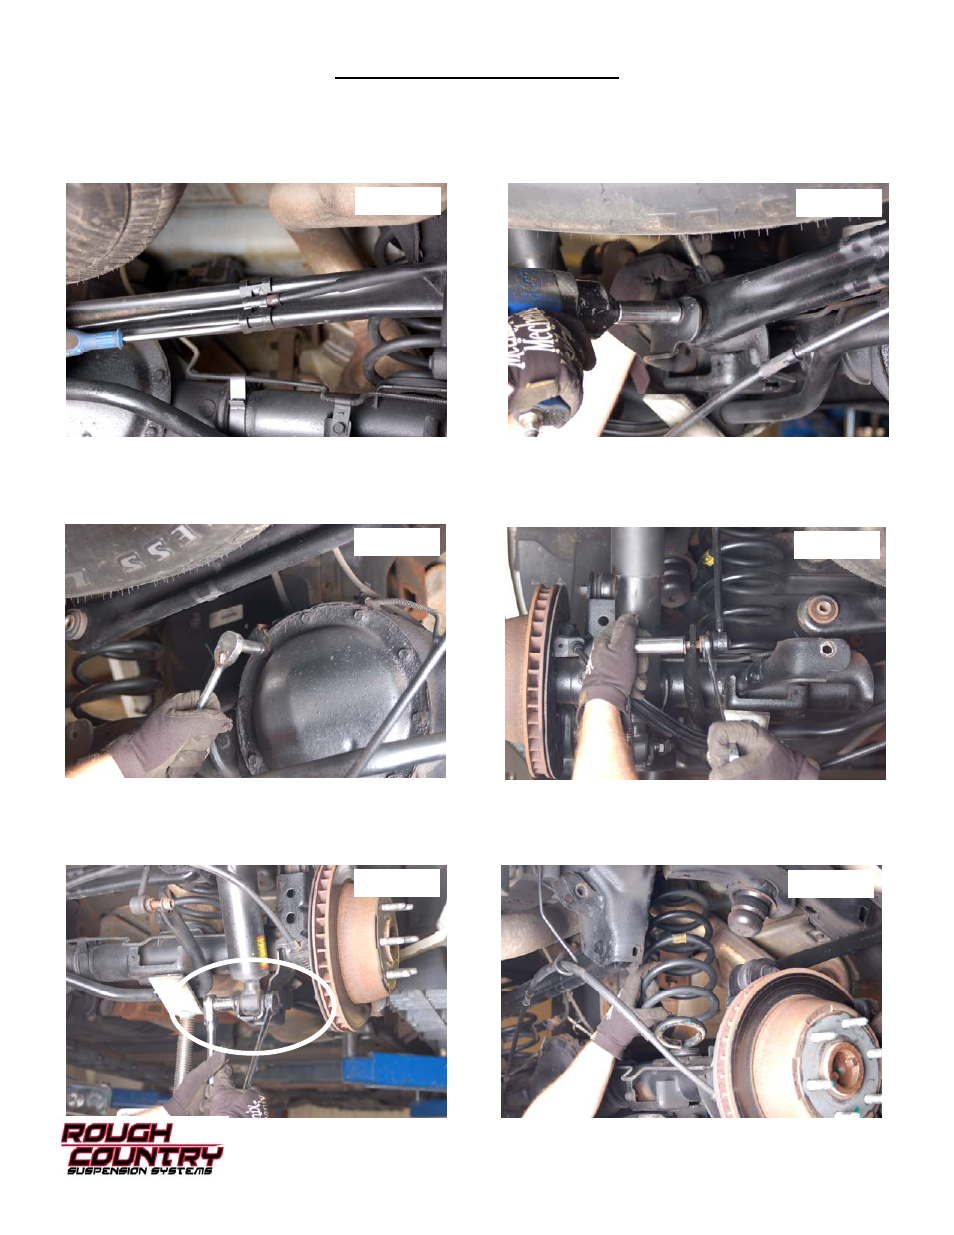
4. Using a flat head screwdriver, remove the e-brake line from the track rod by removing the clip as shown in Photo 34.
5. Remove the track rod from the axle as shown in Photo 35 using a 21mm socket/wrench.
6. Remove the bolt securing the brake line bracket using a 13mm socket as shown in Photo 36. Retain hardware for
reuse.
7. Remove the sway bar links from the axle and the frame using a 18mm wrench as shown in Photo 37. Retain the
upper frame mount hardware for reuse.
8. Remove the lower shock from the axle as shown in Photo 38 using a 21mm wrench/socket leaving the upper part
of the shock attached to the frame. Retain the hardware for reuse.
9. Remove the lower control arm from the axle using a 21mm wrench/socket. Retain hardware for reuse.
10. Lower the axle with the floor jack and remove the coil springs. See Photo 39.
Photo 34
Photo 35
Photo 36
Photo 37
Photo 38
Photo 39