Rough Country 280N2 User Manual
Page 10
11. Install the new coil springs in the stock location. Reinstall the lower control arms on the axle with the stock hardware
and tighten using a 21mm wrench/socket.
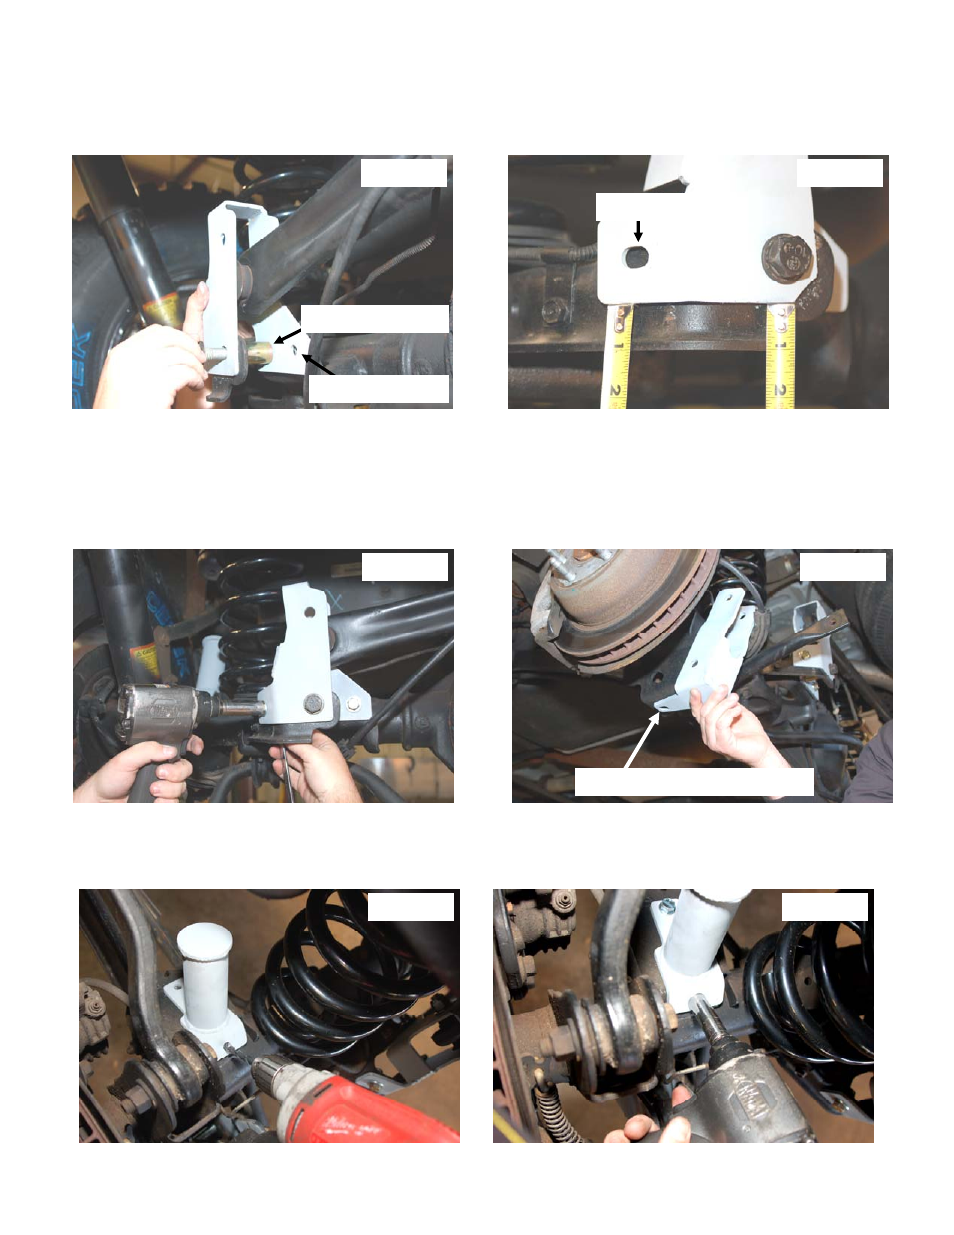
12. Install the new track bar bracket as shown in Photo 40 in the stock location with the supplied crush sleeve and stock
hardware with flanged nut towards middle of vehicle. Do not tighten at this time.
13. Make sure the bracket is even as shown in Photo 40 & 41. Mark and drill the two holes using a 15/32” drill bit.
14. Secure with the supplied 7/16” x 1” bolts, washers /nuts as shown in Photo 42. Raise the axle to align the track rod
with the new bracket and install using supplied 9/16” x 3 1/2” bolt, washers, and nut. Tighten using a 21mm socket &
22mm wrench. Tighten 7/16” bolts to 52 ft. lbs and the 9/16” bolt to 82 ft. lbs.
15. Install the lower shock relocation bracket (Please note there is a passenger and driver side bracket) in the stock
location as shown in Photo 43 using the 1/2” X 1 1/4” bolts, washers & nuts in the lower rear hole and the supplied
9/16” x 3 1/2” bolts, washers, and nuts in the stock location. Tighten 1/2” bolt to 57 ft-lbs. and the 9/16” bolt to 82 ft-
lbs. The stock shocks will be installed after the vehicle is lowered to the ground using stock hardware.
16. Install the bump stops as shown aligning the new bump stop bracket with the factory bump stop. Mark and drill the
holes using a 11/32” drill bit as shown in Photo 44.
17. Install the bump stops with the supplied 3/8” x 1” self tapping bolts using a 9/16” socket. Do not over-tighten. See
Photo 45.
Photo 42
Photo 43
Photo 45
Photo 40
Photo 41
Photo 44
Insert sleeve here
Hole to be drilled
Hole to be drilled
1/2” x 1 1/4” bolts install here