Rough Country 324S User Manual
Page 7
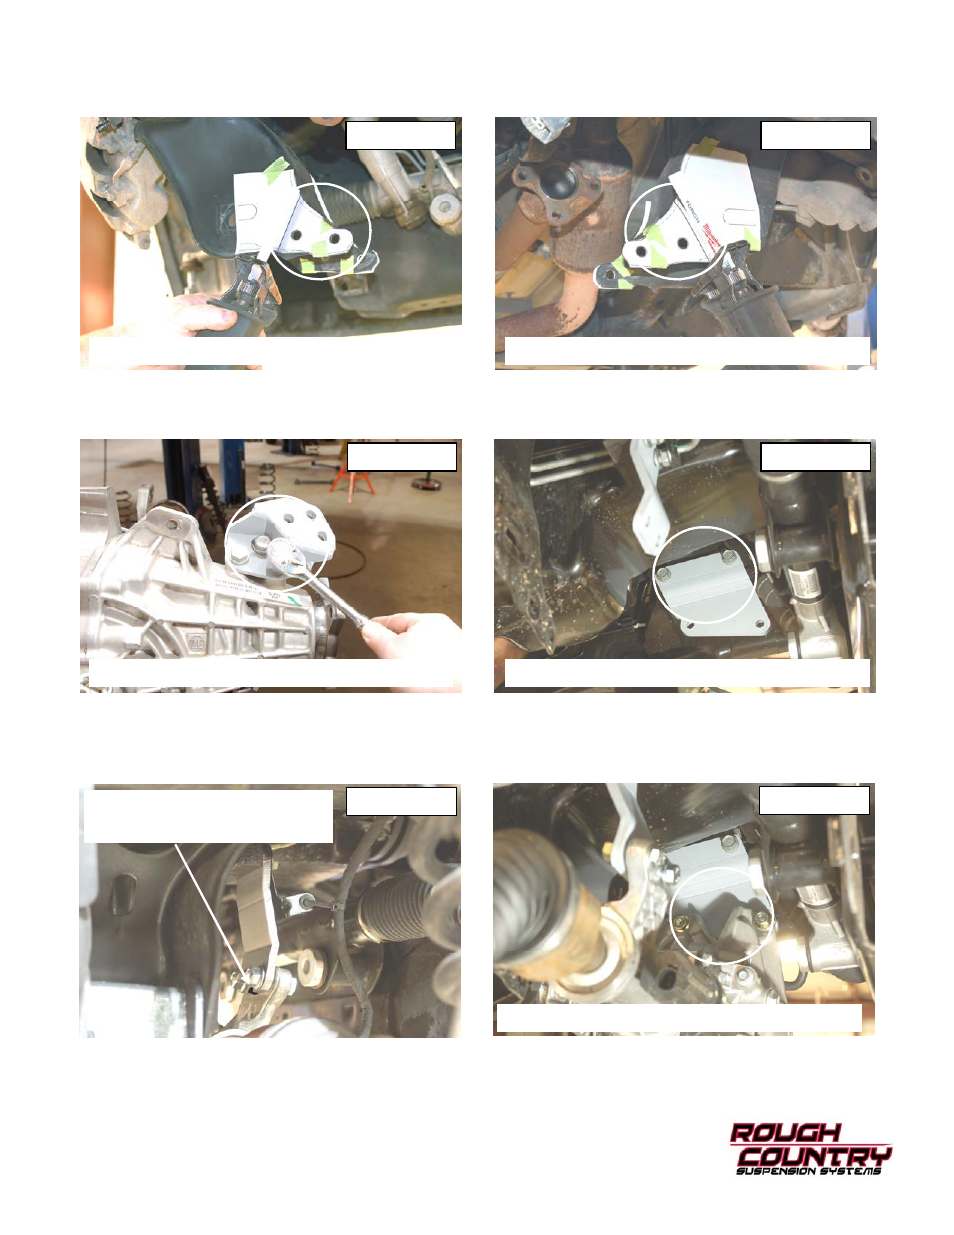
23. Align the supplied template with the lower holes. Tape cut out to driver side lower control arm rear pocket.
24. Cut at the line on the cut out. this is done to make room for rear cross member. Grind sharp edges and paint.
See
Photo 19 & 20.
25. Install rear diff drop bracket on the differential using the stock hardware.
See Photo 21. Tighten using a 18mm
wrench.
26. Install driver side upper diff drop bracket using the stock hardware.
See Photo 22. Do not tighten at this time.
27. Install passenger
side diff bracket using stock hardware in upper location making sure the notch in the bracket goes
down. Do not tighten at this time.
See Photo 23.
28. Reinstall diff in the forward driver side mount as shown in
Photo 24 using supplied 12mm x 45mm bolts, washers.
Do not tighten at this time.
PHOTO 19
PHOTO 20
PHOTO 21
PHOTO 22
PHOTO 24
PHOTO 23
CUT USING A RECIPROCATING SAW
CUT USING A RECIPROCATING SAW
INSTALL DIFF BRACKET
INSTALL DIFF BRACKET
REINSTALL DIFF ON BRACKET
INSTALL PAS DIFF IN
BRACKET WITH NOTCH