Rough Country 324S User Manual
Page 15
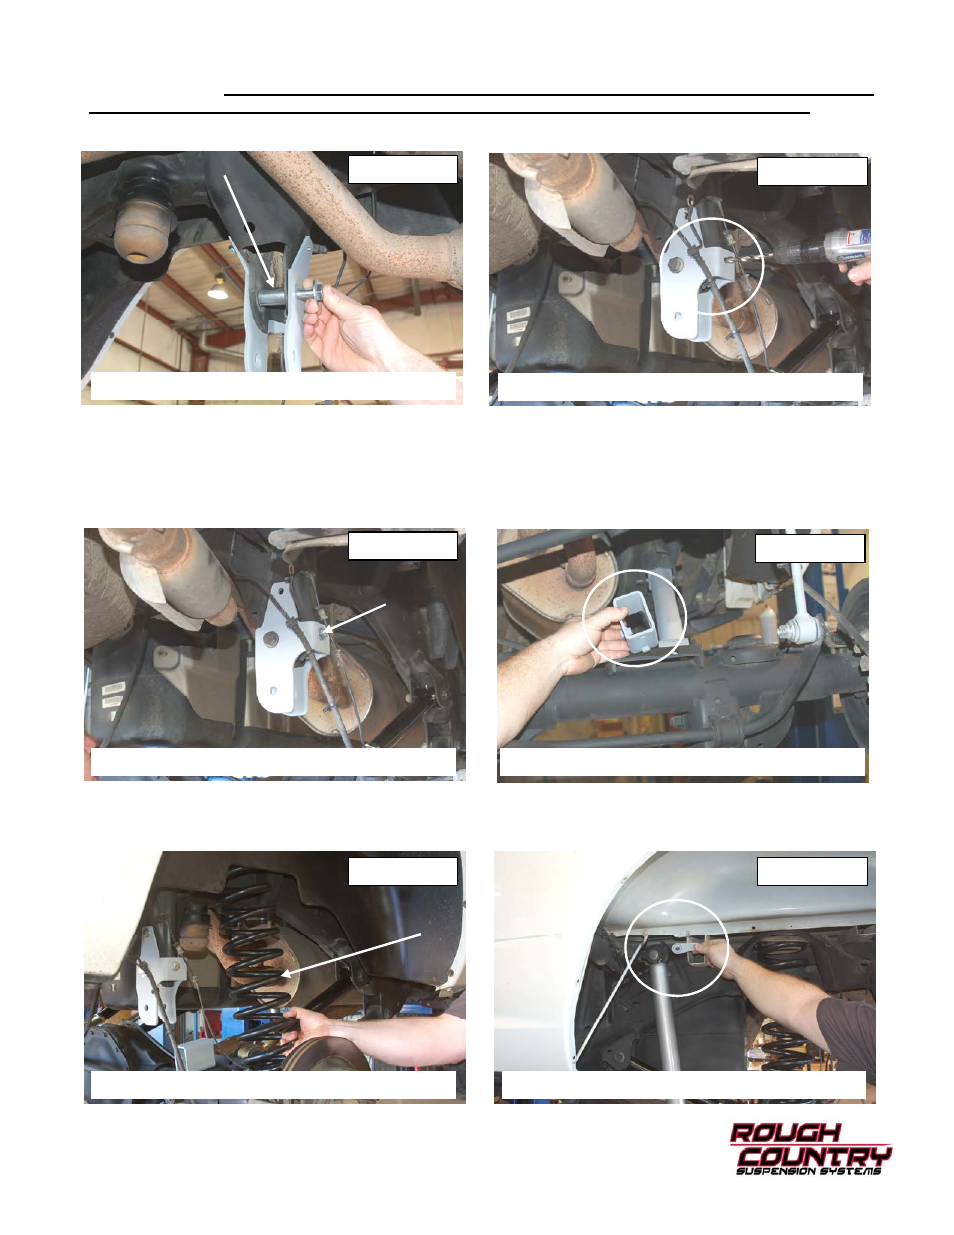
14. Install track bar bracket using supplied crush sleeve,14mm x 80mm bolt, washers and nut
See Photo 13. Do not
tighten at this time.
Make sure the bracket is installed correctly placing the lower hole in the new bracket di-
rectly below the stock hole. Failure to install this bracket correctly will push the axle out of center.
15. Use bracket to mark the side hole to be drilled. Drill the hole on the side of the bracket using a 13/32 drill bit.
See
Photo 14.
16. Install the 3/8
” x 1 1/4” Bolt, washers & nut on the side hole. Tighten using a 14mm socket / wrench.
See Photo 15.
17. Double check to make sure the bracket is still in position.
18. Drill the other two upper holes using a 13/32
” drill bit and install supplied 3/8” x 1 1/4” bolts, washers and nuts.
Tighten using a 14mm wrench / socket.
19. Install bump stops using supplied 3/8
” x 1” bolts, washers and nuts. The pin in the block goes in front hole as shown
in
Photo 16. Tighten hardware using a 14 mm wrench.
20. Install coil spring with stock isolator.
See Photo 17.
21. Install bushing a sleeves into shocks. Install shock onto truck using stock hardware with supplied flag nut for top bolt.
See Photo 18.
PHOTO 13
PHOTO 14
PHOTO 15
PHOTO 16
PHOTO 17
PHOTO 18
INSTALL BOLT AND CRUSH SLEEVE
DRILL USING 13/32” DRILL BIT
INSTALL HARDWARE
INSTALL BUMP STOPS ON AXLE
INSTALL NEW COIL SPRINGS
INSTALL SHOCK USING SUPPLED FLAG NUT