Rough Country 592.20 User Manual
Page 4
18. Using a 21mm wrench and 18 mm wrench socket remove the factory track bar bracket. Retain stock hardware for
re-use.
19. Remove the cotter pin and nut using a 21mm wrench, from the drag link end where it attaches to the pitman arm.
Dislodge link with a tie rod end puller, or a pickle fork. Note: replace the link if any stud looseness is detected, or if
you can twist the studs in its socket with your fingers. Using a 34mm socket, remove the nut from the steering sector
and remove the pitman arm with a puller tool. Inspect the splines on the shaft for excessive wear, repair if needed.
20. Install new arm, lock washer, and nut. Using a 34mm or 1 13/16” socket, tighten bolt.
21. Attach the drag link stud to the pitman arm. Torque nut to factory specs, and install cotter pin. Check for adequate
linkage clearances while turning steering wheel full lock in both positions
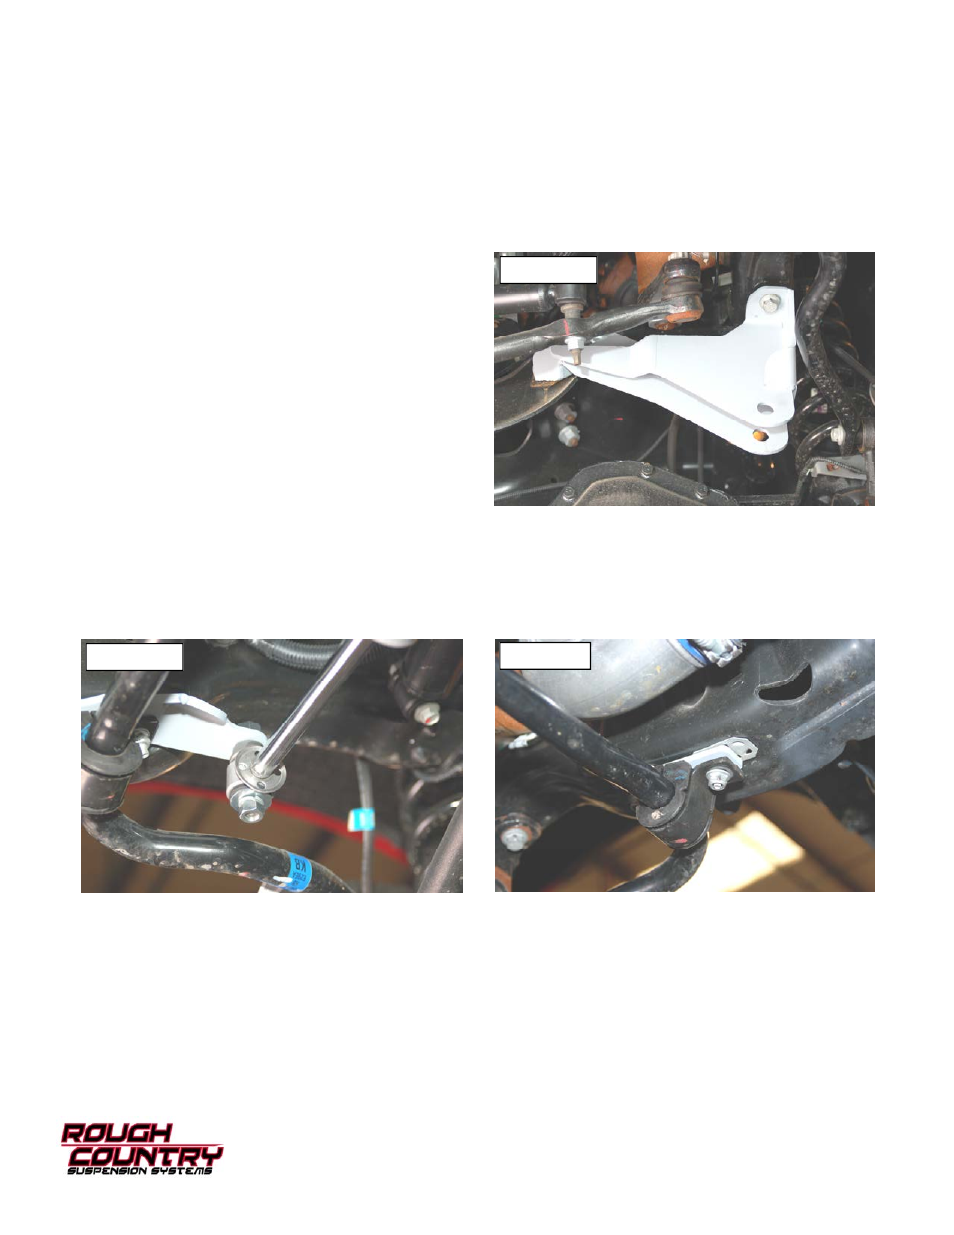
22. Position the Rough Country track bar bracket on the frame in the same position as the original and secure using the
factory hardware. Tighten hardware using a 18mm &
21mm wrench. See Photo 9.
23. Using the nylon bump stop extension provided, place the
extension between the frame and the bump stop cup. Bolt
back into the original location using the 8mmx95mm bolt
supplied using a 13mm wrench. Torque to 15 ft. lbs.
24. Lower the front axle enough to install the new coil springs.
Position the coil springs in the lower coil buckets on the
axle and rotate as necessary to be sure that the pigtail of
the coil in indexed properly in the bucket. Position the fac-
tory rubber isolator on top of each coil, then raise the axle
enough to seat the coil springs in the upper spring buck-
ets.
25. Install the bushings and sleeves on the front gas shock
absorbers part # 658459
26. Compress the front springs enough to install the front
shocks. Bolt the lower end of the shock to the axle using the stock hardware , using a 18mm wrench. Attach the up-
per end of the shock using the stock hardware, and a 18mm wrench, tighten only enough to bulge the bushing.
27. Remove the factory steering stabilizer from the passenger factory frame mount using a 18mm wrench.
28. On the passenger side, install the new stabilizer bracket in between the frame and the factory sway bar mount with
the factory hardware. See Photo 10. On the driver side, remove the sway bar bracket from the frame using a 15mm
wrench and install the supplied spacer plate as shown in Photo 11 with factory hardware.
Photo 10
Photo 11
Photo 9