Fluoview, Fv10i-liv – Olympus FV10i-LIV User Manual
Page 11
8
FLUOVIEW
FV10i-LIV
3
Preparation Before Placing the Specimen
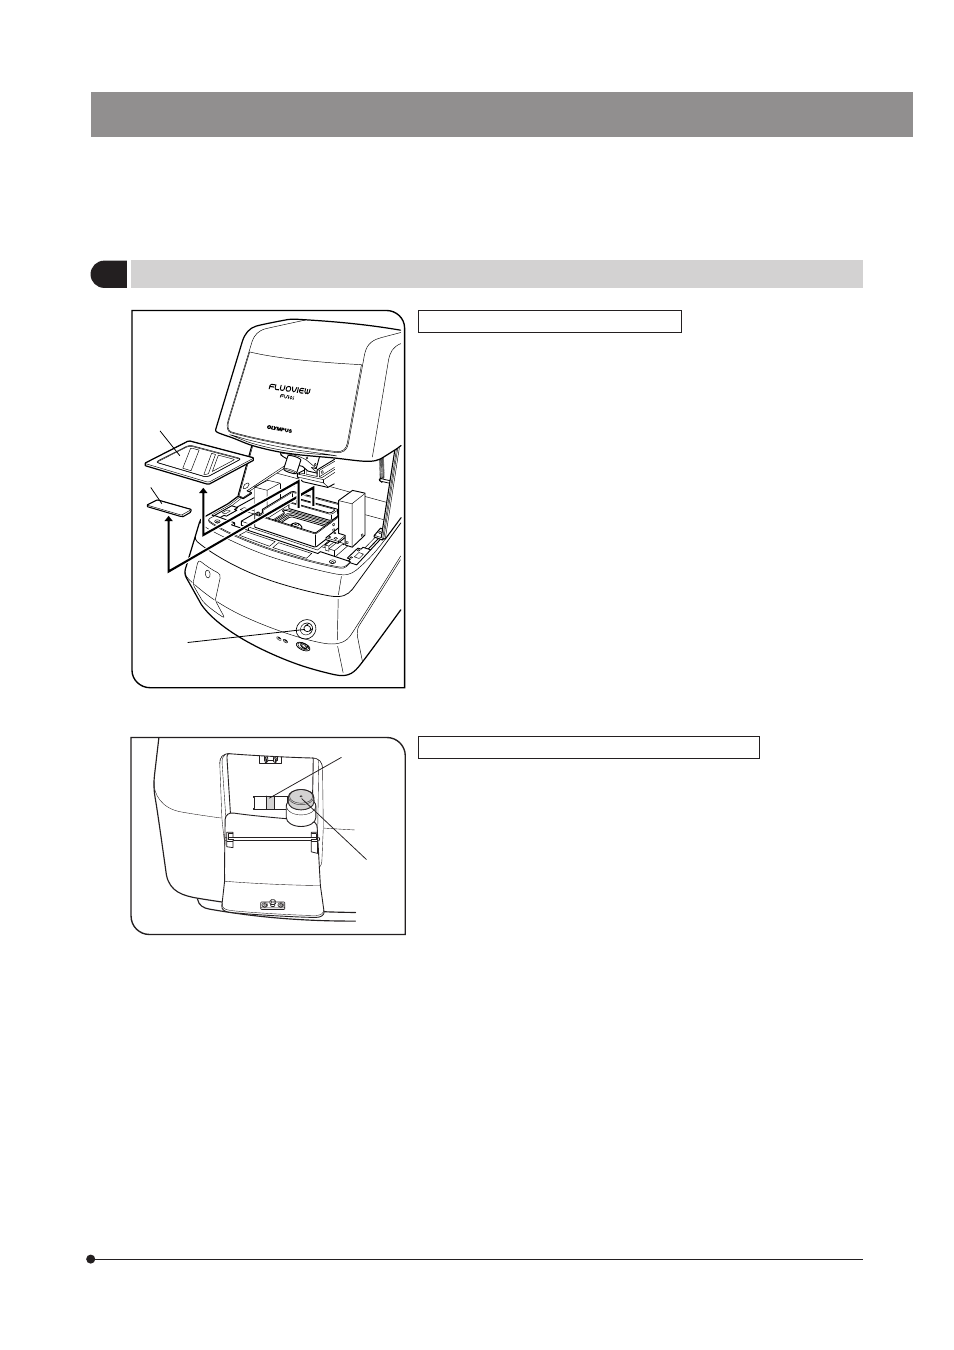
Water Injection in the Incubator (Fig. 4)
}Water injection is not necessary when the internal temperature of the
incubator is not set (OFF).
1. Push and hold the cover button @, and lift the cover.
2. Remove the cover ² from the incubator.
3. Take out the rubber CO
2
feed tube holder ³ from the water reservoir and
pour ultrapure water until it fills about 70% of the water reservoir.
4. Re-place the rubber CO
2
feed tube holder to that the extremity of the
tube is immersed underwater.
5. The cover of the incubator is to be placed after having placed the
specimen.
Fig. 4
Fig. 5
@
²
³
²
@
Water Injection in the Objective Water Tank (Fig. 5)
}Confirm that the drain cock is closed before filling water. Please refer to
“Refilling Water in the Objective Water Tank” in P.11 for the detail information
of the drain cock.
1. Push the dented portion of the water tank cover to open it.
2. Remove the cap from the water inlet @ and pour ultrapure water gently
(so that the filter can pass the water).
3. Fill the water tank while observing the water level window ².
The water level is not visible until the water approaches the full capacity
of 200 ml.
}Be sure to fill the water tank completely when the time-lapse operation is
to be performed.
The amount of water injected into the objective tip is 0.1 ml per time.
When the tank is full, water injection is possible for about 2,000 times.
}The water inlet has a filter inserted in the way. If the water feed is extremely
slow, take out the filter and clean* or change it.
* Clean the filter frame with ultrapure water after taking it out and reversing
it.