Adjusting the anti-tippers – Activeforever Invacare Tracer IV Wheelchair User Manual
Page 43
SECTION 9—ANTI-TIPPERS/WHEEL LOCKS
Part No. 1110558
43
Tracer
®
IV
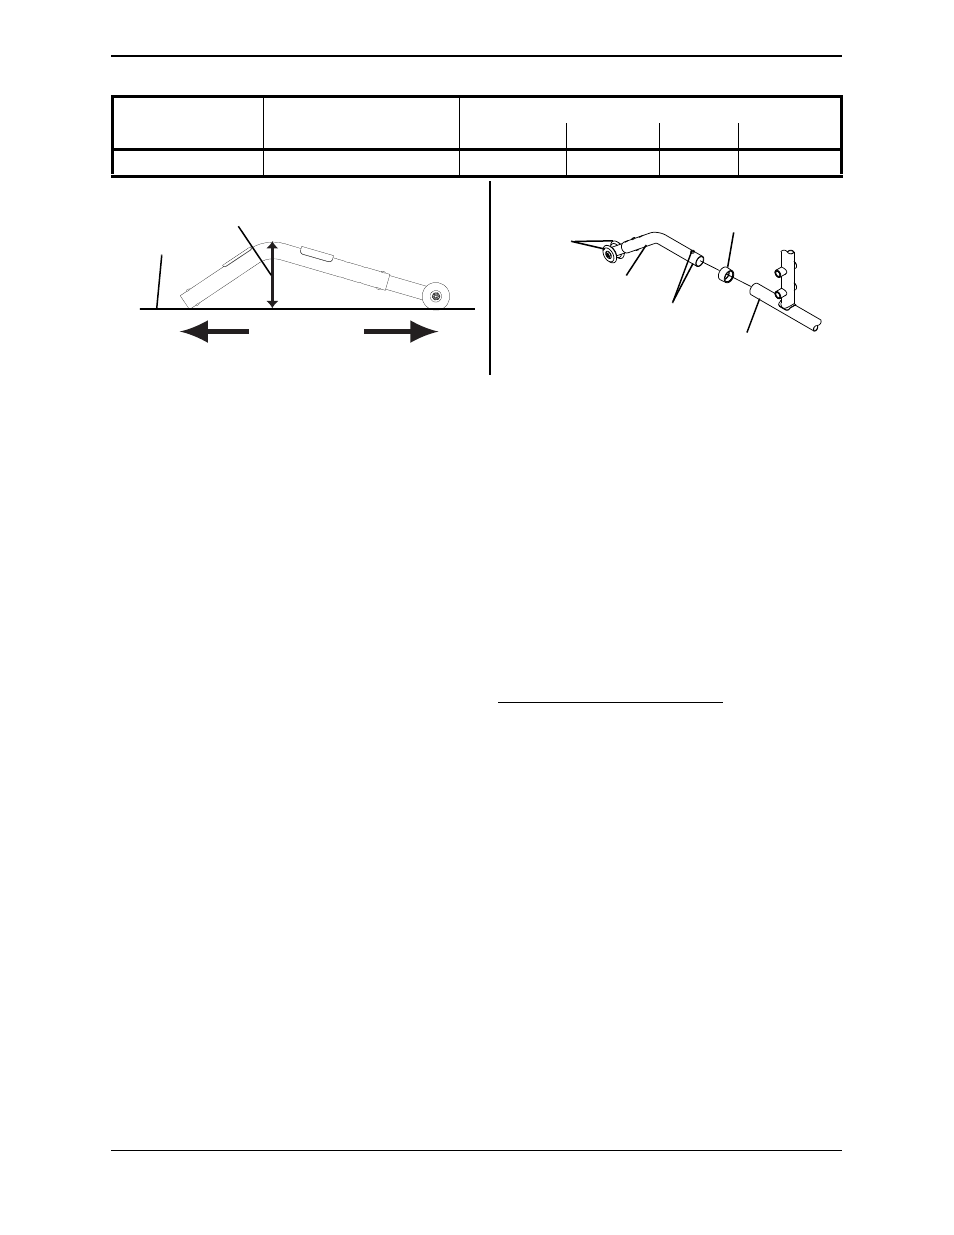
FIGURE 9.1 Installing/Adjusting Anti-tippers - Anti-Tipper Length
1. Press the release buttons and insert the anti-tippers with the anti-tipper wheels
pointing toward the ground/floor into the wheelchair frame tubing (Detail “B”).
2. Ensure that the release button of the anti-tipper fully protrudes out of the hole in the
bottom of the wheelchair frame tubing.
3. Place the wheelchair on a flat surface.
4. Measure the distance between the bottom of the anti-tipper wheels and the
ground/floor.
NOTE: A 1½ to 2-inch clearance between the bottom of the anti-tipper wheels and the ground/floor
MUST be maintained at all times.
5. If the distance between the bottom of anti-tipper wheels and the ground/floor is not
1½ to 2-inches, adjust anti-tippers. Refer to Adjusting the Anti-Tippers on page 43.
Adjusting the Anti-Tippers
NOTE: For this procedure, refer to FIGURE 9.2 on page 44.
NOTE: A 1½ to 2-inch clearance between the bottom of the anti-tipper wheels and the ground/floor
MUST be maintained at all times.
1. Place the wheelchair on a flat surface.
NOTE: If adjusting the anti-tippers on recliner models, ensure that the back canes are in the
upright position before making adjustments.
2. Press the release buttons on the wheeled portion of the anti-tipper and slide it up or
down to the desired adjustment hole.
3. Check to make sure that the release buttons are fully engaged in adjustment holes.
4. Ensure both anti-tippers are adjusted to the same height.
5. Measure the distance between the bottom of the anti-tipper wheels and the
ground/floor.
Wheelchair Model
Seat-to-Floor Height
(in inches)
Anti-Tipper (in inches)
Length
Height
Model
Part No.
TRACER IV
17½ to 19½
13½
3¼
1360
1058836
Anti-Tipper Height
Anti-Tipper
Length
Flat Surface
DETAIL “A”
Anti-Tipper
Wheels
Anti-Tipper
Release Buttons
Rear Frame
Tubing
Anti-Rattle
DETAIL “B”