Rmc 7135, Accessing the drive bays – Acnodes RMC 7135 User Manual
Page 62
661 Brea Canyon Rd., Suite 3
Walnut, CA 91789
tel: 909.598.7388, fax: 909.598.0218
© Copyright 2005 Acnodes, Inc.
All rights reserved. Product description and product specifications
are subject to change without notice. For latest product information,
please visit Acnodes’ web site at www.acnodes.com.
RMC 7135
1U Rackmount System
Accessing the Drive Bays
SATA Drives: Because of their hotswap capability, you do not need to access the inside of the chassis
or power down the system to install or replace SATA drives. Proceed to the next step for instructions.
Note: The operating system you use must have RAID support to enable the hot-swap capability of the
drives.
DVD-ROM Drive: For installing/removing a DVD-ROM drive, you will need to gain access to the inside
of the server by removing the top cover of the chassis. Proceed to the "DVD-ROM Drive Installation"
section in this chapter for instructions. Note that only a "slim" DVD-ROM drive will fit into the 5016T-
MTFB.
Enterprise level hard disk drives are recommended for use in Acnodes chassis and
servers.
SATA Drive Installation
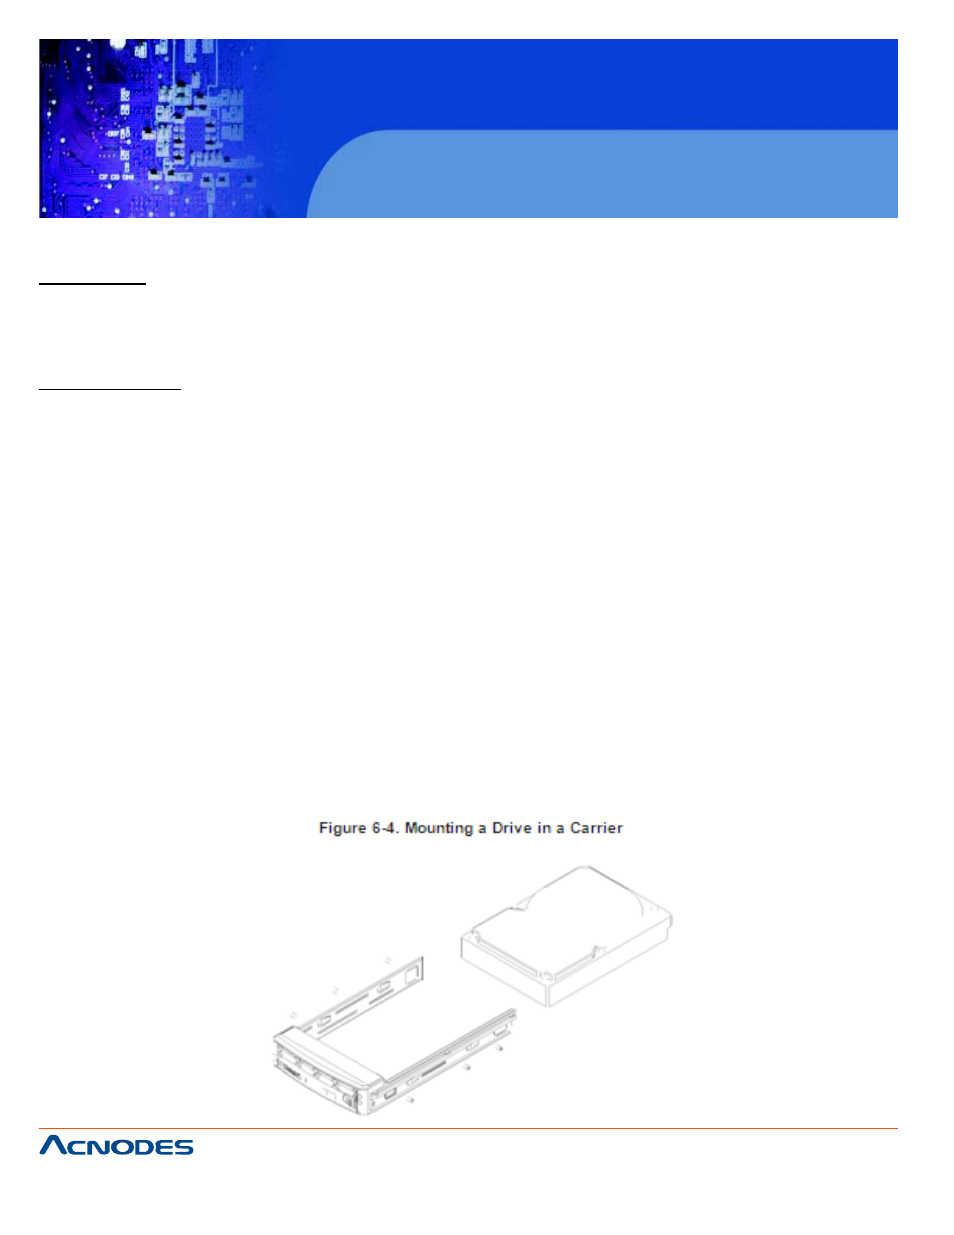
Mounting a Drive in a Drive Carrier
The SATA drives are mounted in drive carriers to simplify their installation and removal from the chas-
sis. These carriers also help promote proper airflow for the system. For this reason, even empty carri-
ers without drives installed must remain in the chassis.
1. Install a new drive into the carrier with the printed circuit board side facing down so that the mount-
ing holes align with those in the carrier.
2. Secure the drive to the carrier with six screws, as shown in Figure 6-4.