Step 2: connect the scanner, Onnect, Canner – Visioneer XP 100 User Manual
Page 28
S
TEP
2: C
ONNECT
THE
S
CANNER
21
S
TEP
2: C
ONNECT
THE
S
CANNER
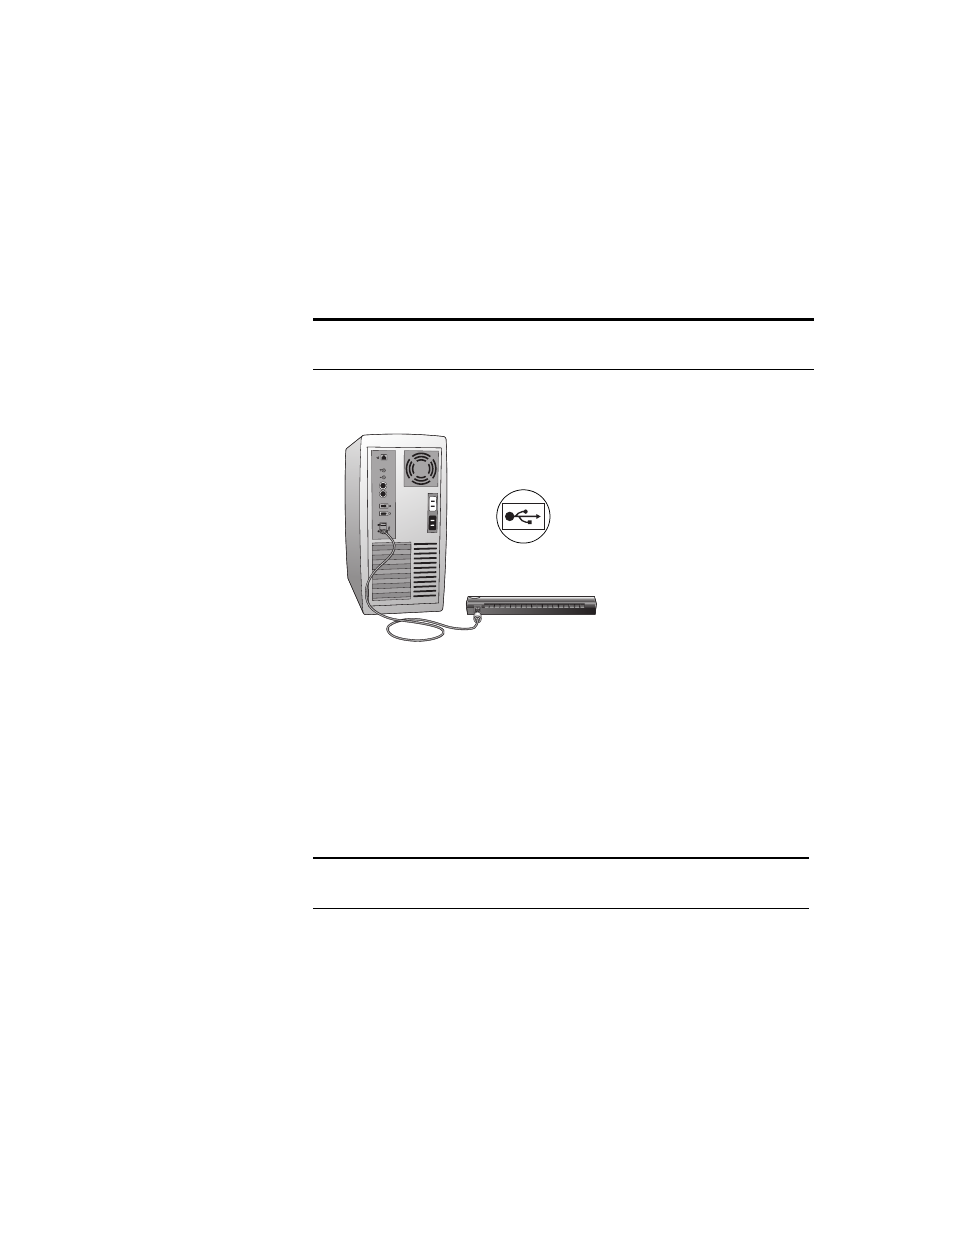
Your Visioneer scanner connects to any available USB port. Check your
computer’s manual for USB port locations.
C
ONNECT
THE
V
ISIONEER
R
OAD
W
ARRIOR
OR
S
TROBE
XP 100 S
CANNER
1. Using the on-screen window as your guide, plug one end of the
USB cable into any USB port on your computer.
Note that the scanner does not have power ports. Your scanner gets
power from the computer through the USB cable.
2. Plug the other end of the cable into the USB port on your scanner.
The USB symbol identifies the location of the USB port on your
computer. If the plug does not attach easily, make sure that you are
plugging it in correctly. Do not force the plug into the connection.
Your computer recognizes that a scanner has been plugged into the
USB port and automatically configures its driver database with the
appropriate software to run the scanner.
3. Now proceed to “Step 3: Calibrate the Scanner” on page 24.
Note: You can connect the scanner to your computer while the
computer is running. You do not have to shut down your computer.
Note: You can also connect the scanner to a USB hub if the hub has
its own power supply plugged into an electrical outlet.