Installation, Installation of the projector and screen, Angle adjustment – VIEWSONIC PJ750 User Manual
Page 8
6
ViewSonic PJ750
INSTALLATION
Installation of the Projector and Screen
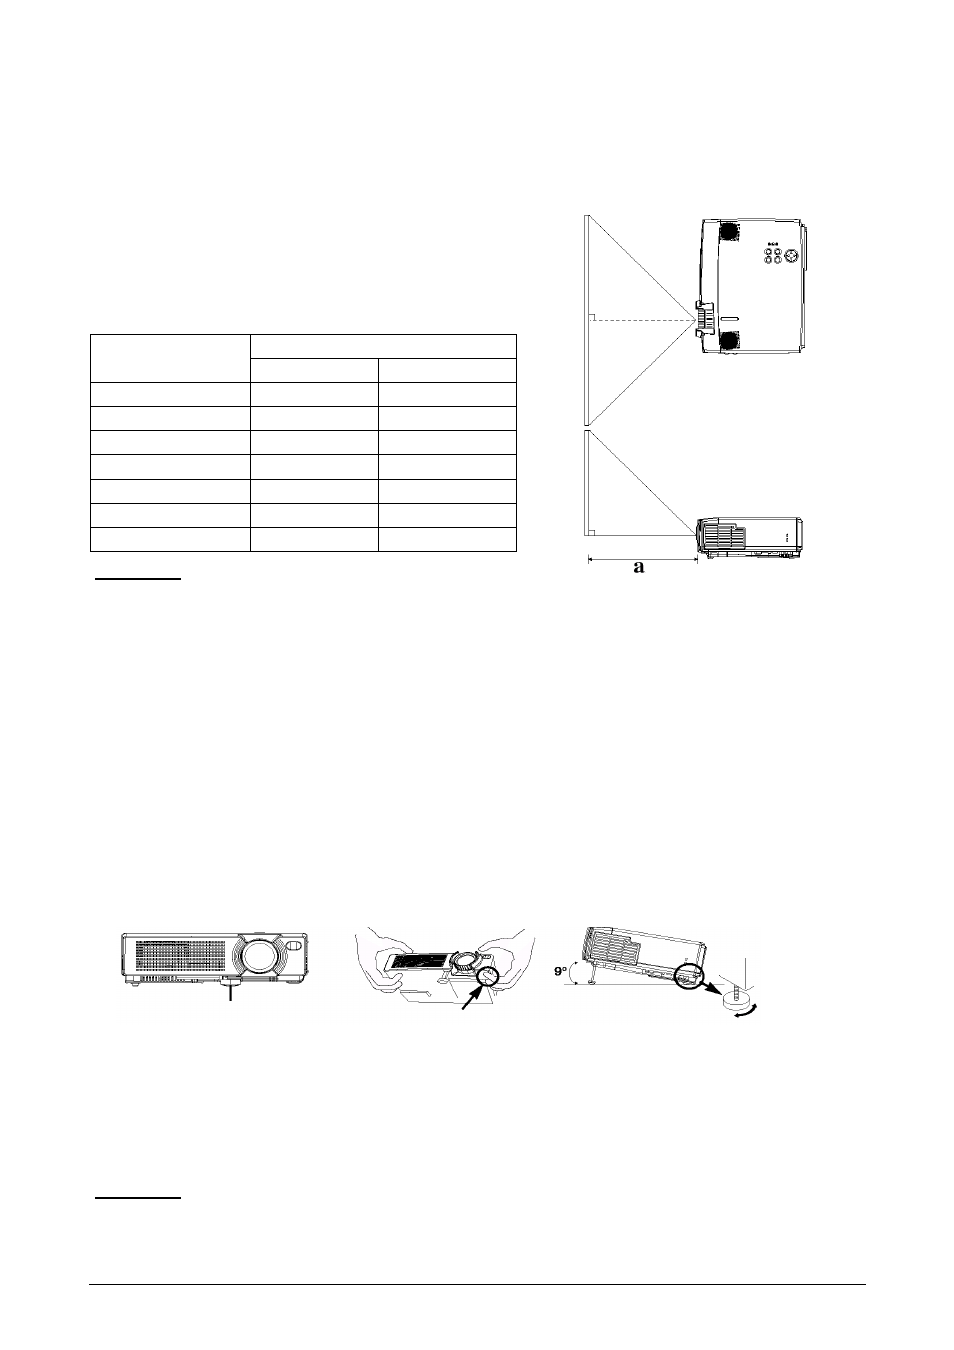
To set the screen size and projection distance, see the illustration and table below.
The projection distance shown in the table below
indicates the full size (1024 × 768 dots).
a:Distance from the projector to the screen (± 10%).
b:Distance from the lens center to the bottom of the
screen (± 10%).
Table 1: Reference for Installation
CAUTION
• Install the projector in a suitable environment as indicated in this manual.
• If you use a metal tool or the like to mount this unit, be sure to connect it via earth connection so
as to avoid a risk of fire or electric shock.
Connect the ground terminal of the AC inlet of this unit to the ground terminal provided in the
building using an optional three-core power supply cord.
• Always use the liquid crystal projector in a horizontal position, if possible. If you operate the
liquid crystal projector with its lens upwards, its lens downwards or to the side, the heat generated
inside the projector may build up and cause malfunctions or damages. Be especially careful to
never block the ventilation holes.
• Do not install the LCD projector in a smoky surrounding, since smoke residue may be
accumulating on critical parts (i.e. LCD panel, lens, etc.).
Angle Adjustment
Use the foot adjusters located on the bottom of the projector to adjust the angle of projection. This
angle can be adjusted within approximately 0° to 9°.
1
Lift up the front side of the projector and press the button of the foot adjuster to adjust the angle
of projection.
2
To lock the foot adjuster at the desired angle, release the button.
3
Turn the screw of the foot adjuster to precisely adjust it. Do not use force, since this could damage
the adjuster or result in a failure of the lock.
CAUTION
• Do not release the foot adjuster button unless you hold the projector, or else the projector may
overturn or the fingers may get caught.
Screen size
[inches (m)]
a [inches (m)]
Min.
Max.
40 (1.0)
62 (1.6)
82 (2.1)
60 (1.5)
94 (2.4)
123 (3.1)
80 (2.0)
127 (3.2)
164 (4.2)
100 (2.5)
160 (4.1)
205 (5.2)
120 (3.0)
192 (4.9)
246 (6.3)
150 (3.8)
241 (6.1)
308 (7.8)
200 (5.0)
323 (8.2)
411 (10.4)
Foot Adjusters
Press the foot adjuster button
Rear Foot Adjuster
Top View
Side View