Replacing the lamp, Resetting the lamp timer – VIEWSONIC PJ750 User Manual
Page 20
18
ViewSonic PJ750
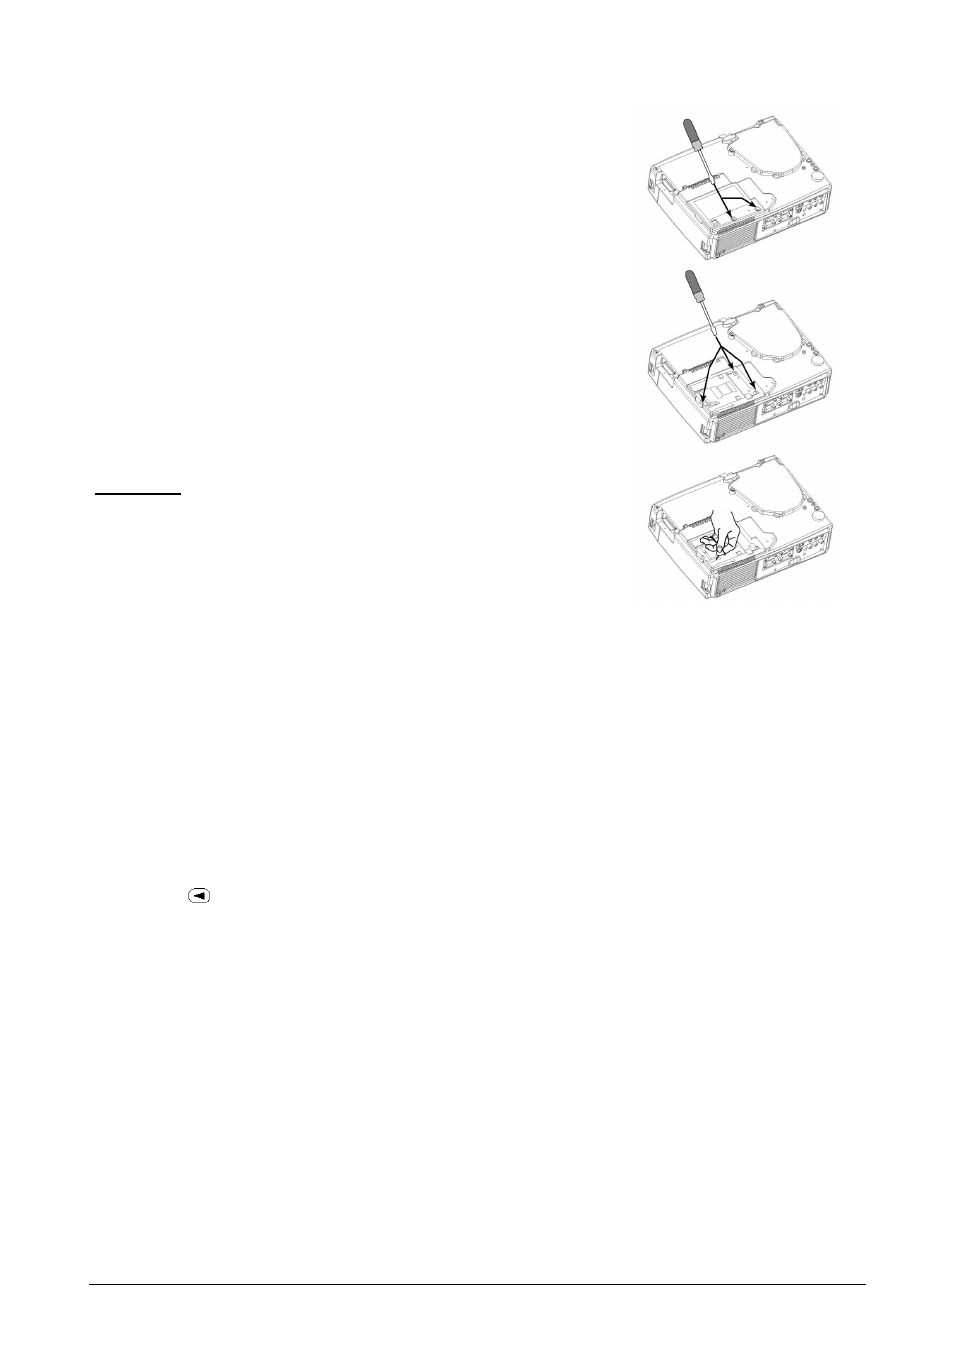
Replacing the Lamp
1
Switch the projector OFF, remove the power cord from the power
outlet, and wait at least 45 minutes for the unit to cool.
2
Prepare a new lamp.
3
Check that the projector has cooled sufficiently, and gently turn it
upside down.
4
Loosen the screw as shown in the diagram, and remove the lamp
cover.
5
Loosen the two screws, and gently remove the lamp while holding
the grips. Touching the inside of the lamp case may result in
uneven coloring.
6
Install the new lamp and tighten the two screws firmly. Also
steadily push the opposite side of the screwed lamp into the unit.
7
Replace the lamp cover in position and tighten the screw firmly.
8
Gently turn the projector right-side up.
CAUTION
• Ensure that screws are tightened properly. Screws not tightened
fully may result in injury or accidents.
• Do not use the projector with the lamp cover removed.
Resetting the Lamp Timer
Reset the lamp timer after replacing the lamp. When the lamp has been replaced after the LAMP
indicator is red, or the CHANGE THE LAMP message is displayed, complete the following opera-
tion within ten minutes of switching power ON. The power will be turned off automatically if over
10 minutes.
1
Switch power ON, and press the RESET button, for approximately three seconds. The ‘LAMP
xxxx hr’ message will appear on the lamp timer on the bottom of the screen.
2
Press the MENU button on the remote control transmitter, or the RESET button on the control
panel, while the lamp timer is displayed. The ‘LAMP xxxx □
→
0 ■ CANCEL’ message will
then appear.
3
Press the and select 0, and wait until the timer display is cleared.
NOTE:
• Do not reset the lamp timer without replacing the lamp. Reset the lamp timer always when
replacing the lamp. The message functions will not operate properly if the lamp timer is not reset
correctly.