Hardware setup – Tripp Lite B051-000 IP User Manual
Page 8
8
Hardware Setup
• Do not overload the AC supply branch circuit that provides power to the rack. The total rack load should not exceed 80 percent of the branch
circuit rating.
• Make sure that all equipment used on the rack – including power strips and other electrical connectors – is properly grounded.
• Ensure that proper airflow is provided to devices in the rack.
• Ensure that the operating ambient temperature of the rack environment does not exceed the maximum ambient temperature specified for the
equipment by the manufacturer (0° to 50° C).
• Do not step on or stand on any device when servicing other devices in a rack.
Safety Instructions
(continued)
Setup Instructions
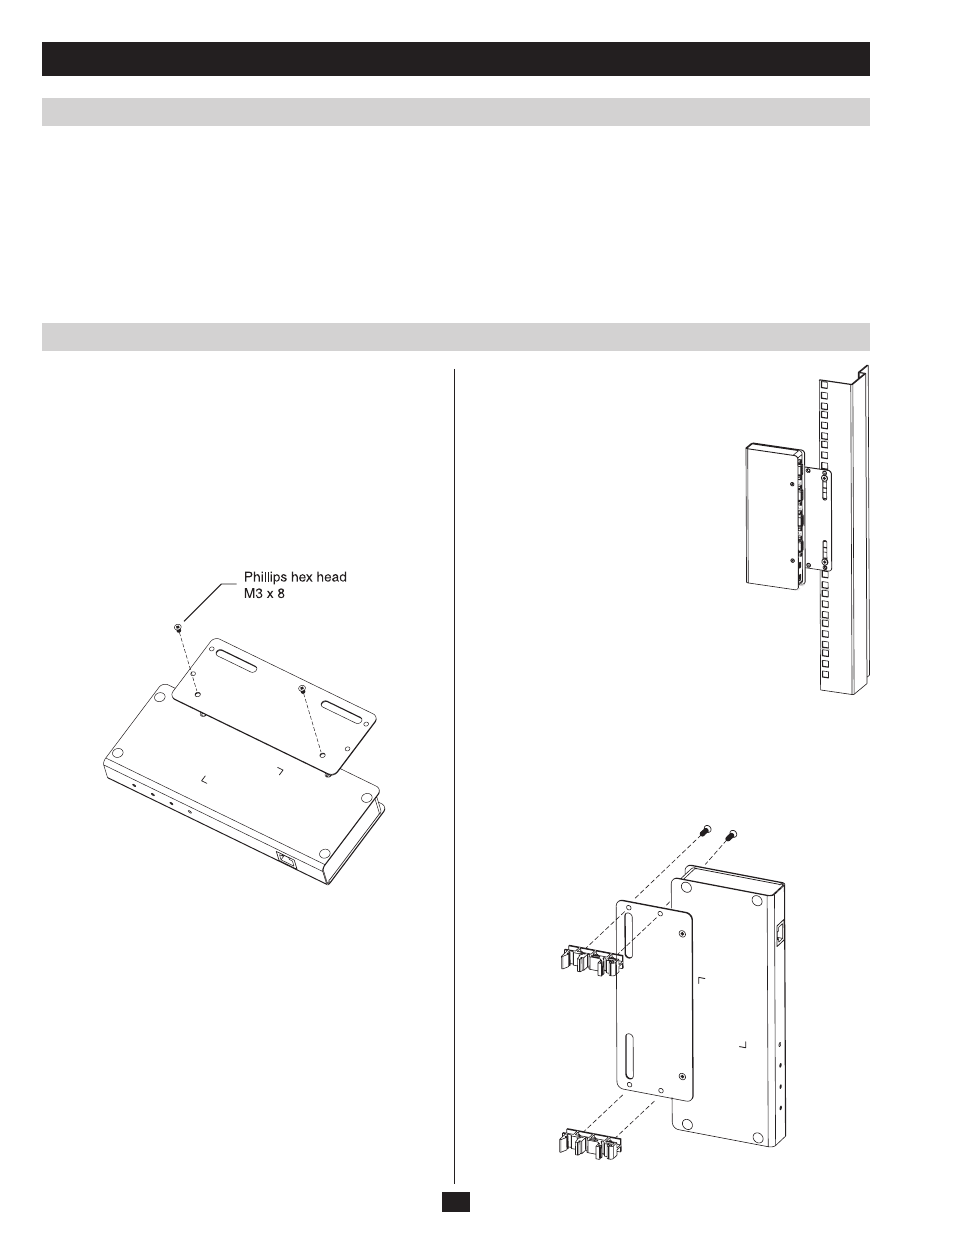
Rack Mounting
For convenience and flexibility, the B051-000 comes with a 0U
rackmount kit so the unit can be conveniently mounted on a system
rack.
To rack mount the unit do the following:
1. Remove the two original screws from the bottom of the unit (near
the rear of the unit).
2. Using the screws and bracket provided with the rack mount kit,
screw the mounting bracket into the B051-000 – as shown in the
diagram below.
DIN Rail Mounting
To mount the B051-000 on a DIN rail:
1. Screw the mounting bracket to the back of the B051-000 as
described in steps 1 and 2 of the Rack Mounting Section.
2. Use the larger screws supplied with the Rack Mount Kit to screw
the DIN rail brackets to the mounting bracket – as shown in the
diagram below:
3. Screw the bracket into any convenient
location on the rack.
Note: Rack screws are not provided. Use
screws that are appropriate for your rack.
3. Hang the unit on the DIN rail.