Http://172.16.66.95/cgi-bin/video.jpg, Once this information is entered, simply click add, Step 2: designate a capture schedule – Thecus Technology N299 User Manual
Page 58: Let’s take a closer look at each field
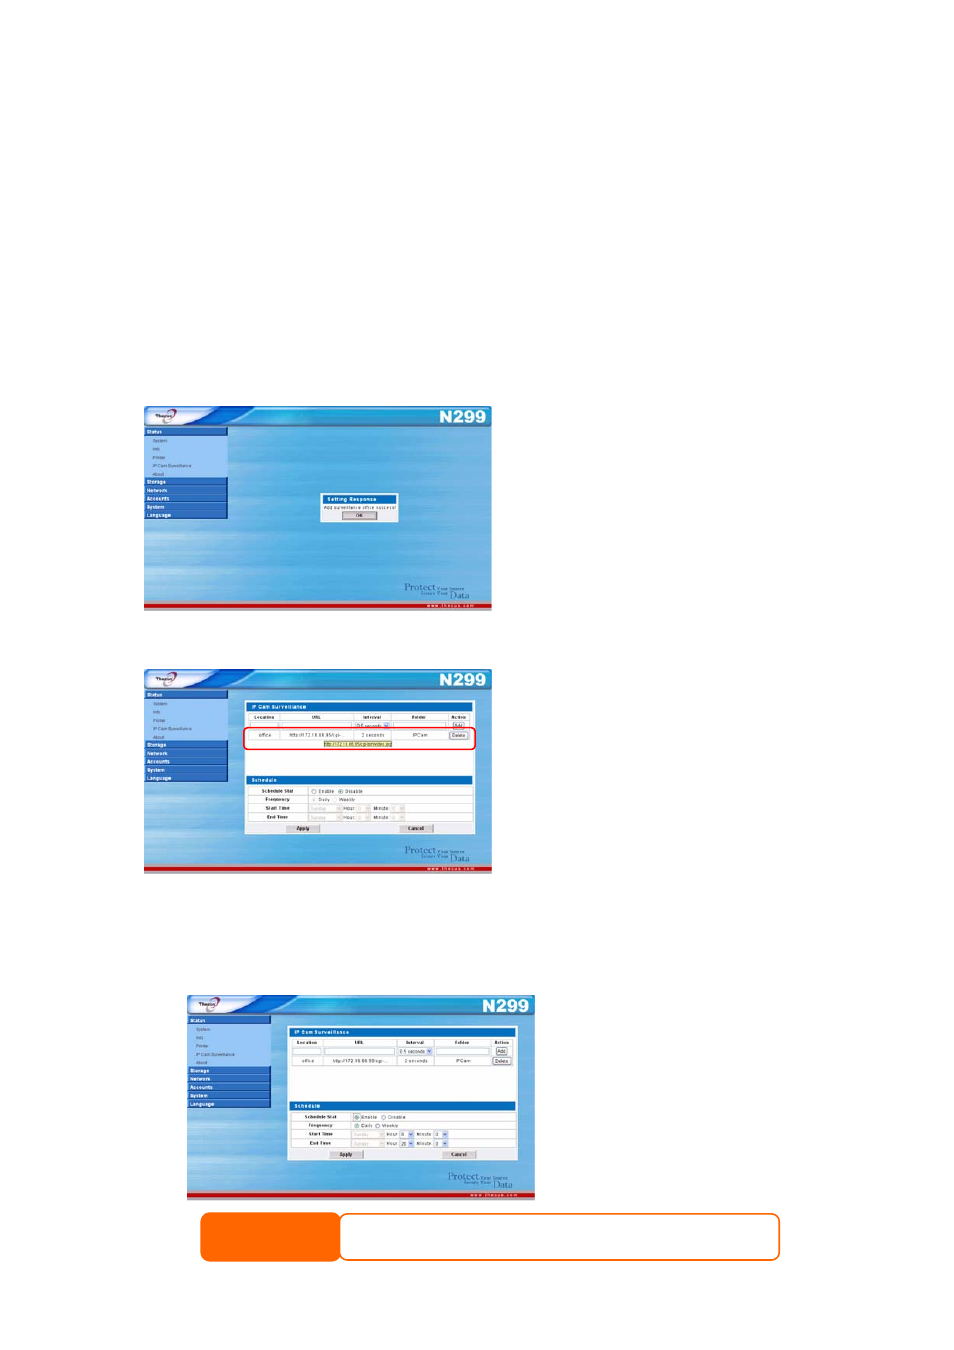
URL: This is where the URL for your IP cam is entered. Every IP cam has a URL
that is provided which links to a landing page for all captured images. In this
example, the Vivotek PT7237 uses the following URL:
http://172.16.66.95/cgi-bin/video.jpg
Please refer to your IP cam manual for the appropriate URL to enter into this field.
Interval: Here, you can designate the time between each captured image. Select
the desired interval from the dropdown menu.
Folder: Enter the name of the folder you wish the N299 to store captured images
to.
Once this information is entered, simply click Add.
After clicking OK to the resulting prompt, your IP cam will appear in the IP Cam
Surveillence window.
Step 2: Designate a Capture Schedule
Once connected, the next step is to create a capture schedule for your IP cam. To
do this, enter the correct information into the Schedule window.
58
Let’s take a closer look at each
field:
Schedule Stat: To enable the
scheduling function, click
Enable.
If the scheduling function is set to Disable, images from any connected IP cameras
will not be saved onto the N299.
NOTE