User and group management, Local user configuration, Adding users – Thecus Technology N299 User Manual
Page 34: Enter a name in the user name box, Press the apply button and the user is created
User and Group Management
The N299 has built-in user database that allows administrators to manage user
access using different group policies. From the Accounts menu, you can create,
modify, and delete users, and assign them to groups that you designate.
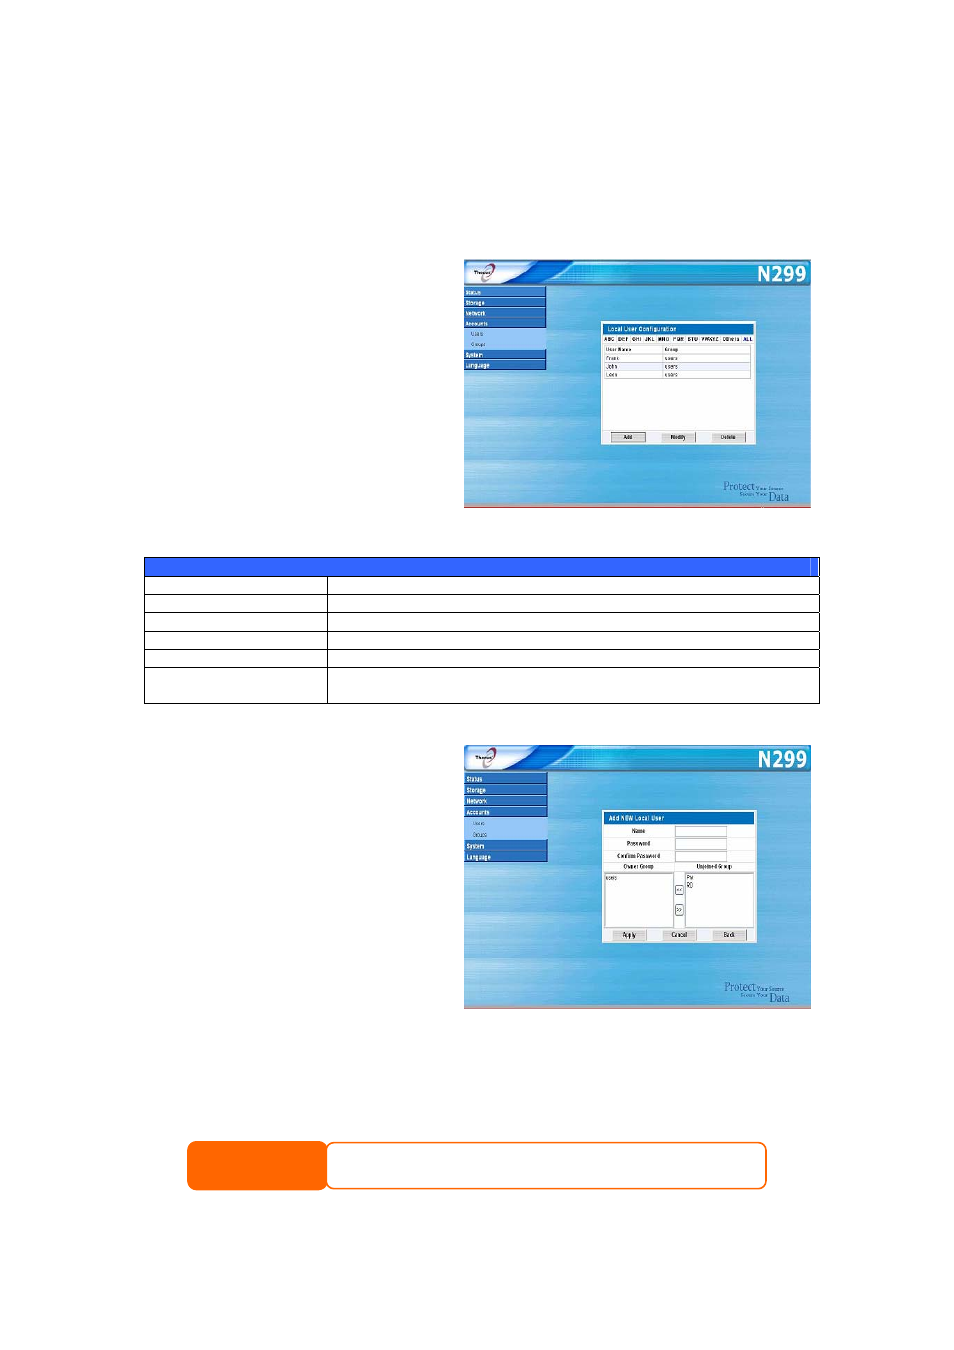
Local User Configuration
From the Accounts menu, choose
the Users item, and the Local User
Configuration screen appears. This
screen allows you to Add, Modify,
and Delete local users.
You can quickly find a particular user
name by clicking one of the letter
groupings at the top of the window.
For example, to find a user name
beginning with the letter M, click the
MNO user group, and the user
names beginning with M, N, or O will
be listed. To see all names, click ALL.
Local User Configuration
Item Description
User Name
Current user name.
Group
Group membership of current user name.
Add Press
the
Add button to add a user to the list of local users.
Modify Press
the
Modify button to modify a local user.
Delete Press
the
Delete button to delete a selected user from the
system.
Adding Users
1. Click on the Add button on
Local User Configuration
screen, and Add NEW Local
User screen appears.
2. Enter a name in the User
Name box.
3. Enter a password in the
Password box and re-enter
the password in the Confirm
Password box.
4. Select which group the user
will belong to. The Owner Group list is a list of groups this user belongs
to. The Unjoined Group list is a list of groups this user does not belong
to. Use the << or >> buttons to have this user join or leave a group.
5. Press the Apply button and the user is created.
All users are automatically assigned to the ‘users’ group.
NOTE
34