TOA Electronics C-RM500 User Manual
Page 28
6.4.5. Home position
Sets the Combination camera to standby status when not being operated.
Note
When "10. OTHER" is selected in the "Switchers" setting, set the
operation common to all channels. In this event, the screen described
in Step 2 below and the rightmost [
CH] indication on the LCD
screen are not shown.
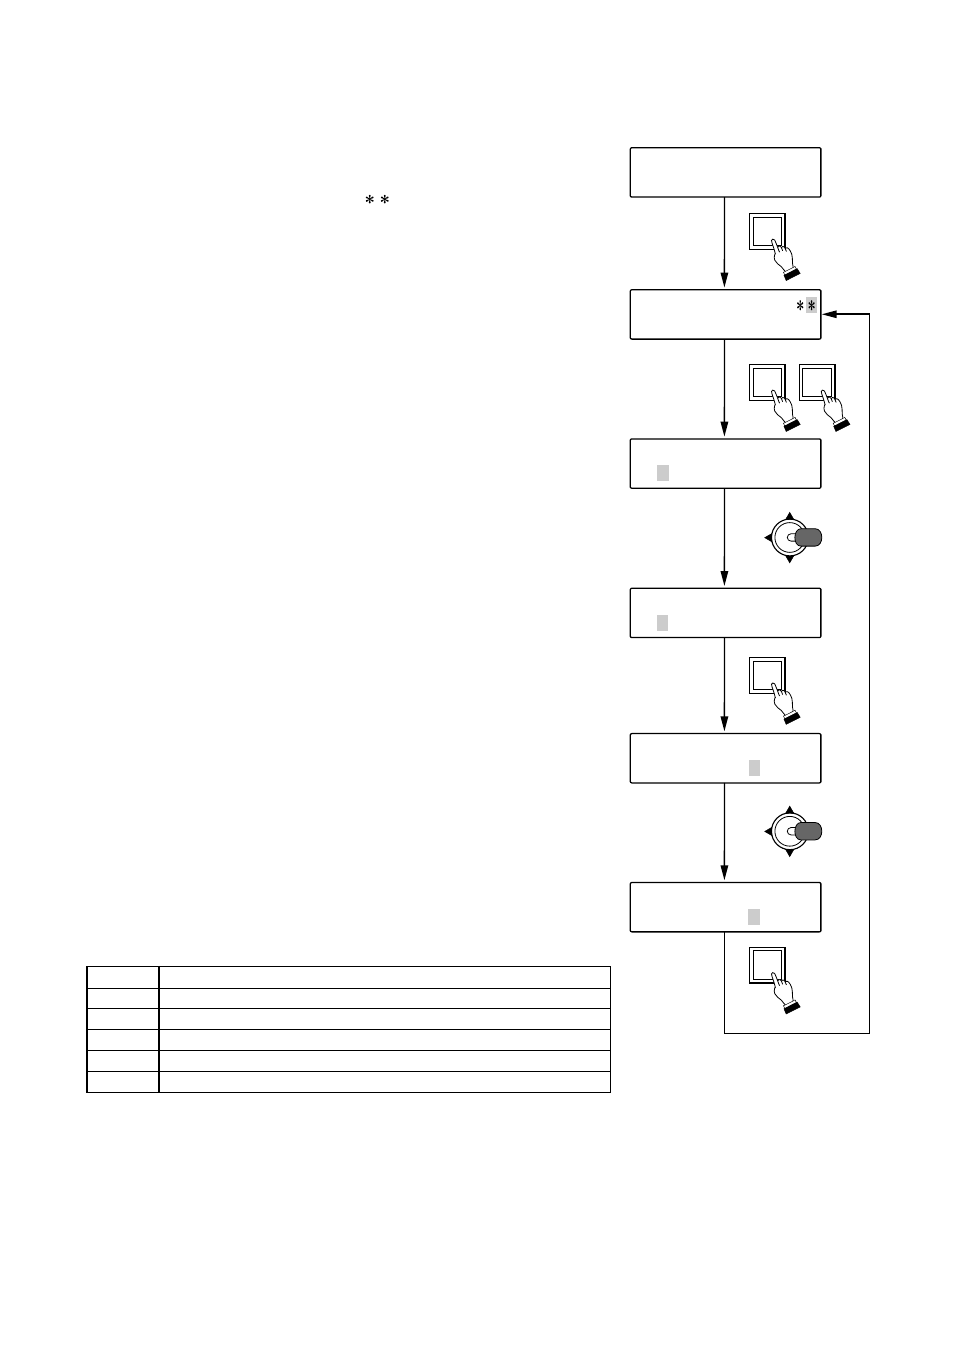
Step 1. Press the Menu key to display the menu screen.
Step 2. Tilt the joystick up or down to select "HOME POS," then
confirm it with the SET key.
The channel (camera number) input screen for the Home
Position setting will appear.
Step 3. Enter the channel number with the numeric keypad, and
confirm the entry with the SET key.
The operation setting is displayed on the bottom line, and the
cursor moves to the position "P" (left). The No. "1" on the left
shows the operation setting when the Home Position selection
input terminal in the unit's rear panel-mounted Alarm
output/control input terminal is broken. Similarly, the No. "2" on
the right shows the operation setting when the Home Position
terminal is made.
(Refer to p. 49 "Alarm Output/Control Input Terminal
Connections.")
Step 4. Tilt the joystick left or right to select the operation settings for
"1" from the list shown below.
Step 5. Press the SET key to confirm the operation setting for "1."
The cursor moves to "P" (right).
Step 6. Tilt the joystick left or right to select the operation settings for
"2" from the list shown below.
Step 7. Press the SET key to confirm the operation setting for "2."
The procedure returns to Step 3, and the settings are displayed
on the LCD screen.
Step 8. To further set other channels, repeat Steps 3 – 7.
To return to the setting display, press the Clear key.
28
H O M E P O S
C H
H O M E P O S
SET
UP
DOWN
RIGHT
LEFT
UP
DOWN
RIGHT
LEFT
2
H O M E P O S
C H 7
1
P O S 1
2
P O S 1
7
SET
3
(Example)
H O M E P O S
C H 7
1
T R A C E
2
P O S 1
4
H O M E P O S
C H 7
1
T R A C E
2
P O S 1
SET
5
H O M E P O S
C H 7
1
T R A C E
2 O F F
6
SET
7
POS1
Orients the camera in the direction of Position 1, as set at the camera.
POS2
Orients the camera in the direction of Position 2, as set at the camera.
PAN
Activates the Auto-Pan function*
1
.
TRACE
Activates the Auto Trace function*
2
.
P-SEQ
Activates the Preset Sequence function*
3
.
OFF
[Home position selector terminal operation settings]
*
1
Automatically pans the camera pan/tilt head.
*
2
Automatically executes manual camera operations stored in memory.
*
3
Automatically sequences camera positions in the order that the position numbers were selected.
Notes
• Make sure to perform each camera setting when "POS2", "TRACE" or "P-SEQ." is selected. The unit could
malfunction if this setting is not correctly performed.
• This selection is set to "POS1" by the factory.