Administration – Tripp Lite B020-U08-19-IP User Manual
Page 35
35
ANMS
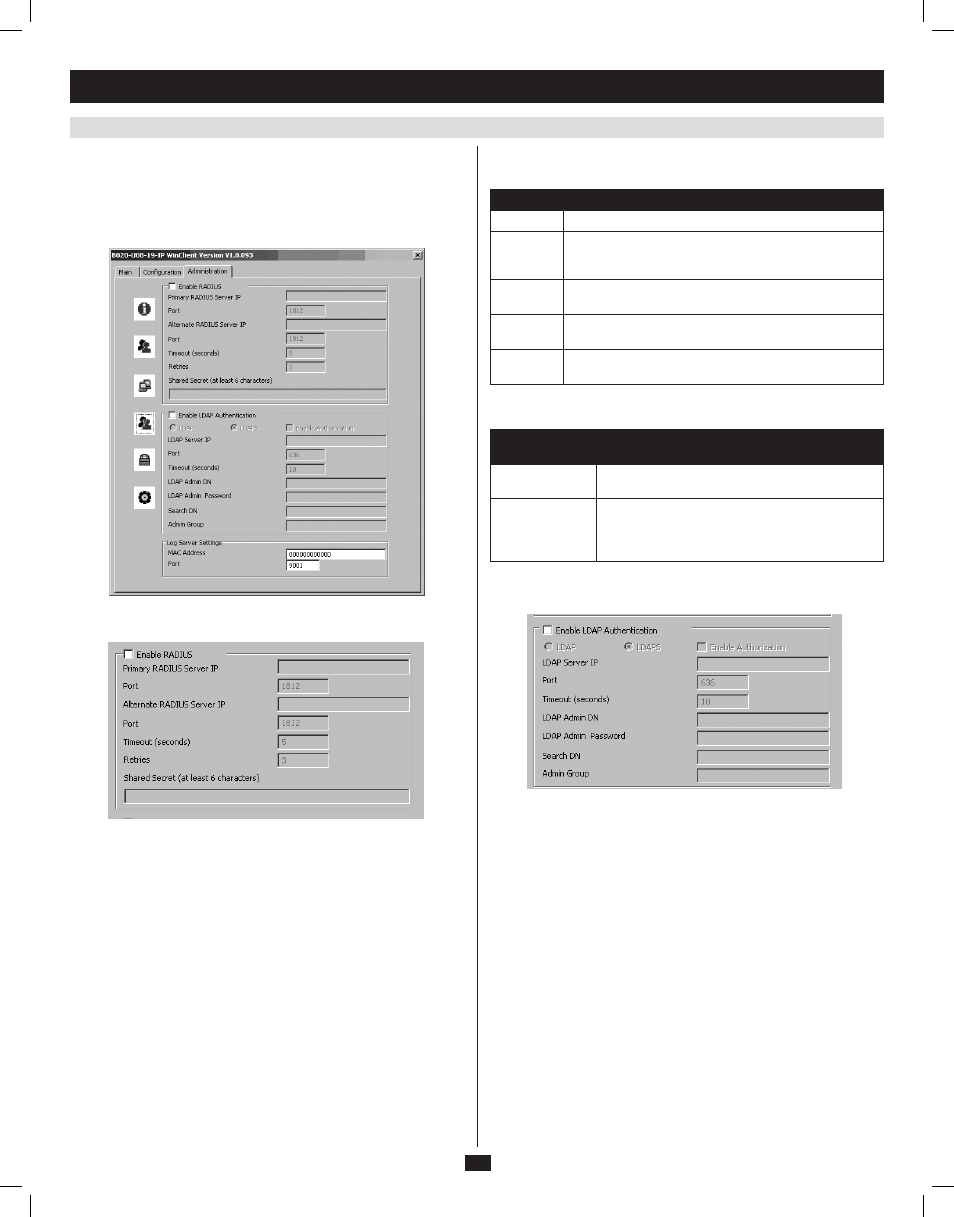
The Advanced Network Management Settings (ANMS) screen box allows
you to set up login authorization management from an external source.
From this screen, administrators can set up remote management via
RADIUS and/or LDAP/S, and set up the access port and MAC address
for the Windows-based log server.
7.2.3 Remote OSD Administration Tab (continued)
7. Administration
(continued)
ANMS - RADIUS
To allow authorization through a RADIUS server, do the following:
1. Check the Enable RADIUS checkbox.
2. Fill in the Primary RADIUS Server IP and access Port, and the
Alternate RADIUS Server IP
and access Port.
3. In the Timeout (seconds) field, set the time in seconds that the KVM
waits for a reply from the RADIUS server before it times out.
4. In the Retries field, enter the number of times you want the KVM to
try and reconnect with the RADIUS server before it gives up.
5. In the Shared Secret field, key in the character string that you want to
use for authentication between the KVM and the RADIUS Server.
On the RADIUS server, set the access rights for each user according to
the information in the table:
Character
Description
C
Gives the corresponding account administrator privileges.
W
Gives the corresponding account access to the KVM
switch via the Windows browser and non-browser
applications.
J
Gives the corresponding account access to the KVM
switch via the Java browser and non-browser applications.
L
Gives the corresponding account access to the log server
on the Web Management Interface.
V
Gives the corresponding account view-only access to all
ports on the KVM switch.
RADIUS Server access rights examples are given in the following table:
RADIUS Access
Rights
Description
C
The corresponding account has administrator
access to the KVM.
W, J, L
User can access the system via the Windows and
Java browser and non-browser applications, and
can access the log server on the Web Management
Interface.
Note: Characters are not case sensitive. Characters are comma delimited.
ANMS – LDAP/S
To allow authentication and authorization via LDAPS, do the following:
1. Check the Enable LDAP Authentication checkbox.
2. Select LDAP or LDAPS.
3. Check the Enable Authorization checkbox.
4. Enter the appropriate IP address and access port for the LDAP or
LDAPS server in the LDAP Server IP and Port fields. The default port
number for LDAP is 389, and is 636 for LDAPS.
5. In the Timeout (seconds) field, set the time in seconds that the KVM
waits for an LDAP or LDAPS server reply before it times out.
6. In the LDAP Admin DN field, set the ‘root’ point for the LDAP
manager to bind to the server.
7. In the LDAP Admin Password field, key in the LDAP manager’s
password. (This field is optional.)
8. In the Search DN field, set the distinguished name of the search base
(i.e. the domain name where the search starts for the user name).
9. In the Admin Group field, key in the name of the LDAP manager.
(This field is optional.)
10. On the LDAP server, set the access rights for each user. (The
following sections describe how to configure LDAP for use with the
KVM switch.)
201009236 93-2985.indd 35
11/18/2010 4:21:45 PM