Installation – Tripp Lite B020-U08-19-IP User Manual
Page 11
11
5. Installation
(continued)
5.9.1 Local Console (continued)
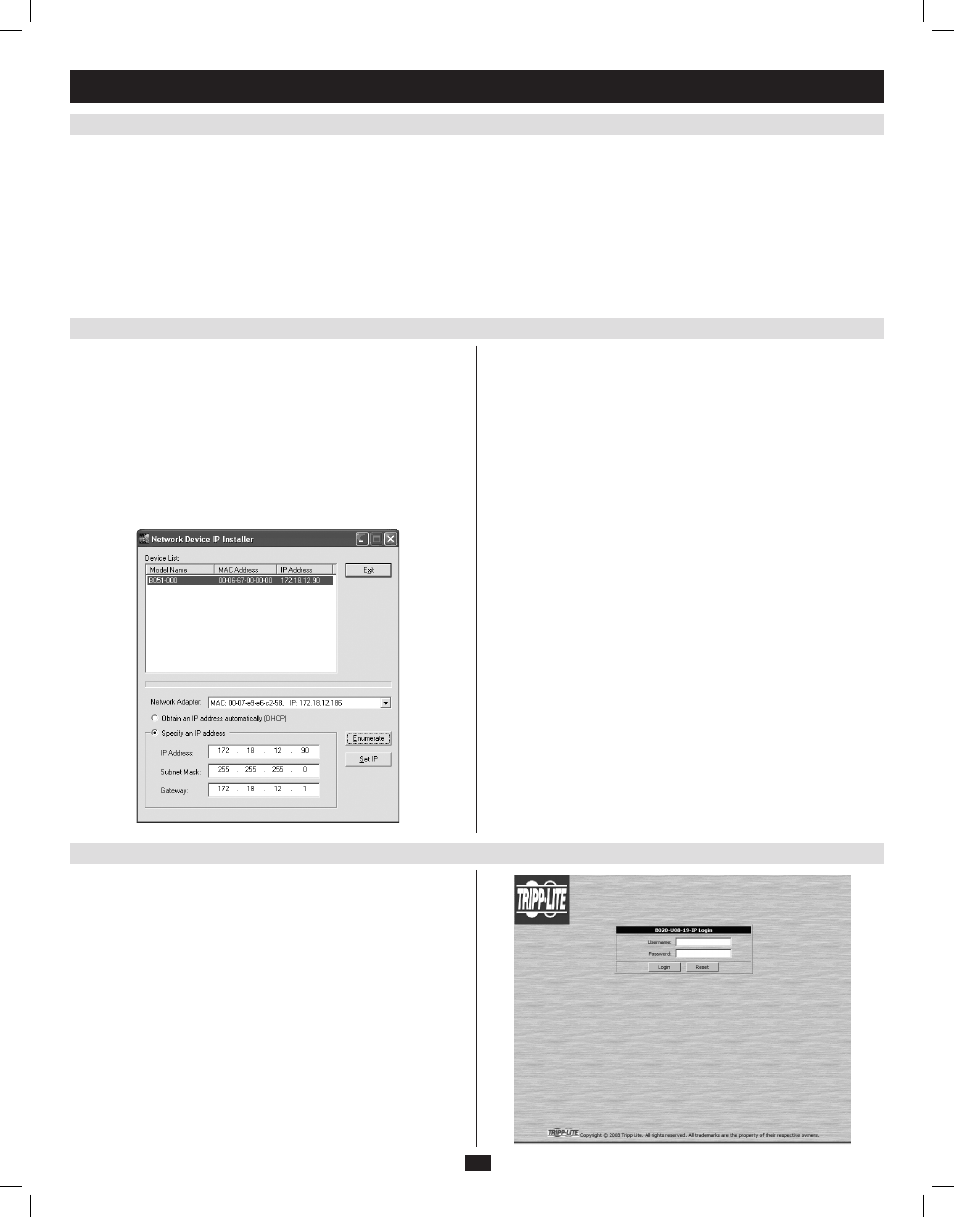
5.9.2 IP Installer
5.9.3 Browser
2. Press the [F4] key to bring up the OSD Admin page.
3. In the OSD Admin page, highlight SET IP ADDRESS and press the [Enter] key.
4. DHCP – The first field allows you to enable or disable DHCP. When enabled, the KVM is assigned an IP address by the DHCP server. This setting is
enabled by default. To disable the DHCP setting and set up a fixed IP address, press the [Spacebar] key. Once the DHCP is disabled, you will be al-
lowed to edit the remaining fields in the SET IP ADDRESS screen.
5. In the remaining fields, enter in the IP address, subnet mask and default gateway you want to assign to the KVM switch.
6. Press the [Esc] key to exit the SET IP ADDRESS screen, and to pull up a prompt asking if you wish to save the settings you just entered. If you do not
wish to save the settings, press the [N] key. If you do wish to save the settings, press the [Y] key. Upon pressing the [Y] key, the settings will be saved
and the KVM will be reset.
Computers that are running Windows can use the IP Installer utility found
in the included CD to assign an IP address to the KVM.
Note: The IP Installer Settings section located in the
Network page of the
KVM’s web management interface must be enabled in order to use the IP
Installer to assign an IP address. (See page 43 for details.) This setting is
enabled by default.
1. Save the IP Installer.exe file from the CD to a desired location on a
computer that is on the same network as the B020-U08-19-IP.
2. Locate the IP Installer.exe file that you just saved and double-click on
it. A screen similar to the one below will appear:
3. The IP Installer searches the network and displays all B020-U08-19-IP
KVM Switches it finds in the device list. If your device does not show
up in the list, click the Enumerate button to refresh the device list. If
more than one B020-U08-19-IP shows up in the list, locate the desired
device using the Mac address located on the bottom of the console
KVM. Once you have located your device in the list, highlight it.
4. From here you can choose between the following two options: Obtain
an IP address automatically
(DHCP) or Specify an IP address. If you
choose to assign your own address, fill in the IP Address, Subnet Mask,
and Gateway fields with information appropriate to your network. Click
on the Set IP button to apply the new network settings to the selected
KVM switch.
5. After the new IP address shows up in the device list, click the Exit but-
ton to exit the IP Installer.
If the KVM switch is on a network that does not contain a DHCP server
to automatically assign an IP address, the default IP address is set to
192.168.0.60.
1. On a computer/server that is on the same network as your console
KVM switch, set the computer/server’s IP address to 192.168.0.XXX,
where XXX represents any number or numbers except 60, as
192.168.0.60 is the default IP address of the KVM.
2. Using this computer/server, access the B020-U08-19-IP via the URL
192.168.0.60. A screen will appear asking you to provide a username
and password.
Note: If you are first prompted by a screen that says the websites security
certificate can not be trusted, click on the link to proceed anyways; the
certificate can be trusted.
201009236 93-2985.indd 11
11/18/2010 4:21:36 PM