Modifiying an nsync task, Deleting an nsync task, Setting up an nsync target on an nsync device – Thecus Technology Thecus N199 User Manual
Page 70
Add Nsync Task
Item Description
Task Name
The name of your Nsync task.
Manufacturer
Select whether the target is a Thecus Product (e.g. N199) or FTP
server.
Target Server IP
Address
The IP address of your target server.
Source Folder
The share folder you want to backup.
Nsync Task Name
The name of your Nsync task.
Authorized Username
on Target Server
The account name on the target server.
Password on Target
Server
The password for the username on the target server.
Test Connection
Click to check the connection to the Target Server.
Schedule
Schedule backup of your share folders.
Time
The time when the Nsync task will run.
Type
Select whether to run the Nsync task daily, weekly, or monthly.
Daily: input the time of day to execute Nsync task.
Weekly: input which day of the week to execute the task.
Monthly: decide which day of the month to execute the task.
Apply
Click to submit the task.
Before starting an Nsync Task, make sure the target server’s Nsync Server (or FTP
Server) is enabled.
NOTE
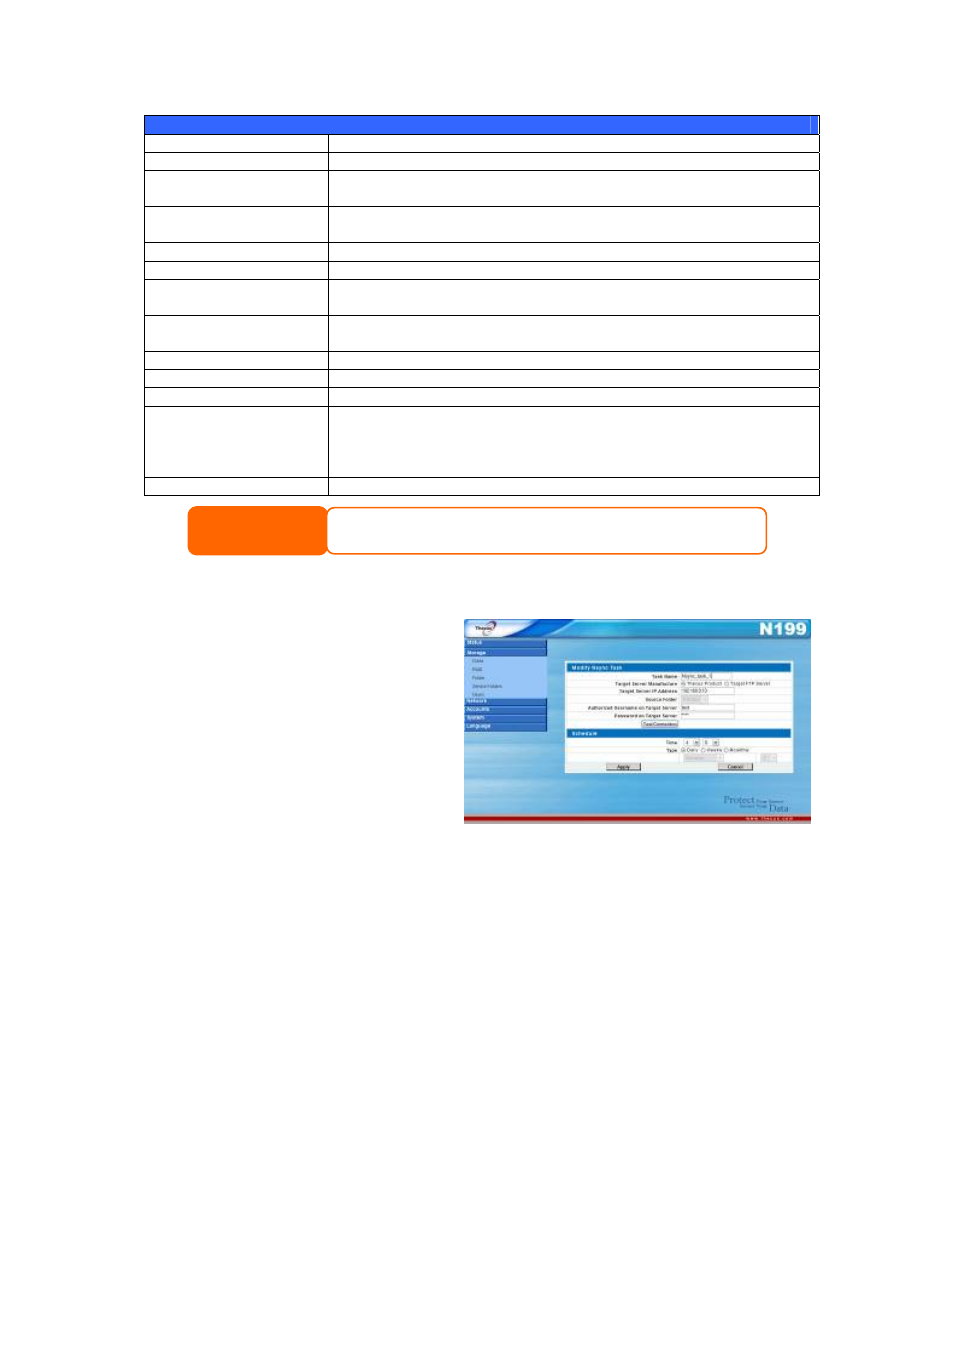
Modifiying an Nsync Task
1. On the Nsync window, select
the Nsync task you would like
to modify by checking its
checkbox. Click Modify and
the Modify Nsync Task
window appears.
2. Change the settings for your
Nsync task.
3. Click Apply to save your
settings.
Deleting an Nsync Task
1. On the Nsync window, select the Nsync task you would like to delete by
checking its checkbox.
2. Click Delete to remove the selected Nsync task.
Setting Up an Nsync Target on an Nsync Device
On the Nsync target server, the administrator of that server has to set up a user
account with a folder named “nsync” and grant write access.
1. On the Nsync server, add a user for Nsync source (ex. nsyncsource1). For
instructions on how to add a user on the N199, see Chapter 4: System
Management > User and Groups Management > Local User
Configuration >
70