Ip cam surveillance, Ip cam configuration, Step 1: connect the ip cam to the n199 – Thecus Technology Thecus N199 User Manual
Page 57
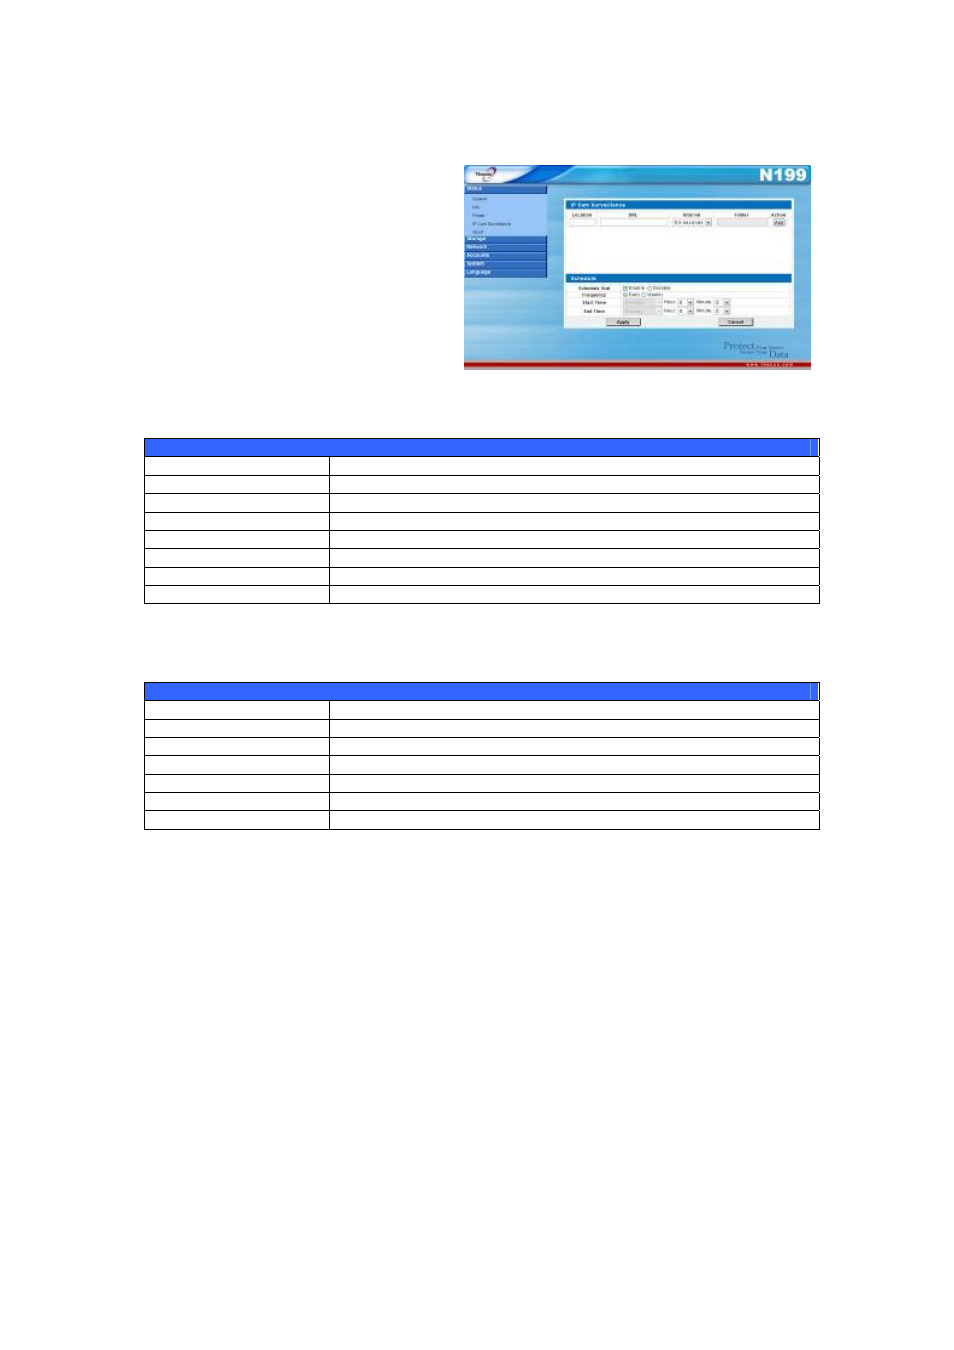
IP Cam Surveillance
With the Simple Surveillance Server,
you can connect an IP cam to the
N199 to capture images. The Simple
Surveillance Server also supports
scheduling, which means that you
can configure the N199 to perform
surveillance at any time.
57
From the Status menu, choose the
IP Cam Surveillance item, and the
IP Cam Surveillance Information
screen appears. The IP Cam screen provides information and allows you to
configure the Simple Surveillance Server.
IP Camera
Item Description
Location
Specify the location where the IP Cam located.
URL
Input the URL address to capture the image.
Interval
Designates the interval for each captured frame.
Folder
Input where the images will reside.
Action Click
ADD to add the task, Delete to remove task.
Apply Click
Apply to save changes.
Cancel Click
Cancel to abandon changes.
You can also designate a schedule for the Simple Surveillance Server using the
Schedule Configuration window:
Schedule Configuration
Item Description
Schedule Start
Checked on enable to activate image capture.
Frequency
Frequency of the schedule. Select from Daily and Weekly
Start Time
Scheduled time for image capture to begin.
End Time
Scheduled time for image capture to finish.
Apply Click
Apply to save changes.
Cancel Click
Cancel to abandon changes.
IP Cam Configuration
Setting up an IP Cam for use with the N199 is easy. In this example, we’ll setup a
Vivotek PT7237 IP cam for use with the N199. Configuring a different IP cam will
be slightly different depending on the model you are using, but this guide will
outline the basics.
Follow the instructions included with your IP cam for installation. Once your IP
cam is properly installed, follow the steps below to configure your N199.
Step 1: Connect the IP Cam to the N199
The first step is to connect your IP cam to the N199. To do this, login to the
N199’s Web Admin Interface and select IP Cam Surveillance from the menu.
The IP Cam Surveillance window will appear. Here, we will connect your
installed IP Cam to the N199.