Country selection, Inserting cartridges – Toshiba ESTUDIO 60F User Manual
Page 8
8
v If you want to connect the e-STUDIO60F to a PC,
please refer to the chapter PC connection
. You
must install the software first and then connect
the e-STUDIO60F to the PC!
After you have connected the e-STUDIO60F to
the mains, it will prompt you to make some basic
settings as follows
.
Country selection
1 Press
OK
.
2 Use
/ to choose your country.
3 Press
OK twice
.
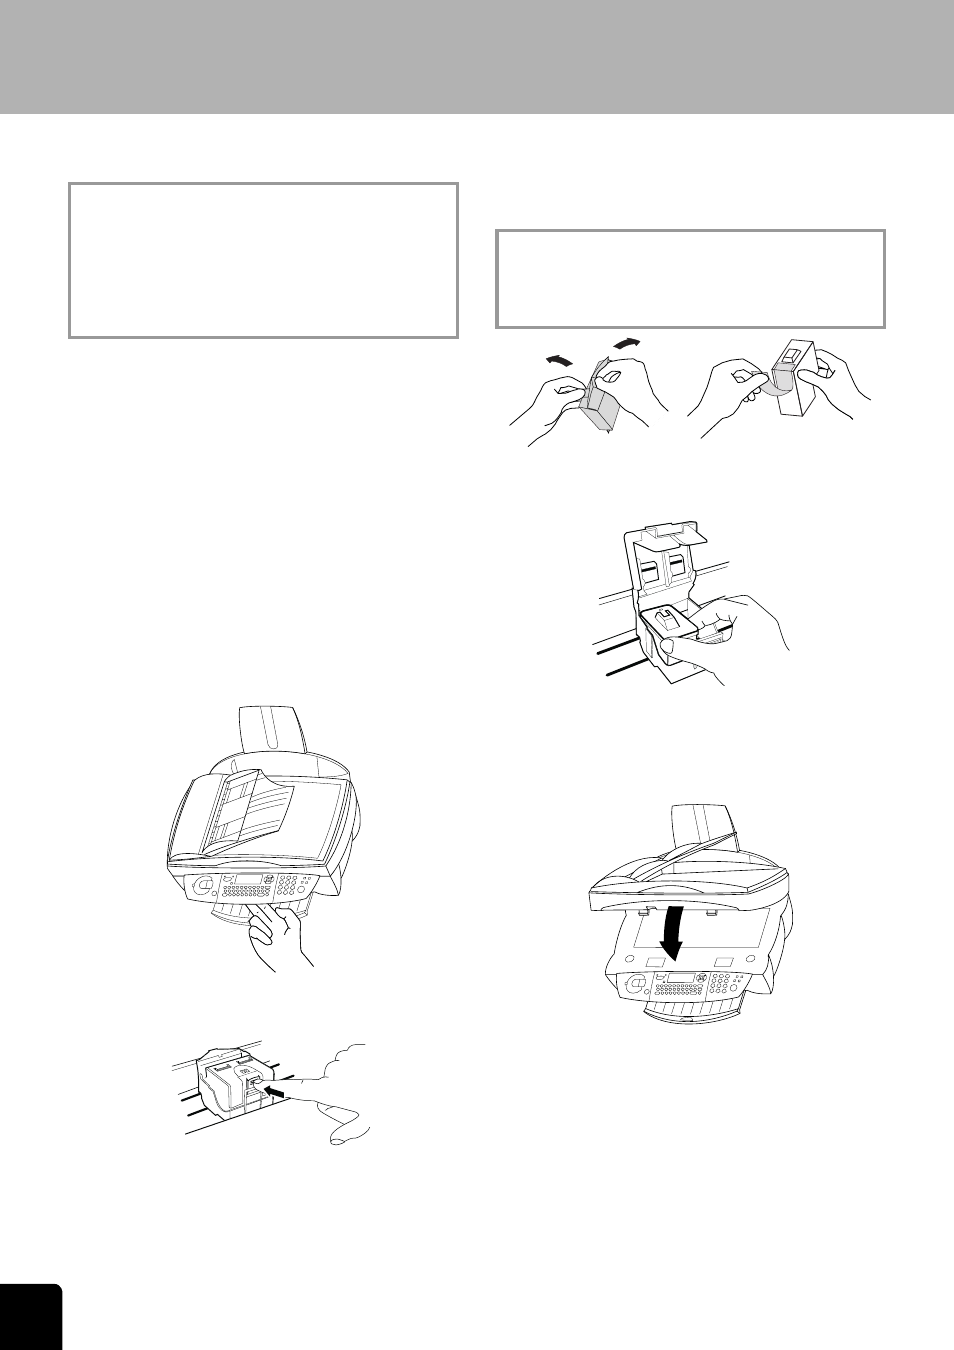
Inserting cartridges
Before you can print documents, there have to be ink
cartridges in your e-STUDIO60F
. Therefore two free
cartridges for a few test pages are included with your
machine
.
The display will indicate if one of the cartridges is emp-
ty or if there is no cartridge in the e-STUDIO60F
.
1 Open the machine by pulling the lever under the
control panel
.
2 Press the lever in the middle of the cartridge holder
to open the holder
.
3 Take the ink cartridges out of their packaging and
remove the protective strip
.
v Please make sure that the protective strip was re-
moved completely
.
Be careful not to touch the nozzle or the con-
tacts!
4 Insert the colour cartridge with the contacts for-
ward and the “nose” down into the left compart-
ment of the cartridge holder
.
5 Insert the black cartridge into the right compart-
ment
. Close the cartridge holder. You’ll hear a click
when it snaps home
.
6 Close the machine
.