Installation, Front door installation, Optional remote control – Regency FIREGENIE FG39-NG User Manual
Page 21: Final check
Regency FG39 FireGenie Freestanding Gas Stove
21
INSTALLATION
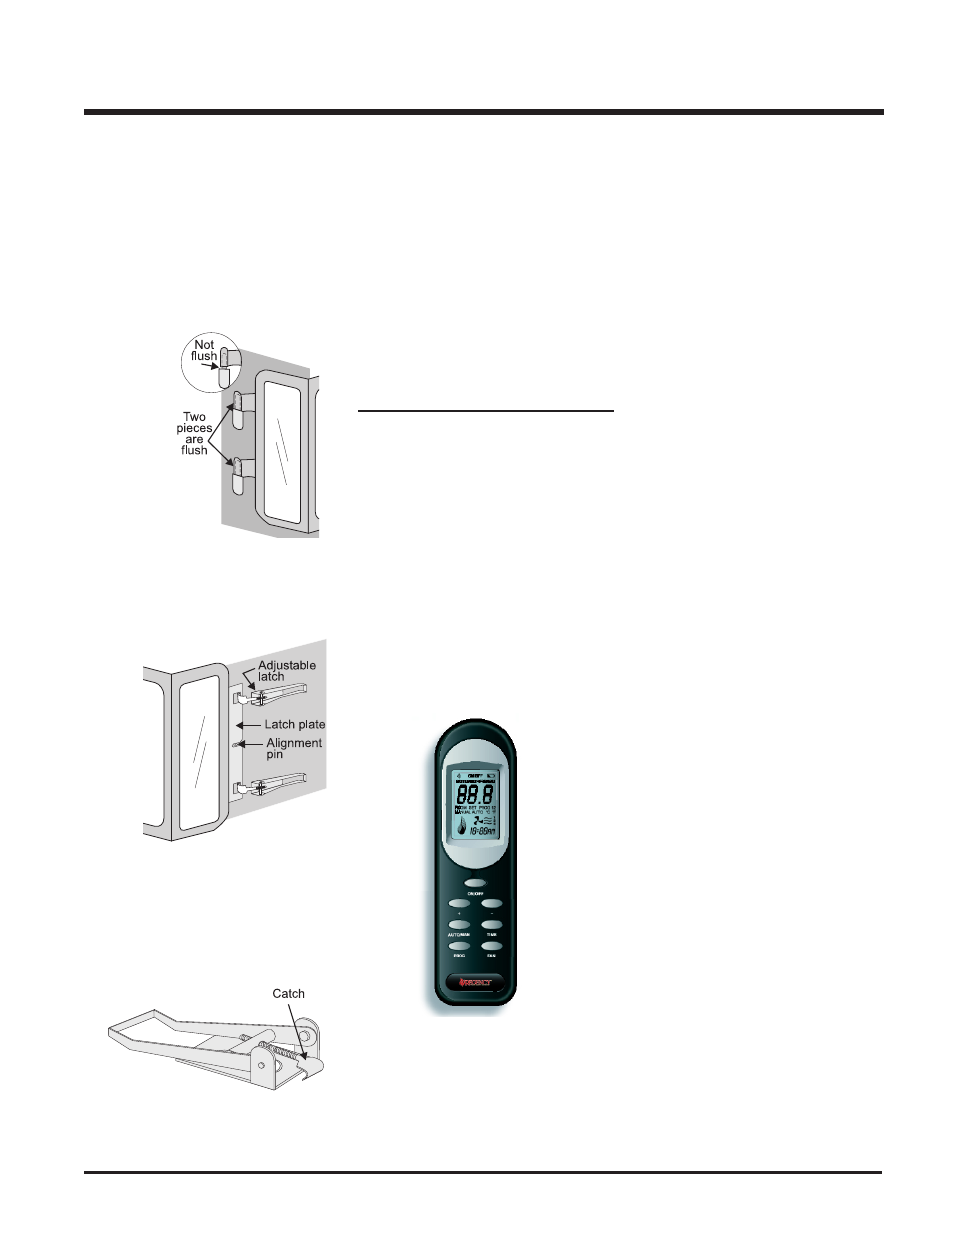
Diagram 1
FRONT DOOR
INSTALLATION
(packaged separately)
1) Open the two side panels.
2) Slide the door onto the two hinge pins
making sure the two pieces are flush to-
gether. See diagram 1.
4) The latches should already be at the proper
setting. If they are too hard or too easy to
close, you may want to adjust them by
loosening the latch catch. See diagram 3.
Diagram 2
Diagram 3
5) Remove the blue plastic protective coating
from the glass.
6) Test the seal around the door by placing a
piece of paper between the unit and the
door, close the door and try to pull the paper
out. If it slips out easily, then the door is not
properly sealed. Tighten or loosen the latch.
See diagram 3.
Note: The door latch may require ad-
justment as the door gasket ma-
terial compresses after a few fires
and after glass replacement. Turn
the latch catch inward or out-
ward to loosen or tighten.
3) Close the door. The latch plate must be
centered around the alignment pin. See
diagram 2. If the latch plate interferes with
the corner of the stove you may want to
angle the plate slightly so the door closes
easier.
OPTIONAL
REMOTE CONTROL
Use the Regency Remote Control Kit approved
for this unit. Use of other systems may void your
warranty.
The remote control kit comes with a hand held
transmitter and a wall mounting plate.
1) Choose a convenient location to mount the
hand held transmitter, protection from ex-
treme heat is very important.
The remote can also be used as a wall thermo-
stat.
FINAL CHECK
Before leaving this unit with the customer, the
installer must ensure that the appliance is firing
correctly. This includes:
1) Clocking the appliance to ensure the cor-
rect firing rate (rate noted on label) at 15
minutes.
2) If required, adjusting the primary air to
ensure that the flame does not carbon. First
allow the unit to burn for 15 min. to stabilize.
3) Check for proper draft.
CAUTION
Any alteration to the product that
causes sooting or carboning that
results in damage to the exterior
facia is not the responsibility of the
manufacturer.