A quick look at the front panel controls – RCA 31-5030 User Manual
Page 8
8
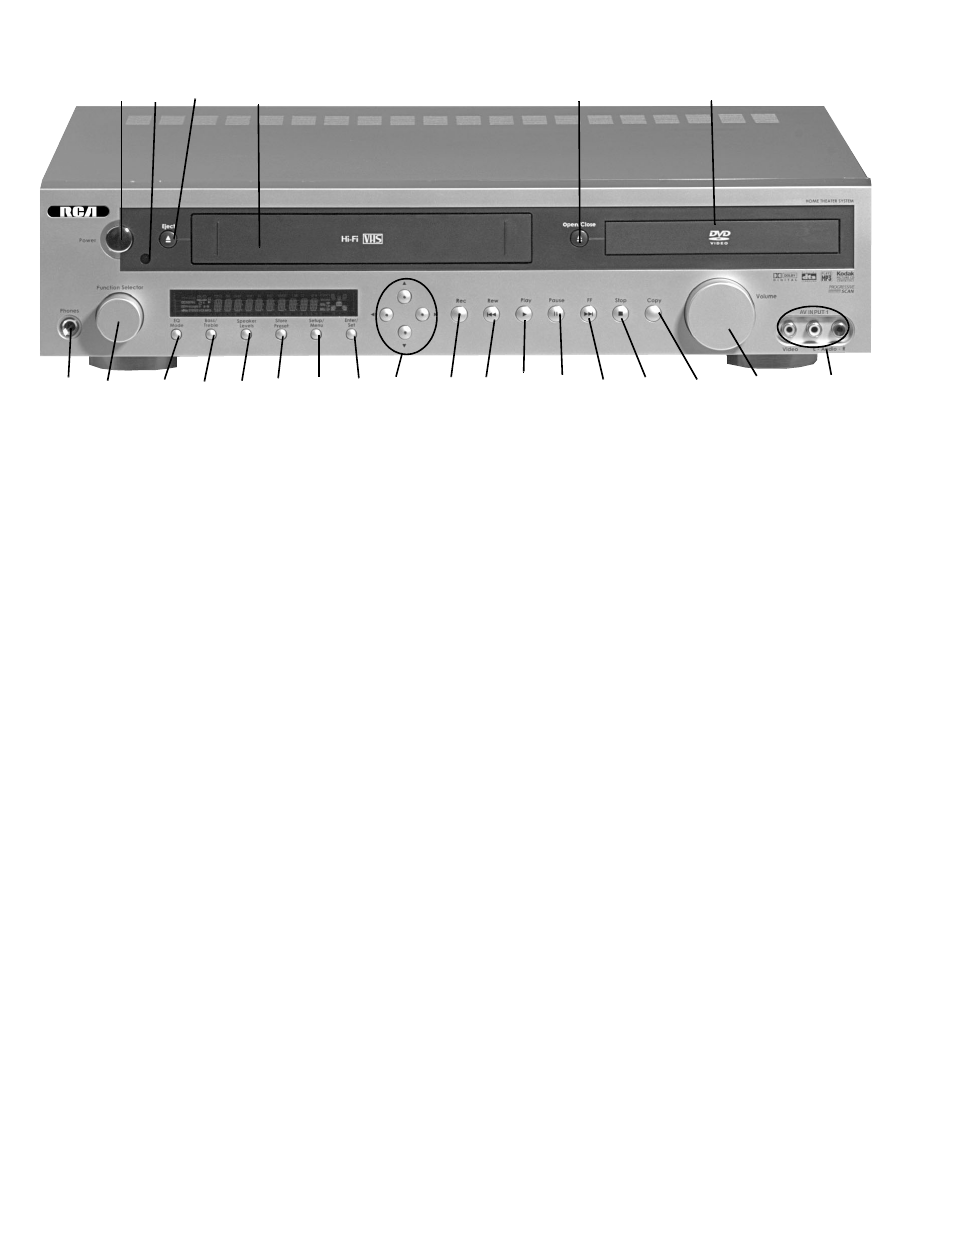
A QUICK LOOK AT THE FRONT PANEL CONTROLS
1.
POWER
—
Press to turn the system on or off.
2.
IR SENSOR
—
Aim the remote control here.
3.
EJECT
—
Press to remove the currently loaded VHS tape.
4.
VHS DECK
—
Insert the videotape here.
5.
OPEN/CLOSE
—
Press to open and close the DVD tray.
6.
DISC TRAY
—
Insert disc (DVD, CD, etc.) here.
7.
PHONES
—
Insert headphone plug here.
8.
FUNCTION SELECTOR
—
Rotate to select the desired
home theater function: VCR (TV), DISC, FM, AM, ANALOG 1, ANALOG 2 and
DIGITAL.
9.
EQ MODE
—
Press to select a preset equalizer setting.
10.
BASS/TREBLE
—
Press to select bass or treble, and then adjust using
e / d
.
11.
SPEAKER LEVELS
—
Press to select the desired speaker, and then adjust the volume level using
e / d
.
12.
STORE PRESET
—
Press to save a
radio preset.
13.
SETUP/MENU
— In full Stop mode, press to display the
setup menus for the DVD and VCR decks. In all other DVD Play modes
(PLAY, RESUME STOP, etc.), press to display the DVD disc menu.
14.
ENTER/SET
—
Press to enter and confirm menu settings.
15.
f / e / g / d
—
Press to navigate the on-screen
menus.
16.
REC
—
Press to start recording in the VCR deck.
17.
REW
F
—
In the Disc function, press to skip to the previous
chapter/track. In the VCR function, press to rewind the tape. In Play
mode, press to scan backward at variable speeds.
18.
PLAY
—
Press to start playback of a disc or VHS tape.
19.
PAUSE
—
Press once to pause playback. Press repeatedly to
step forward one frame at a time.
20.
FF
J
—
In the Disc function, press to skip to the next chapter/
track. In the VCR function, press to fast-forward the tape. In Play
mode, press to scan forward at variable speeds.
21.
STOP
—
Press to stop playback of a disc or VHS tape.
22.
COPY
—
Press to copy the disc in the DVD deck to the
videotape in the VCR deck. The system will not copy Macrovision® encoded
DVDs.
23.
VOLUME
— Rotate to adjust the volume.
24.
AV INPUT 1(VIDEO L-AUDIO-R)
—
Connect to the
audio/video outputs of a camcorder, video game or other component.
1
2
3
8
5
18
6
9
7
10
13
15
4
24
14
11
23
17
12
16
19
20
21
22