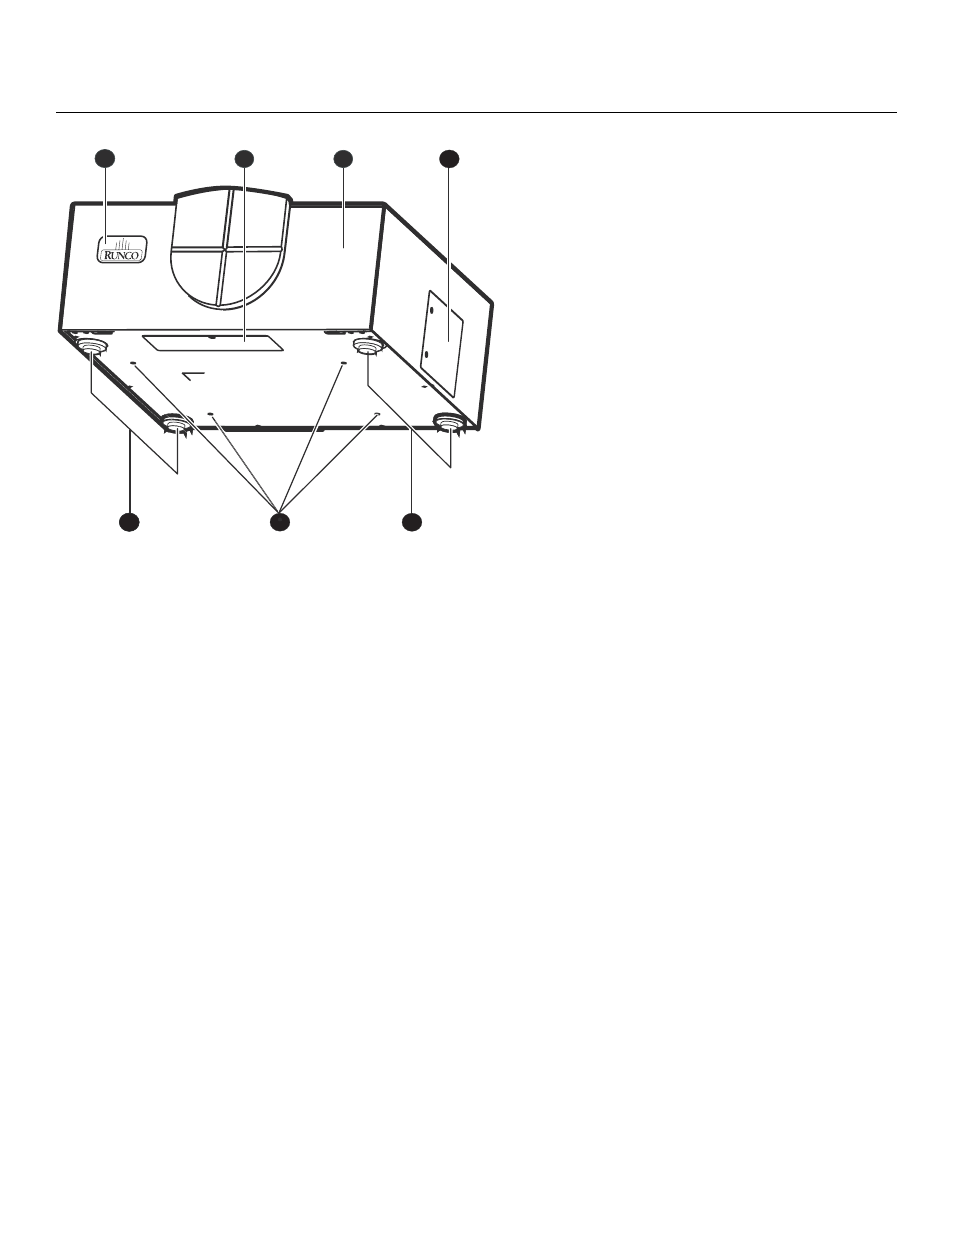
Figure 2-2 . vx-3000d rear/bottom/side view, 2. vx-3000d rear/bottom/side view, Pre l iminar y – Runco CINEWIDETM VX-3000D User Manual
Page 23
VX-3000d Series Installation/Operation Manual
7
PRE
L
IMINAR
Y
Figure 2-2. VX-3000d Rear/Bottom/Side View
1.
RUNCO LOGO
The logo can be rotated to match the projector orientation: inverted (ceiling-mounted)
or upright. To rotate the logo, grip it at the sides, pull it away from the projector and
rotate it 180 degrees.
2.
CABLE OPENING
Pass cables through this opening.
3.
CABLE ACCESS DOOR
Open to access connectors.
4.
LAMP MODULE COVER
Remove this cover to access the lamp compartment.
5.
FRONT/REAR ADJUSTERS
Use these to adjust the projector height or projection angle.
6.
CEILING MOUNT HOLES
Use these to attach the ceiling bracket to the projector.
5
6
5
4
3
2
1