Part names of the remote control – NEC HT1100 User Manual
Page 9
E-9
17
13
8
4
5
2
3
7
9
6
1
11
16
19
LIGHT
COMPONENT
POWER
COMPUTER
AUTO ADJ.
PIC-MUTE
POSITION
MAGNIFY
3D REFORM
VIDEO
MENU
ASPECT
DOWN
UP
AUTO
PICTURE
MUTE
VIEWER
HELP
FREEZE
CANCEL
COMP.V
COMP.
DVI
S-VIDEO
ENTER
15
12
18
14
20
21
22
9
10
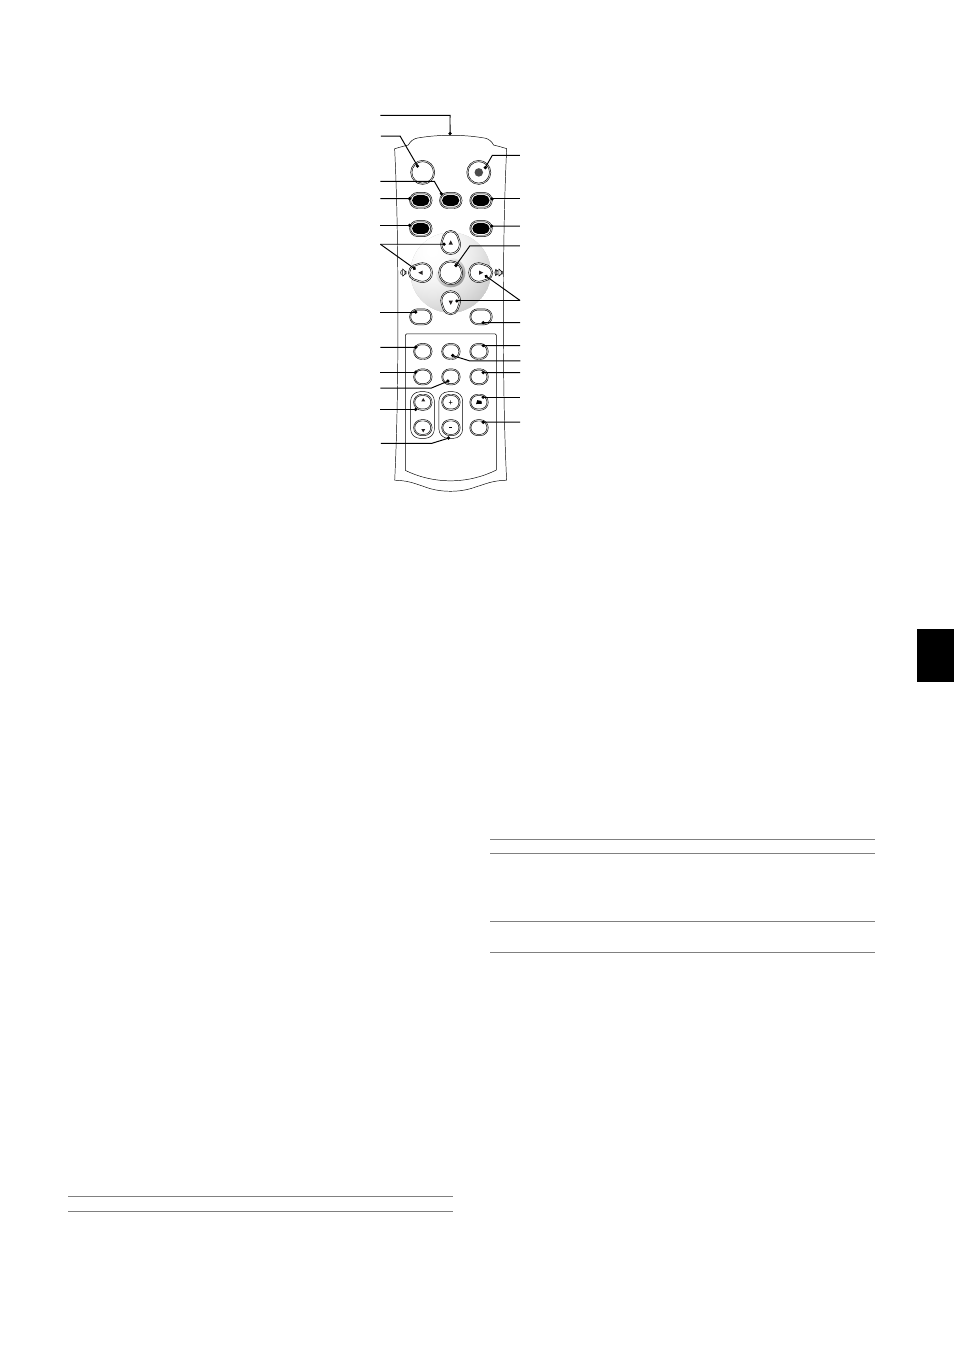
1. Infrared Transmitter
Direct the remote control toward the remote sensor on the projector
cabinet.
2. POWER Button
Use this button to turn the power on and off when the main power is
supplied and the projector is in standby mode (Power-saving mode
or Idle mode).
To turn on or off the projector, press and hold this button for a mini-
mum of two seconds.
3. LIGHT Button
Use this button to turn on or off the button’s backlight. Unless another
button is pressed within 10 seconds while the backlight is on, it will
turn off to conserve the batteries.
4. VIDEO Button
Press this button to select an NTSC, PAL, PAL-N, PAL-M, PAL60,
SECAM or NTSC4.43 compatible video source from a VCR, DVD
player, or laser disc player.
5. S-VIDEO Button
Press this button to select an S-Video source from a VCR, DVD player
or laser disc player.
6. COMPONENT Button
Press this button to select a video source from component equip-
ment connected to your COMPONENT input.
7. COMPUTER Button
Press this button to select a video source from computer or compo-
nent equipment connected to your COMPUTER IN port.
8. DVI Button
Press this button to select a DVI digital signal from a computer, DVD
player or settop box.
9. Select
̆̄̇̈ / Volume Button
̆̄ : Use these buttons to select the menu of the item you wish to
adjust.
̇̈ : Use these buttons to change the level of a selected menu item.
When no menus appear, these buttons work as a volume con-
trol.
NOTE: When the Viewer is selected, volume control is not available.
10. ENTER Button
Executes your menu selection and activates items selected from the
menu.
Part Names of the Remote Control
11. MENU Button
Displays the menu for various settings and adjustments.
12. CANCEL Button
Press this button to exit "Menus". Press this button to return the ad-
justments to the last condition while you are in the adjustment or
setting menu.
13. ASPECT Button
Press this button to display the Aspect Ratio select screen. Each
time this button is pressed, the option will be changed. See page E-
30.
14. PICTURE Button
Press this button to display the Preset window. Each time this button
is pressed, the option will be changed. See page E-29.
15. AUTO ADJ Button
Use this button to adjust an COMPUTER source for an optimal pic-
ture. Some signals may not be displayed correctly or take time to be
displayed. See page E-21.
NOTE: This function may not be available depending upon the input signal.
16. PIC-MUTE Button
This button turns off the image and sound for a short period of time.
Press again to restore the image and sound.
NOTE: When the menu is displayed, a press of this button mutes an image
and sound without turning off the menu.
17. FREEZE Button
This button will freeze a picture. Press again to resume motion.
18. VIEWER Button
Press this button to select the Viewer source.
19. POSITION Up/Down Button
This button adjusts position of a zoomed image. See page E-23.
20. MAGNIFY (+) (–) Button
Use this button to adjust the image size up to 400%. The image is
magnified about the center of the screen. When the image is magni-
fied, you can move the image by using the SELECT
̆̄̇ ̈ button.
See page E-24.
21. 3D REFORM Button
Press this button to enter 3D Reform to correct the keystone (trap-
ezoidal) distortion, and make the image square. See page E-20.
22. HELP Button
Provides the online help or the set information.