E-20 – NEC HT1100 User Manual
Page 20
E-20
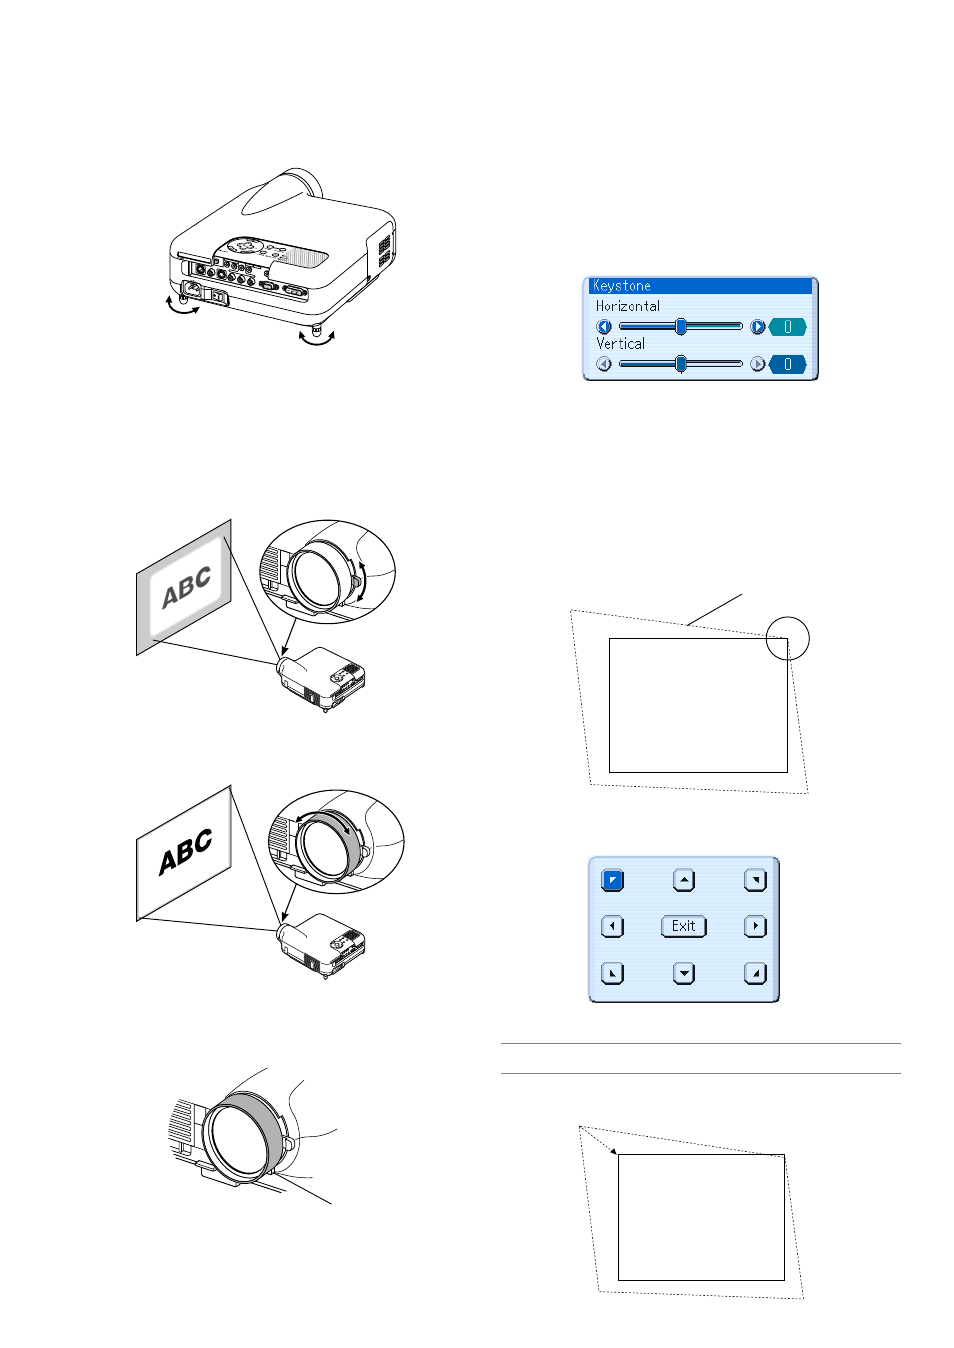
The rear foot height can be changed. Rotate the rear foot to the desired
height, but the vertical distance from the bottom to the desk or floor
should be 1" (25 mm) to make the projector horizontal on the flat sur-
face.
PC CONTROL
RGB IN
DVI-D IN
SG TRIGGER
VIDEO IN
S-VIDEO IN
S-VIDEO
S-VIDEO
RGB/DVI
RGB/DVI
VIDEO
VIDEO
AUDIO IN
AUDIO IN
COMPONENT
Y
Cb/Pb
Cr/Pr
Up
Down
Up
Down
CAUTION:
Do not use the tilt-foot for purposes other than originally intended.
Misuses such as gripping the tilt-foot or hanging on the wall can
cause damage to the projector.
Zoom
Use the Zoom lever to fine adjust the image size on the screen.
Focus
Use the Focus ring to obtain the best focus.
Correcting the Horizontal and Vertical Key-
stone Distortion (3D Reform)
Use the 3D Reform feature to correct keystone (trapezoidal) distortion
to make the top or bottom and the left or right side of the screen longer
or shorter so that the projected image is rectangular.
Two options are available for correcting procedures.
Press the 3D REFORM button to toggle between Keystone and Corner-
stone.
Keystone
Iris
Use the Iris lever underneath the lens to adjust the brightness and the
contrast ratio optically.
Iris lever
Screen
Projected image
Screen
The Cornerstone adjustment screen is displayed.
NOTE: Press the 3D REFORM button to toggle between "Cornerstone" and "Key-
stone."
4. Use the SELECT
̆̄̇̈
button to select one icon which points in
the direction you wish to move the projected image frame.
(The drawing shows the upper right corner.)
3. Press the 3D REFORM button on the remote control.
1. Press the SELECT
̇̈
button to adjust the horizontal keystone.
2. Press the SELECT
̆̄
button to select "Vertical".
3. Press the SELECT
̇̈
button to adjust the vertical keystone.
4. After completing, press the ENTER button.
Cornerstone
1. Project an image so that the screen is smaller than the area of the
raster.
2. Pick up any one of the corners and align the corner of the screen
with the one of the image.