Convenient features, Using image position, Turning off the image and sound – NEC HT1100 User Manual
Page 23: Freezing a picture, Capturing a picture, E-23, A commercially available anamorphic lens is needed, You can capture a still image while freezing it
E-23
CONVENIENT FEATURES
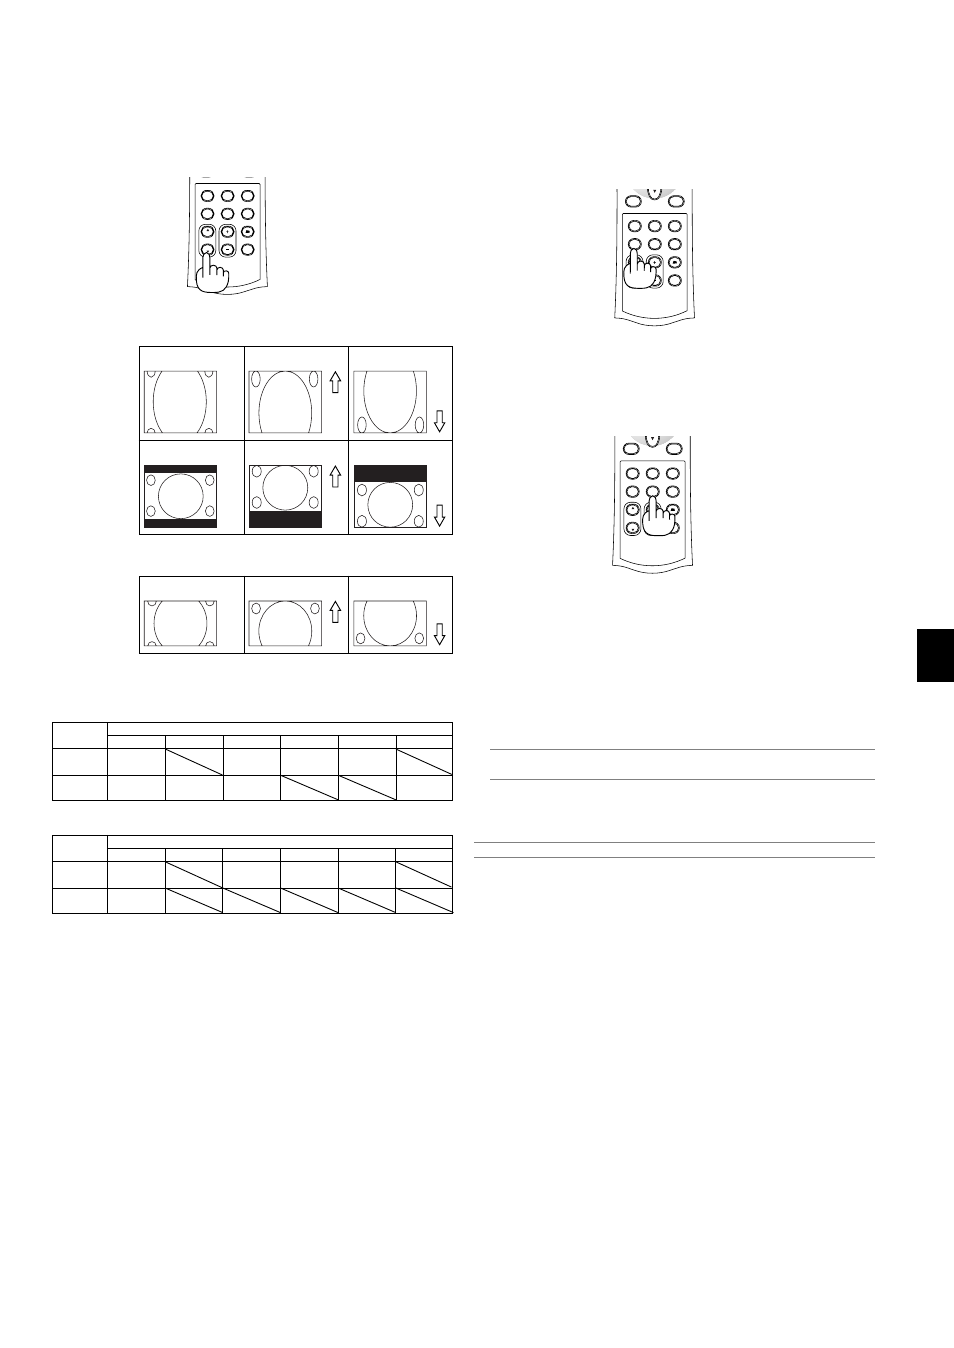
Move the viewable
area up or down
Move the position of
an image up or down
Zoom or V-Zoom
UP
DOWN
Cinema
UP
DOWN
When “4:3” is selected in Screen Type:
When “16:9” and “Anamorphic”(*) are selected in Screen Type:
Move the viewable
area up or down
Zoom
UP
DOWN
Table of Availability for Image Position
For PC, DVD Progressive, 480p, 480i, 576p, 576i
Screen Type
4:3
Aspect Ratio
Normal
Not available
Not available
Full
Not available
Zoom
Available
Available
Cinema
Available
V-Zoom
Available
Stadium
Not available
For 720p, 1080i, 1080p
Screen Type
4:3
Aspect Ratio
Normal
Available
Not available
Full
Zoom
Not available
Cinema
Available
V-Zoom
Not available
Stadium
Using Image Position
The POSITION button adjusts the position of an image when “Zoom”,
“V-Zoom” or “Cinema” is selected in Aspect Ratio.
See also “Adjusting the position of an image [Image Position]” on page
E-32.
AUTO ADJ.
PIC-MUTE
POSITION
MAGNIFY
3D REFORM
ASPECT
DOWN
UP
AUTO
PICTURE
MUTE
VIEWER
HELP
FREEZE
* A commercially available anamorphic lens is needed.
Turning Off the Image and Sound
Press the PIC MUTE button to turn off the image and sound for a short
period of time. Press again to restore the image and sound.
Freezing a Picture
Press the FREEZE button to freeze a picture. Press again to resume
motion.
AUTO ADJ.
PIC-MUTE
POSITION
MAGNIFY
3D REFORM
MENU
ASPECT
DOWN
UP
AUTO
PICTURE
MUTE
VIEWER
HELP
FREEZE
CANCEL
AUTO ADJ.
PIC-MUTE
POSITION
MAGNIFY
3D REFORM
MENU
ASPECT
DOWN
UP
AUTO
PICTURE
MUTE
VIEWER
HELP
FREEZE
CANCEL
Capturing a Picture
You can capture a still image while freezing it.
1. Press the FREEZE button and then press the MENU button. The
CAPTURE window will be displayed.
2. Press the ENTER button to capture the image.
NOTE: A “_CAP_” folder will be created and a captured image will be stored
in the PC card inserted into the projector's slot.
3. Select “Exit” or press the CANCEL button to end the CAPTURE
screen.
NOTE: To delete captured images, see "Deleting Captured Images" on page E-41.
16:9
Anamorphic*
16:9
Anamorphic*