Care and replacement (continued) – Panasonic TQBJ0323-1 User Manual
Page 48
Maintenance
48 ENGLISH
Care and Replacement (continued)
Lamp replacement procedure
When the projector is mounted in the ceiling, do not work directly under the projector or put your face close to the
•
projector.
Be sure to install the lamp unit and attach the lamp unit cover securely. If they are not securely installed, it may
•
cause the protection circuit to operate and the power cannot be turned on.
1
Disconnect the power plug from the wall outlet
according to “TURN THE PROJECTOR OFF”
( page 23), wait for at least 1 hour and check
the bottom if the lamp unit has cooled.
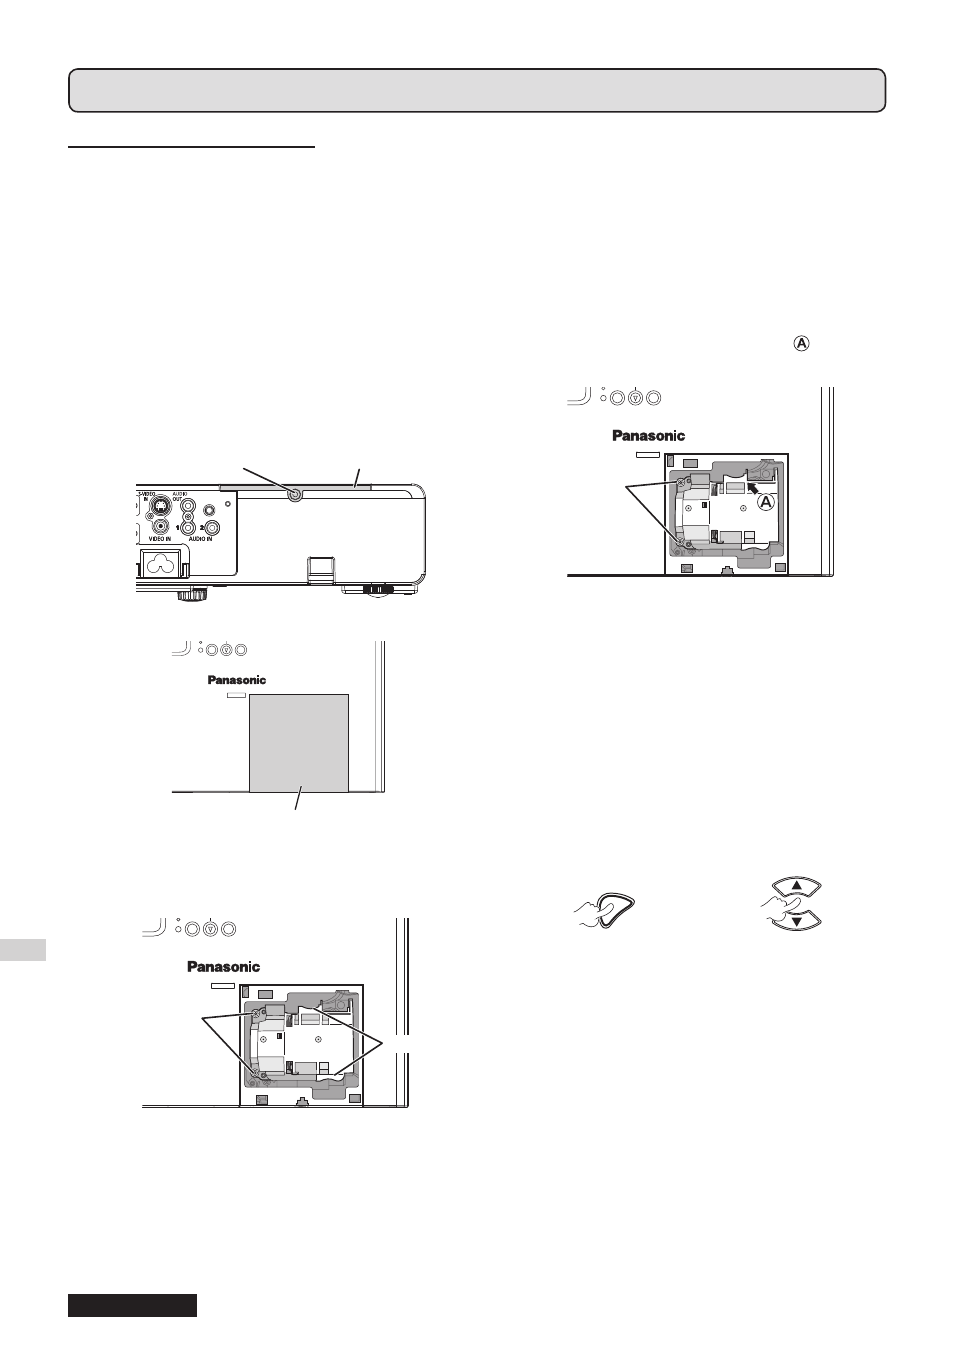
2
Use a Phillips-head screwdriver to loosen the
1 lamp unit cover screw on the back of the
projector until the screw loosen and remove
the lamp unit cover.
3
Use a Phillips-head screwdriver to loosen the
2 lamp unit screws. Pull the used lamp unit
gently from the projector.
Lamp unit cover
Rear side
Top side
Lamp unit cover
Lamp unit cover screw
Lamp unit screws
Handles
4
Press in the lamp unit until it clicks and make
sure the unit is installed securely. Tighten the
2 lamp unit screws securely with a Phillips-
head screwdriver.
During insertion, particularly press the portion
securely.
5
Attach the lamp unit cover and tighten the
1 lamp unit cover screw securely with a
Phillips-head screwdriver.
6
Connect the power cord to a wall outlet.
7
Press [POWER] to begin projection.
NOTE:
If
•
INITIAL START UP in the PROJECTOR SETUP menu
is set to
ON, the projector starts projecting when the power
cord is connected to a wall outlet. (
8
MENU
To display the main
menu.
To scroll to the
PROJECTOR SETUP
menu.
Lamp unit screws