Panasonic TQBJ0323-1 User Manual
Page 15
Preparation
ENGLISH 15
Details of your projector (continued)
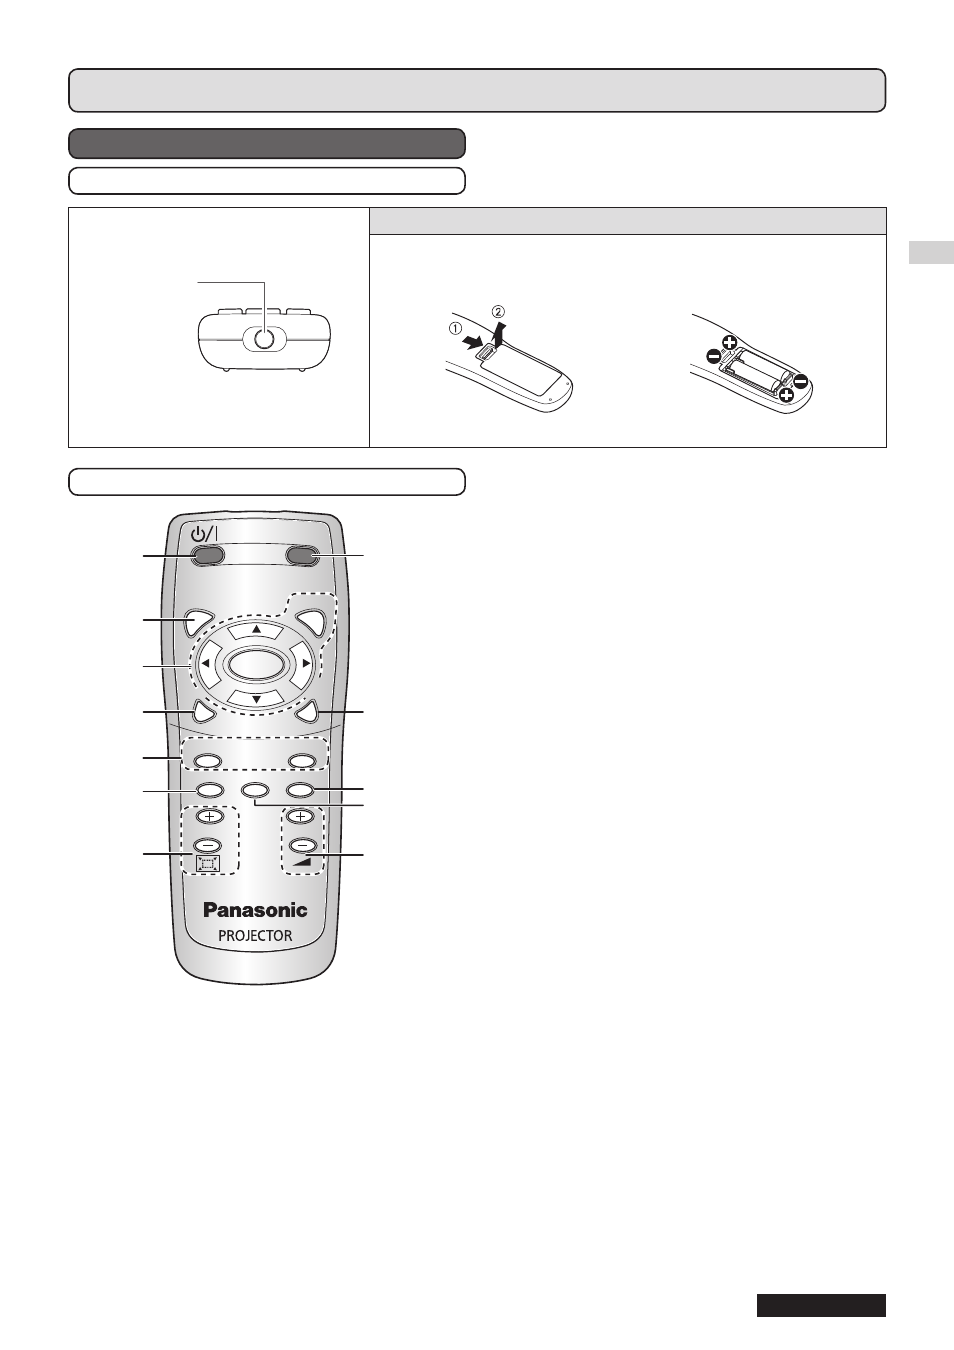
PROJECTOR’S REMOTE CONTROL
Top and rear view
Remote control
signal emitters
Installing/removing batteries
Press the tab and lift up the
cover.
Insert the batteries according to the
polarity diagram indicated inside or
remove.
Use only manganese batteries.
Front view
AUTO
SETUP
MENU
RETURN
ENTER
FREEZE
AV
MUTE
COMPUTER
VIDEO
DEFAULT FUNCTION
WIN.
INDEX-
DIGITAL ZOOM
VOLUME
①
⑤
②
③
④
⑥
⑦
⑫
⑪
⑩
⑧
⑨
① POWER
Switch between standby mode and projection
mode. ( page 22, 23)
② Display the Main menu. ( page 29)
③ Navigate through the menus with [] and
confirm the selection with
[ENTER]. ( page 28)
④ Capture the projected image as a frozen picture.
⑤ Switch the required input signal button to select.
⑥ Reset some of the settings to the factory default
settings. ( page 26)
⑦ Control the zoom size. ( page 27)
⑧ Control speaker volume. ( page 26)
⑨ Create shortcut assigned to certain selected
function. ( page 27, 40)
⑩ Display frozen image while the display of
subsequent images continues. ( page 26)
⑪ Turn off the projection temporarily. ( page 25)
⑫ Detect the input signal.
Adjust the settings of
SHIFT, DOT CLOCK
and
CLOCK PHASE in the POSITION menu
automatically for
COMPUTER signals. ( page 25)
NOTE:
Do not drop the remote control.
•
Avoid contact with liquids or moisture.
•
Do not attempt to modify or disassemble the remote control.
•
Do not let strong light shine onto the signal receptor which will cause a malfunction.
•
The remote control operates within the range of 7 m (23' 0"), approximately ±30 ° vertically and horizontally from the projector
•
avoiding any obstacles.
The operating range may differ due to the screen material and may not be effective with a translucent screen.
•