Set-up – FujiFilm FinePix E900 User Manual
Page 49
96
97
Settings
4
◆
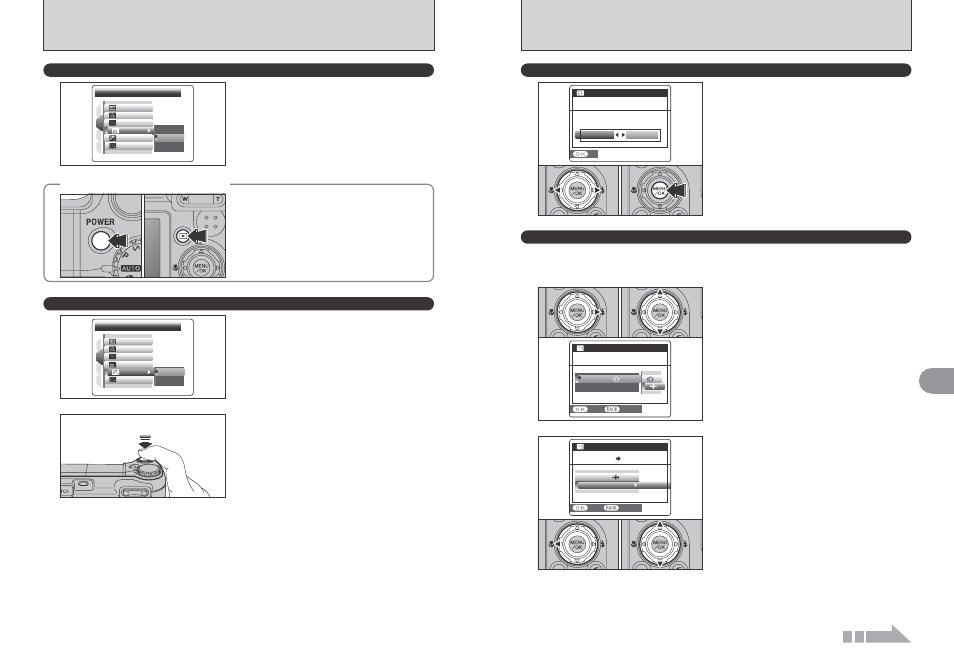
To restore power to the camera
◆
1 Press the “POWER” button to turn the camera
back on for shooting.
2 Hold down the “
w
” button for about 1 second to
play back images.
When this function is enabled and the camera
remains unused for 2 or 5 minutes, it is turned off.
Auto power off function prevents leaving the power
on.
●
!
The Auto power off function is disabled during automatic
playing back and discharging, and when a USB connection is
being used.
î AUTO POWER OFF
2
MIN
MIN
2
MIN
MIN
5
MIN
MIN
OFF
OFF
1
4
3
2
AUTO POWER OFF
AUTO POWER OFF
ON
ON
OFF
OFF
ON
ON
OFF
OFF
OK
OK
:
:
:
:
:
:
When this function is enabled, you can save power
and get the maximum possible running time from
your batteries.
The LCD monitor darkens when camera is not used
for 10 seconds.
Î LCD POWER SAVE
2
MIN
MIN
1
4
3
2
LCD POWER SAVE
LCD POWER SAVE
ON
ON
OFF
OFF
ON
ON
OFF
OFF
OK
OK
:
:
:
:
:
:
OFF
OFF
ON
ON
●
!
Pressing any other button as well as the shutter button wakes
the camera up.
When the LCD monitor is dark, pressing the shutter
button down halfway recovers the LCD monitor
brightness.
●
!
The LCD power save function is disabled in Continuous AF
and movie mode.
FORMAT
FORMAT
SET
SET
FORMAT
FORMAT OK?
OK?
ERASE ALL DATA
ERASE ALL DATA
OK
OK
CANCEL
CANCEL
ï FORMAT
Initialize (format) the xD-Picture Card for use with
the camera.
Because initializing the xD-Picture Card erases all
the frames (files), including protected frames (files).
Back up important frames (files) onto your PC or
another media.
1 Press “d” or “c” to select “OK”.
2 Pressing the “MENU/OK” button erases all the
frames (files) and initializes the xD-Picture
Card.
●
!
When [CARD ERROR], [WRITE ERROR], [READ ERROR]
or [CARD NOT INITIALIZED] appears, see P.122 for
information before formatting the xD-Picture Card.
0
1
0
2
LOCATION
LOCATION
LOCATION
TIME DIFFERENCE
TIME DIFFERENCE
TIME DIFFERENCE
TIME DIFFERENCE
SET
SET
TIME DIFFERENCE
TIME DIFFERENCE
SET
SET
CANCEL
CANCEL
:
1 Press “d”.
2 Press “a” or “b” to select “TIME DIFFERENCE”.
0
1
0
2
0
1
0
2
2
ó TIME DIFFERENCE
This function sets a time difference relative to the date and time currently set. When this setting is
enabled, the specified time difference is applied when pictures are taken.
Use this function when traveling to destinations in different time zones.
1 Press “c”.
2 Press “a” or “b” to change between “å” HOME
and “ß” LOCAL.
To set the time difference, select “ß” LOCAL.
å HOME: Your home time zone
ß LOCAL: Your destination time zone
LOCATION
LOCATION
LOCATION
LOCAL
LOCAL
TIME DIFFERENCE
TIME DIFFERENCE
TIME DIFFERENCE
TIME DIFFERENCE
SET
SET
CANCEL
CANCEL
:
1
0
1
0
2
SET-UP
✽ How to use the SET-UP menu (➡P.90)
Continued