Photography menu – FujiFilm FinePix E900 User Manual
Page 30
Bebeep
Beep
58
59
Advanced
Features
3
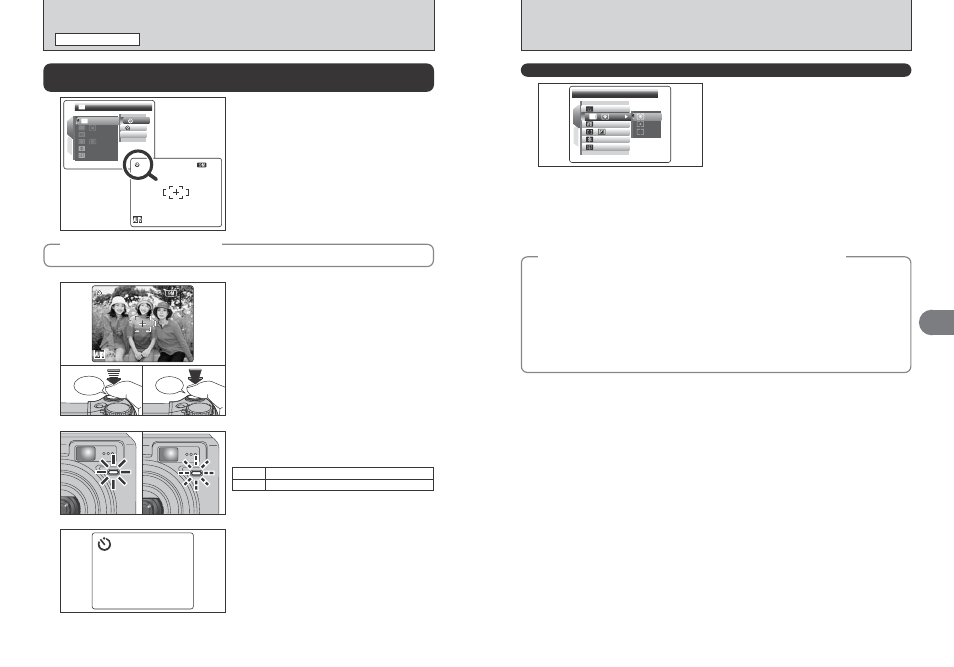
A countdown appears on the LCD monitor indicating
the time remaining until the picture is taken.
Self-timer mode is canceled after each shot.
9
4
1
2
AUTO
AUTO
OFF
OFF
:
:
:
:
:
10SEC
10SEC
SET
SET
OFF
OFF
STD
STD
:
66
N
N
1 Position the AF frame over the subject.
2 Press the shutter button down halfway to focus
on the subject.
3 Without releasing the shutter button, press the
button all the way down (fully pressed) to start
the self-timer.
2
0
1
0
2
0
3
●
!
The AF/AE lock can be used (
➡P.27).
●
!
Take care not to stand in front of the lens when pressing the
shutter button as this can prevent the correct focus or
brightness (exposure) from being achieved.
The self-timer lamp lights and then starts blinking
until the picture is taken.
3
●
!
To stop the self-timer, once it has started running, press the
“DISP/BACK” button.
PHOTOGRAPHY MENU
PHOTOGRAPHY MENU
✽ Displaying the menus (➡P.56)
Ä SELF-TIMER PHOTOGRAPHY
Available Photography modes: B, À, U, ., /, N, M, <, >
The self-timer is used in situations where the
photographer is included in the shot.
When selecting the self-timer setting, the self-timer
icon appears on the LCD monitor.
*: The picture is taken after 10 seconds.
(: The picture is taken after 2 seconds.
●
!
Any of the following cancels the self-timer setting:
i Completing the shooting
i Changing the Mode dial setting
i Setting the camera to Playback mode
i Turning the camera off
1
◆
Using the 2-second self-timer
◆
This is useful when you worry about camera shake even if attaching the camera on a tripod.
ˆ PHOTOMETRY
Available Photography modes:
N, M, <, >
Use this mode for scenes where the brightness of
the subject and background differ markedly so that
the MULTI setting is unlikely to achieve the desired
results.
) MULTI (Pattern): Light metering where the
camera assesses the scene
and selects the correct
exposure.
_ SPOT: Light metering where the exposure is
optimized for the center of the image.
+ AVERAGE: Light metering where an average
value for the entire image is used.
●
!
In the “
B
”, “
À
”, “
U
”, “
.
”, “
/
” and “
r
” modes, light
metering is fixed at the MULTI setting and cannot be
changed.
SET
SET
1
2
AUTO
AUTO
OFF
OFF
:
:
:
:
:
PHOTOMETRY
PHOTOMETRY
STD
STD
:
◆
The photometry modes are effective for the following subjects
◆
h MULTI
In this mode, the camera uses automatic scene recognition to analyze the subject and provide
optimum exposure in a wide range of shooting conditions. This mode should be used for everyday
photography.
h SPOT
This mode is useful for subjects with strongly contrasting light and dark areas where you want to
achieve the correct exposure for a particular feature.
h AVERAGE
The advantage of this mode is that the exposure tends not to change for different compositions or
subjects. This mode is particularly effective for shots of people wearing black or white clothing and
shots of scenery.
■ Self-timer lamp display
*
Lit for 5 seconds
➡ Blinking for 5 seconds
(
Blinking for 2 seconds
66
N
N