Trimming – FujiFilm FinePix S3Pro User Manual
Page 50
98
98
99
Advanced
Features
Playback
4
] TRIMMING
PLAYBACK MENU
2
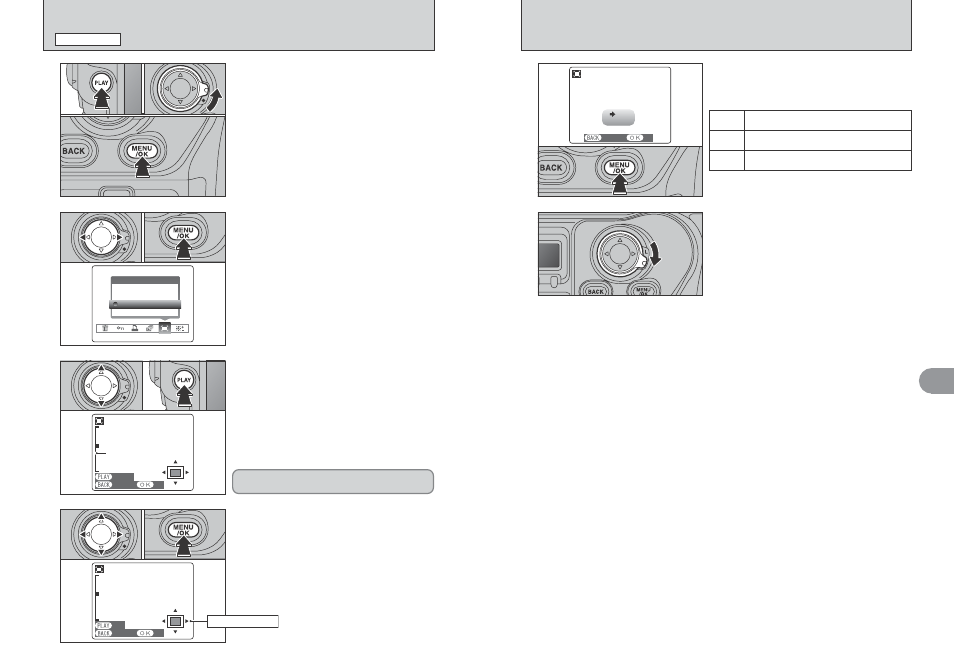
1 Press “d” or “c” to select “]” TRIMMING.
2 Press the “MENU/OK” button.
3
1 Press “a” to zoom in. Press “b” to zoom out on
a still image. A zoom bar appears on the LCD
monitor.
2 Press the “PLAY” button to move to another part
of the image.
●
!
Press the “BACK” button to return to single-frame playback.
●
!
Press the “PLAY” button to return to zooming.
0
1
0
2
4
1 Press “a”, “b”, “d” or “c” to display another
area. The current displayed image appears on
the navigation screen.
2 Press the “MENU/OK” button to save the image.
Zoom bar
Saved image size varies depending on the zoom
scale. Up to 1M can be saved.
0
1
0
2
0
1
0
2
1 Press the “PLAY” button to select Playback
mode.
2 Unlock the 4-direction button.
3 Press the “MENU/OK” button to display the
menu screen.
1
0
1
0
2
0
3
5
Check the saved image size and press the
“MENU/OK” button. The trimmed image is added
as a separate file in the final frame.
6M
3M
■ Image Sizes
Printing at up to 10R (25.4
× 30.5 cm/10 × 12 in.) /
A4 size
Printing at up to 6R (15.2
× 20.3 cm/6 × 8 in.) / A5
size
1M
Printing at up to 3R (8.9
× 12.7 cm/3.5 × 5 in.) size
When you have finished the procedure, lock the 4-
direction button to prevent accidental improper use.
6
Navigation screen