Start-up – Lochinvar ARMOR 151 User Manual
Page 53
Installation & Operation Manual
53
10
Start-up
Chlorine concentration less than 200 ppm
1. Do not fill the water heater or operate with water
containing chlorine in excess of 200 ppm.
2. Filling with chlorinated fresh water should be acceptable
since drinking water chlorine levels are much lower.
3. Do not use the water heater to directly heat swimming
pool or spa water.
4. At initial fill and during water heater startup and testing,
check system thoroughly for any leaks. Repair all leaks
before proceeding further.
Check for gas leaks
Before starting the water heater, and
during initial operation, smell near
the floor and around the water heater
for gas odorant or any unusual odor.
Remove the top access panel and smell
the interior of the water heater enclosure.
Do not proceed with startup if there is any
indication of a gas leak. Use an approved
leak detection solution. Repair any leaks
at once.
DO NOT adjust or attempt to measure
gas valve outlet pressure. The gas valve is
factory set for the correct outlet pressure.
This setting is suitable for natural gas and
propane, requiring no field adjustment.
Attempting to alter or measure the gas
valve outlet pressure could result in
damage to the valve, causing potential
severe personal injury, death, or
substantial property damage.
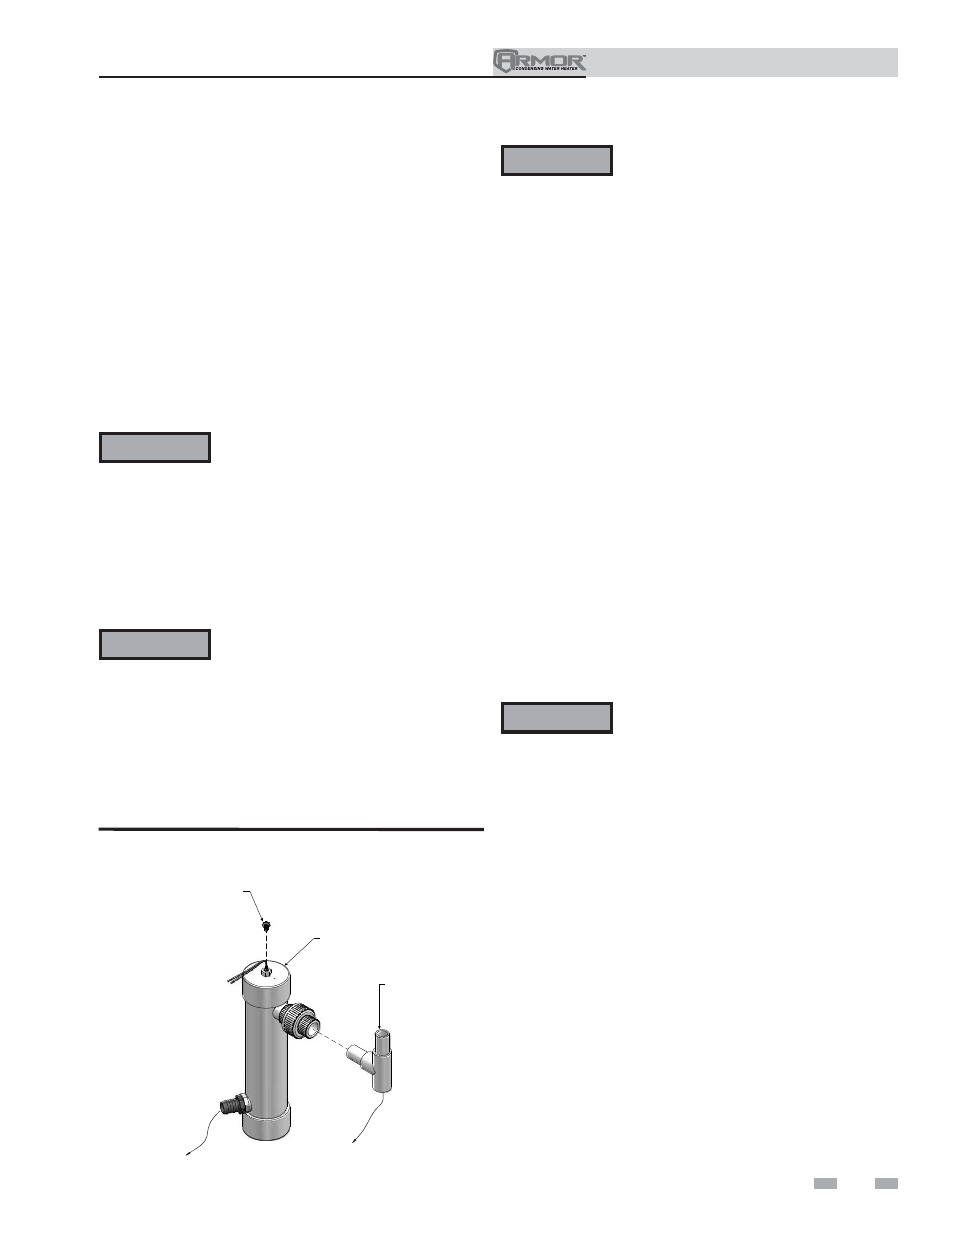
PVC TEE ASSEMBLY
(FACTORY SUPPLIED)
TO FLOOR
DRAIN
2” PVC CAP WITH
BLOCKED DRAIN SWITCH
RETAINING
SCREW
CONDENSATE FROM
HEAT EXCHANGER
Figure 10-1 Condensate Trap
ƽ WARNING
ƽ WARNING
Propane water heaters only – Your propane
supplier mixes an odorant with the propane
to make its presence detectable. In some
instances, the odorant can fade, and the gas
may no longer have an odor. Before startup
(and periodically thereafter), have the
propane supplier verify the correct odorant
level in the gas.
Inspect/fill condensate system
Inspect/check condensate lines and fittings
1. Inspect the condensate drain line, condensate PVC fittings
and condensate trap.
Fill condensate trap with water
1. Remove the PVC cap retaining screw from the PVC cap
(FIG. 10-1).
2. Remove the 2 inch PVC cap with the switch located at the
top of the trap (FIG. 10-1).
3. Fill with fresh water until the water begins to pour out of
the drain.
4. Replace the cap. Press the cap onto the trap until the cap
makes contact with the drain.
5. Replace the retaining screw.
ƽ WARNING
The condensate trap (FIG. 10-1) must be
filled with water during all times of water
heater operation to avoid flue gas emission
from the condensate drain line. Failure to
fill the trap could result in severe personal
injury or death.
ƽ WARNING