Prepare water heater, Gas conversions – Lochinvar ARMOR 151 User Manual
Page 13
Installation & Operation Manual
13
2
Prepare water heater
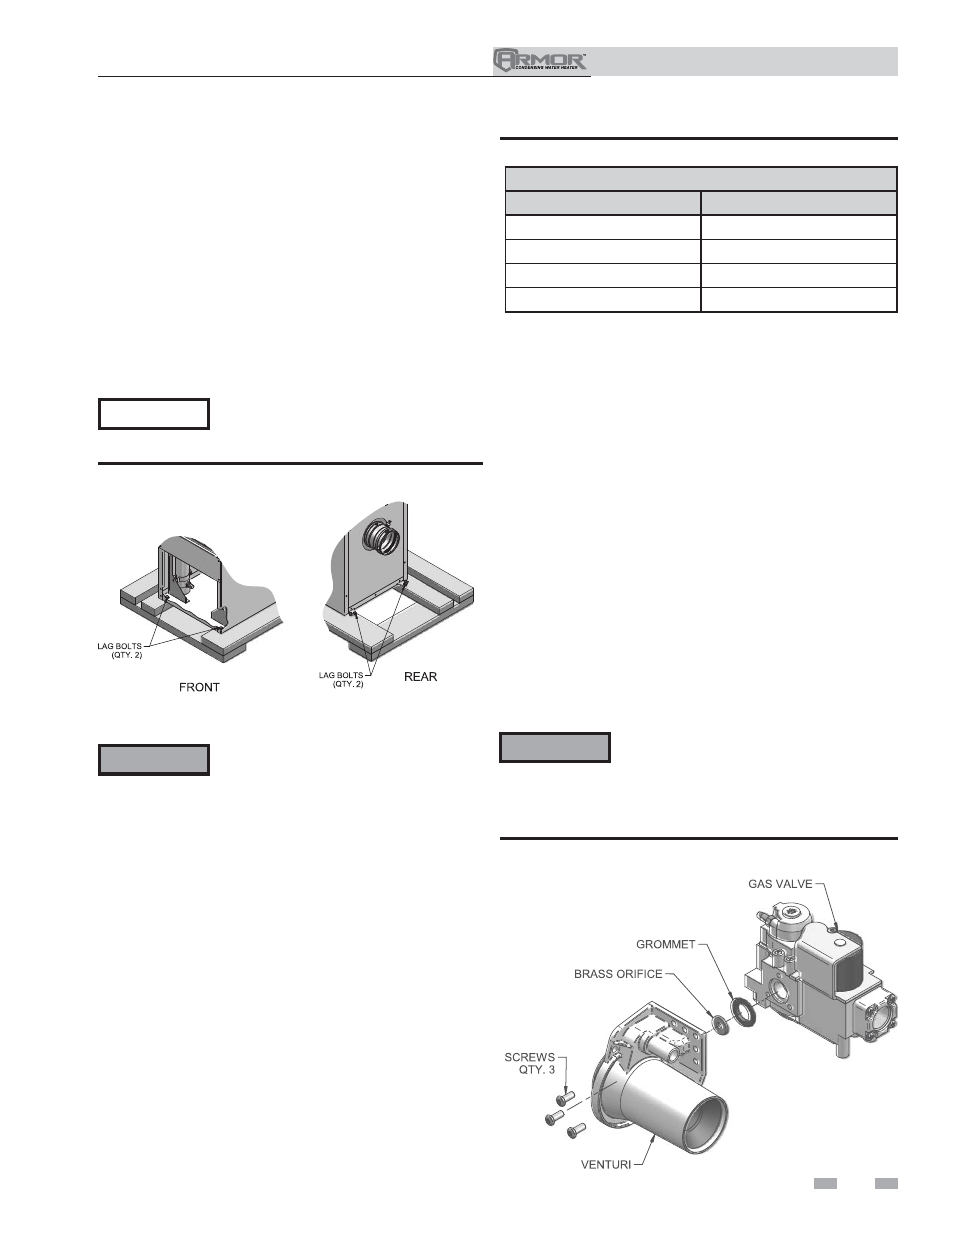
Figure 2-2 Installing Propane Orifice - Models 151 - 286
Remove water heater from wood pallet
1. After removing the outer shipping carton from the water
heater, remove the parts box.
2. Remove the front door to access the lag bolts in front of
the unit (FIG. 2-1).
3. To remove the water heater from the pallet (after
removing the front door):
a. Remove the two lag bolts from the wood pallet
inside the water heater (FIG. 2-1).
b. Detach the water heater from the lag bolts in the rear
of the unit, see FIG. 2-1.
Do not drop the water heater or bump the
jacket on the floor or pallet. Damage to
the water heater can result.
For a water heater already installed, you
must turn off gas supply, turn off power
and allow the water heater to cool before
proceeding. You must also completely test
the water heater after conversion to verify
performance as described under Start-
up, Section 10 of this manual. Failure to
comply could result in severe personal
injury, death, or substantial property
damage.
For Models 151 - 400 you must install
a propane orifice to operate the Armor
water heater on propane gas. Verify when
installing that the orifice size marking
matches water heater size (Models 151 –
400, Table 2A).
The 501 - 801 Models do not require an
orifice installation for propane operation,
but they will require a valve adjustment.
Models 151 - 286
1. Remove the top and front access covers from the unit (no
tools required for removal).
2. Remove the three screws securing the gas valve to the
venturi (FIG. 2-2).
3. Locate the propane orifice disk from the conversion kit bag.
Verify that the stamping on the orifice disk matches the
water heater size (151 – 286) (see Table 2A above).
Place the orifice into the black rubber grommet in the side
of the gas valve and secure in the valve (FIG. 2-2).
4. Reposition the gas valve against the venturi and replace the
screws (FIG. 2-2) securing the valve to the venturi.
5. After installation is complete, attach the propane conversion
label (in the conversion kit bag) next to the water heater
rating plate. Attach the LP caution label (in the conversion
kit bag) to the left side of the unit in the lower left corner.
6. Replace the top and front access covers.
Figure 2-1 Water heater Mounted on Shipping Pallet
Gas conversions
LP Conversion Table
Model
LP Orifice Stamping
151
150
200
210 / W150
286
285
400
8.0
NOTICE
ƽ WARNING
Table 2A LP Conversion Table
ƽ WARNING
After converting to LP, check combustion
per the Start-up procedure in Section 10
of this manual. Failure to check and verify
combustion could result in severe personal
injury, death, or substantial property damage.