Upper front cover hinge assembly, Upper front cover hinge assembly -61 – Lexmark 4059-XXX User Manual
Page 224
4-61
4059 Service Manual
4059-XXX
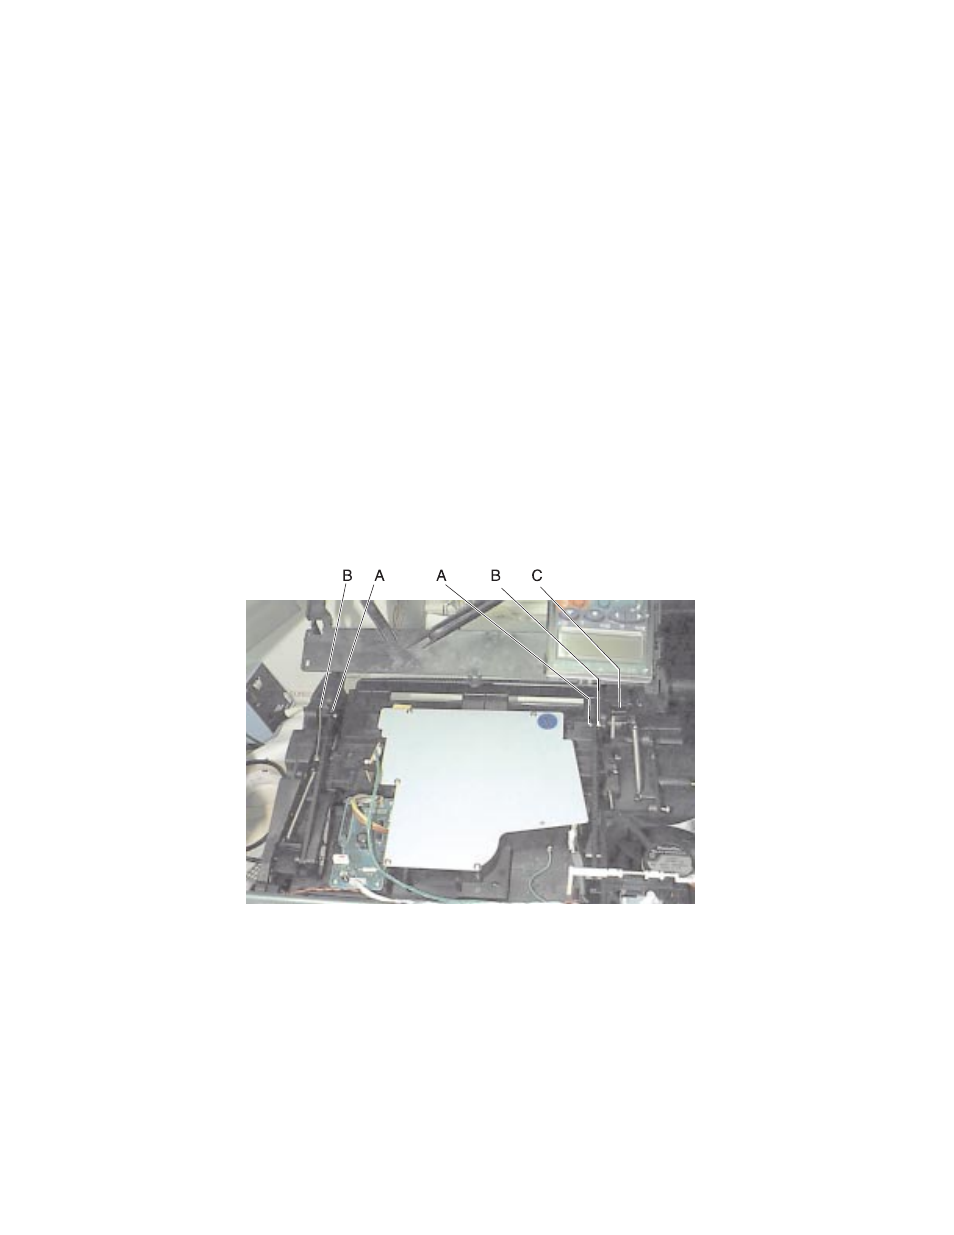
Upper Front Cover Hinge Assembly
1. Remove the upper front cover.
2. Remove the laser assembly cover.
3. Remove the C-clips (A) from the upper front cover hinge
assembly left and right hinge pins and remove the pins. Note
the pin orientation and the C-clip location on the inside of each
hinge.
4. Detach the two springs (B) from the upper front cover hinges.
5. Disconnect the operator panel cable from the operator panel
assembly.
6. Raise the upper front cover hinge assembly to a position that
lets you lift the left pivot arm from the mounting bracket (C).
7. Lift the left pivot arm from the bracket and move the upper cover
hinge assembly toward the left to clear the right upper cover
pivot arm from the mounting bracket.
8. Remove the upper front cover hinge assembly.
- E260d (142 pages)
- 6600 Series (173 pages)
- 10N0227 (1 page)
- Z12 (2 pages)
- 301 (144 pages)
- NO. 35 (1 page)
- Z65n (111 pages)
- dn2 (217 pages)
- 10E (144 pages)
- Z2300 (54 pages)
- 230 (213 pages)
- 310 Series (2 pages)
- PRO700 (24 pages)
- C 720 (18 pages)
- C520 (145 pages)
- X656 MFP (104 pages)
- Prospect Pro207 (27 pages)
- 337 (258 pages)
- OptraImage 242 (207 pages)
- T64x (6 pages)
- C524 (146 pages)
- 4098-001 (70 pages)
- 1200 Series (21 pages)
- X650 Series (8 pages)
- 5300 (179 pages)
- 302 (274 pages)
- 4549 (235 pages)
- 202 (320 pages)
- 4076-0XX (89 pages)
- 10N0016 (1 page)
- 5025 (171 pages)
- 1361760 (1 page)
- C 546dtn (6 pages)
- Interpret S400 (40 pages)
- x6575 (2 pages)
- 27S2156-001 (2 pages)
- MENUS AND MESSAGES C522 (55 pages)
- Z25 (24 pages)
- Z35 (101 pages)
- series x5100 (77 pages)
- Z82 (105 pages)
- 2500 Series (76 pages)
- 1200 (208 pages)
- Z33 (114 pages)
- 7600 Series (181 pages)