Part 2 – remote configuration, Part 2 - remote configuration – Lindy Switch User Manual
Page 21
0
Part 2 – Remote configuration
The second part of the configuration requires you to log into the LINDY KVM
IP from a system via either a network connection or a dial-up connection (via
modem or ISDN). In either case there are two types of access applications that
you can use:
• The VNC viewer – a small application supplied on the CD-ROM or
downloadable from the RealVNC website or even downloadable from the
LINDY KVM IP itself.
or
• A standard browser that supports Java – As soon as a web browser makes
contact, the LINDY KVM IP downloads a Java application to it. This allows a
viewer window to be opened and operation to commence just as it would
with the VNC viewer application.
To perform the remote configuration
1 Use either the VNC viewer or a standard web browser to make remote
contact with the LINDY KVM IP – see
Connecting to the LINDY KVM IP
for more details.
2 If the username entry is not blanked out, enter ‘admin’. Then enter the
password that was set during the local configuration stage (if no password
was set, then just press
). Once logged in, the LINDY KVM IP will show
the video output from the host system (if one is connected), or otherwise a
‘No Signal’ message.
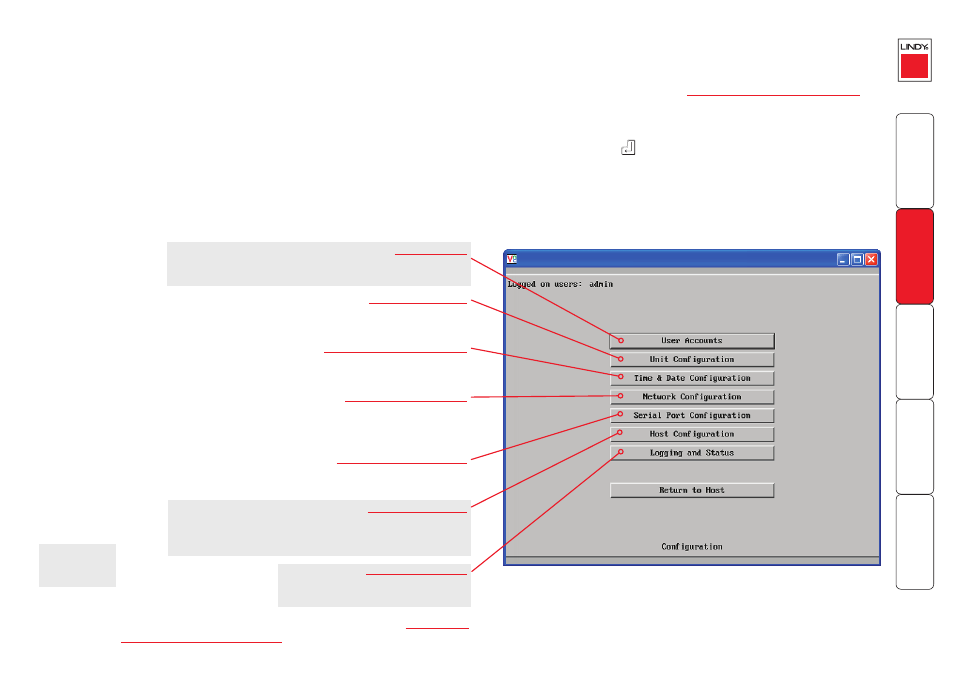
3 Click the Configure button in the top right hand corner of the window to
display the configuration menu
Many of the options within the configuration menu duplicate those
that were set (or are available) in the local configuration. However,
there are numerous other settings that are only available here.
Allows you to create and manage up to sixteen separate user
accounts, each with separate access permissions.
Allows you to alter both basic and fundamental
settings within the LINDY KVM IP.
Allows you to set the current time and date as well as the
timezone specifier and specify a network timeserver, if necessary
Here you can alter any of the existing network settings plus you
can take advantage of the IP access control feature that lets you
to specifically include or exclude certain addresses or networks.
Lets you setup or alter the details concerning
the modem and power control serial ports.
Allows you to configure user access, hot key switching and
power control codes for up to 128 host systems that may be
connected to the LINDY KVM IP via KVM switch units.
Provides various details about the user
activity on the LINDY KVM IP.
For more information about each menu option, please see
in the ‘Further information’ chapter.
Shaded items signify
options that are not
available at the local
configuration stage.