La-140 – mounting your radiator – Listen Technologies Stationary LA-350 User Manual
Page 75
69
LA-140
LT-82
Design Guide Design Guide
LA-140
2
3
$WWDFK7LOW$UP´%µWR6ZLQJ$UPRIUDGLDWRUVZLQJDUPFRPHVDWWDFKHGWRUHDURIUDGLDWRUXVLQJLQFOXGHG
Mounting Hardware Screws. It is recomended that the top hole of the radiator swing arm be used using included
mounting hardware screws in this install.
Attach Tilt Arm “B”
4
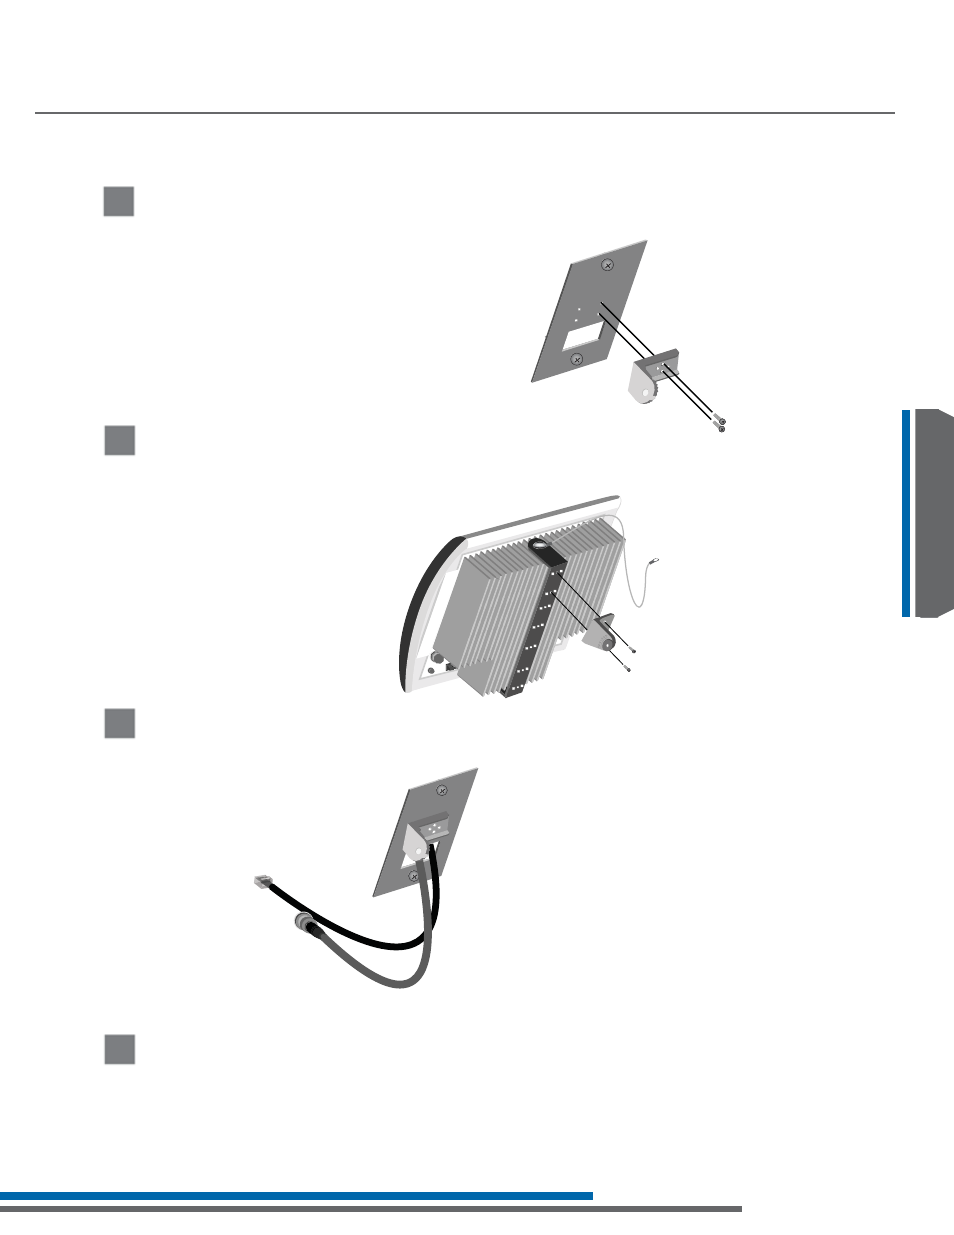
$WWDFK7LOW$UP´$µWR:DOO%R[3ODWH$WWDFK7LOW$UP´$µLQVXFKDPDQQHUWKDWLWVLWVDFURVV:DOO%R[3ODWHXVLQJ
Mounting Hardware Screws, not up and down on plate.
Attach Tilt Arm “A”
5
3XOO&$7DQG&RD[LDOFDEOHVWKURXJKKROHLQ:DOO%R[3ODWH
Pull CAT-5 and Coaxial cables through (if necessary)
Determine correct angle setting to use for the radiator using the design guide, see page 13 of design guide.
Determine correct angle
LA-140 – Mounting your Radiator
This manual is related to the following products: