Lt-82 setup and operating instructions, Connect audio inputs, Xlr wiring – Listen Technologies Stationary LA-350 User Manual
Page 47: Μ3krqh:lulqj, Lt-82 design guide design guide lt-82, If using input 2, Test tone (if necessary) if using input 1
41
LT-82
Design Guide Design Guide
LT-82
8
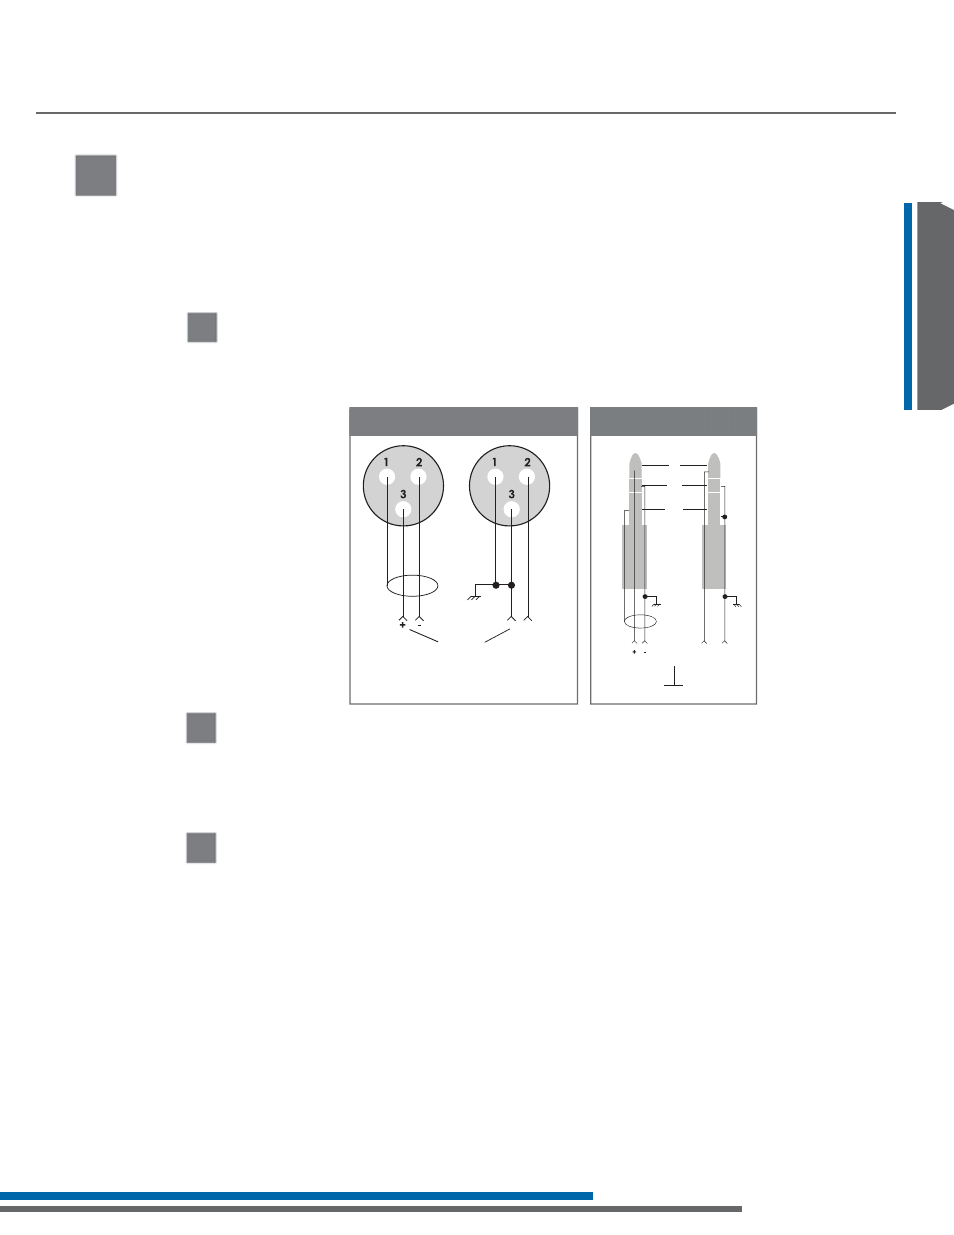
Connect Audio Inputs
7KH/7KDVWZRDXGLRLQSXWRSWLRQV,QSXWDQG,QSXW,QSXWLVD
balanced connection using either an XLR or 1/4” phono connector.
Input 2 has two unbalanced mixing phono connectors. Use Input 1 if you
are using a microphone or if you have a balanced connection such as
from a professional audio mixer (you can also use Input 1 for
unbalanced connections). Use Input 2 to connect to an unbalanced
audio source.
8A
Connect the audio source(s) to one or both audio input connections. Input 1 offers a choice of balanced
XLR or 1/4” phono connector. Plug your microphone into Input 1 and move the input select switch to
Mic (for dynamic microphones) or Mic + PH Power (for condenser microphones). Plug your balanced or
unbalanced audio source into Input 1. Use the following diagram.
8B
3OXJ\RXUXQEDODQFHGDXGLRVRXUFHLQWR,QSXWDQGVHOHFWWKHDXGLROHYHOVZLWFKIRUG%XRUG%XWR
match the audio level coming from your equipment.
If using Input 2
ATTENTION: When using Input 1 and Input 2 simultaneously, the audio signals will mix together.
Input 1 will mix with both left and right signals of Input 2.
8C
To broadcast a test tone, press the test tone button. This helps to test
receivers when no audio source is available.
Test Tone (if necessary)
If using Input 1
XLR Wiring
Input from
Balanced
Audio
Source
Unbalanced
Audio
Source
µ3KRQH:LULQJ
Balanced
Tip
Ring
Sleeve
Unbalanced
Top Ring
Top Ring/Sleeve
Audio from
Balanced
Audio
Source
Unbalanced
Audio
Source
Sleeve
LT-82 Setup and Operating Instructions