La-140 setup and operating instructions, Set compatibility switch (sw2), Front led indicators – Listen Technologies Stationary LA-350 User Manual
Page 63
57
LA-140
LT-82
Design Guide Design Guide
LA-140
LA-140 Setup and Operating Instructions
8
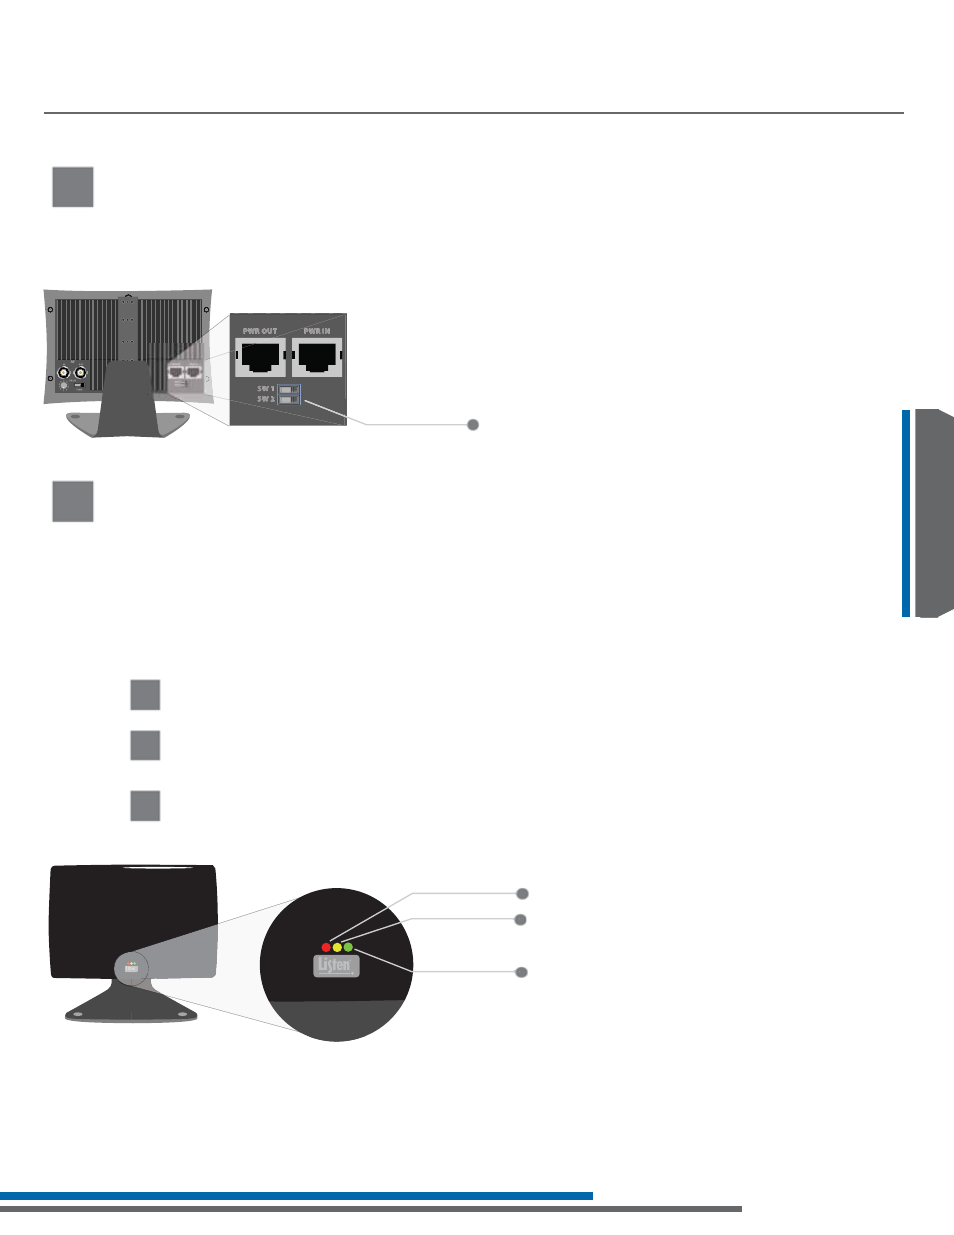
If using a Listen LT-82 Transmitter with the Listen LA-140 Radiator leave this switch in the “OFF” position.
,I\RXDUHXVLQJWKH/LVWHQ/$5DGLDWRUZLWKDQRWKHUPDQXIDFWXUHU·VWUDQVPLWWHUPRGXODWRUVHWWKLV
switch to the “ON” position.
Set Compatibility Switch (SW2)
9A
The red LED is the “Power On” LED. If the Red LED is lit, the radiator has power.
Red LED
9B
The yellow LED is the “no connection” LED. If lit, the radiator is not connected to a transmitter or another radiator.
When properly connected the yellow LED will be extinguished.
Yellow LED
IMPORTANT: Ensure this switch is in the “OFF” position whenever using the radiator
with the Listen LT-82 Transmitter.
9
There are three LEDs located on the bottom center of the front of the radiator. These LEDs are very useful
for determining the current status of the radiator. See below for possible LED combinations and how to
interpret what the combinations mean.
Front LED Indicators
9C
The green LED is the “Signal Present” LED. If the green LED is lit, the radiator is outputting an IR signal into the room.
During normal operation the red and green LEDs will be on simultaneously (unless defeated by SWI)
Green LED
&RPSDWLELOLW\ZLWK2WKHU0DQXIDFWXUHU·V6ZLWFK6:
Green LED
Yellow LED
Red LED
ATTENTION: The LEDs can be disabled using switch 1 located on the rear of the radiator. If you believe
there is power to the radiator but there are no LED indications on the front of the radiator,
switch 1 has likely been set to the “OFF” position. Make sure switch 1 is in the “ON” position
before attempting to check the status of the radiator.