Paper feed magnet – Lexmark 4039-1XX User Manual
Page 71
Repair Information
57
4039-1XX
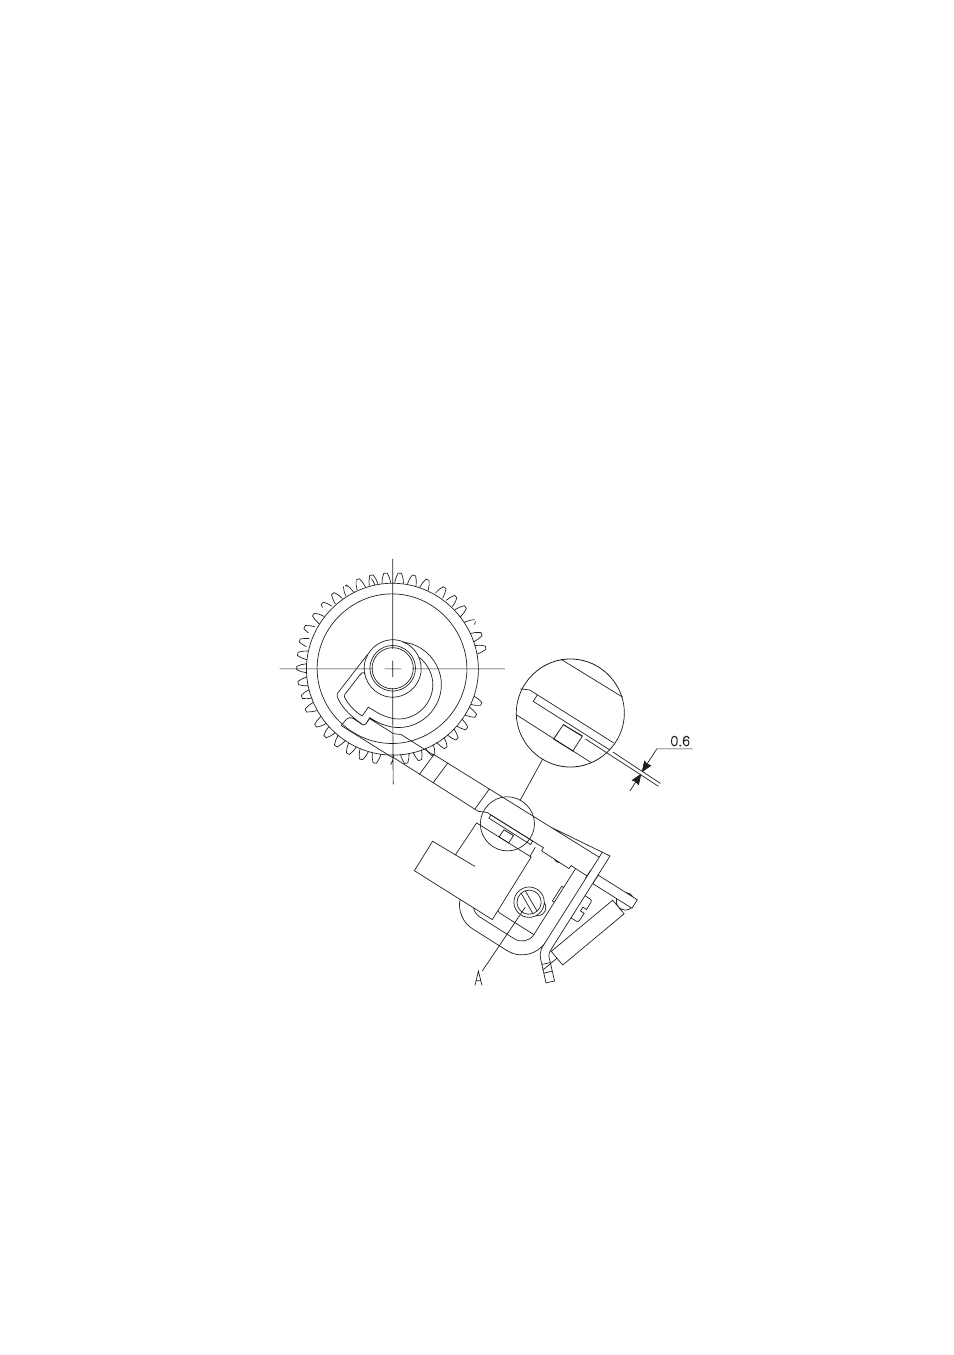
Paper Feed Magnet
1. Remove the system board. The magnet is accessed through the
holes in the right frame.
2. With the armature latched on the cam step check for 0.60 mm ±
0.07 mm (0.024 in ± 0.003 in.) between the foam pad and the
magnet pole piece. If adjustment is required, continue:
3. Keep the armature latched and loosen the magnet mounting
screw [A].
4. Insert feeler gage.
5. Rotate the magnet against the feeler gage.
6. Tighten the mounting screw.
7. The gage should pass between the foam pad and the magnet
pole piece with moderate resistance.
See also other documents in the category Lexmark Printers:
- E260d (142 pages)
- 6600 Series (173 pages)
- 10N0227 (1 page)
- Z12 (2 pages)
- 301 (144 pages)
- NO. 35 (1 page)
- Z65n (111 pages)
- dn2 (217 pages)
- 10E (144 pages)
- Z2300 (54 pages)
- 230 (213 pages)
- 310 Series (2 pages)
- PRO700 (24 pages)
- C 720 (18 pages)
- C520 (145 pages)
- X656 MFP (104 pages)
- Prospect Pro207 (27 pages)
- 337 (258 pages)
- OptraImage 242 (207 pages)
- T64x (6 pages)
- C524 (146 pages)
- 4098-001 (70 pages)
- 1200 Series (21 pages)
- X650 Series (8 pages)
- 5300 (179 pages)
- 302 (274 pages)
- 4549 (235 pages)
- 202 (320 pages)
- 4076-0XX (89 pages)
- 10N0016 (1 page)
- 5025 (171 pages)
- 1361760 (1 page)
- C 546dtn (6 pages)
- Interpret S400 (40 pages)
- x6575 (2 pages)
- 27S2156-001 (2 pages)
- MENUS AND MESSAGES C522 (55 pages)
- Z35 (101 pages)
- Z25 (24 pages)
- series x5100 (77 pages)
- Z82 (105 pages)
- 2500 Series (76 pages)
- 1200 (208 pages)
- Z33 (114 pages)
- 7600 Series (181 pages)