Setup menu, Delete confirmation, Clean ccd – Konica Minolta DYNAX 7D User Manual
Page 56
1
11
10
0
1
11
11
1
Setup menu
L
LC
CD
D b
ba
ac
ck
klliig
gh
htt
5
5 s
se
ec
c..
3
3 m
miin
n..
–
–
R
Re
es
se
ett d
de
effa
au
ulltt
–
–
O
Offff
““N
No
o””
P
Po
ow
we
err s
sa
av
ve
e
M
Me
en
nu
uS
Se
ec
c..M
Me
em
mo
orry
y
D
De
elle
ette
e c
co
on
nff..
C
Clle
ea
an
n C
CC
CD
D
MENU SECTION MEMORY
The camera can remember which menu section was lasted
opened. If the menu section memory function is on, when the
menu button is pressed, the last menu section that was last
displayed is opened. When menu section memory is off, section 1
of the recording or playback menu is displayed when the menu
button is pressed.
Each time a delete command is used a confirmation screen
appears confirming the action to erase the image data. When this
screen opens, the no button is highlighted. This function allows the
yes button to be initially highlighted to make deleting images
easier. Care should be taken when deleting images as the data
cannot be retrieved once erased.
DELETE CONFIRMATION
D
De
elle
ette
e?
?
Y
Ye
es
s
N
No
o
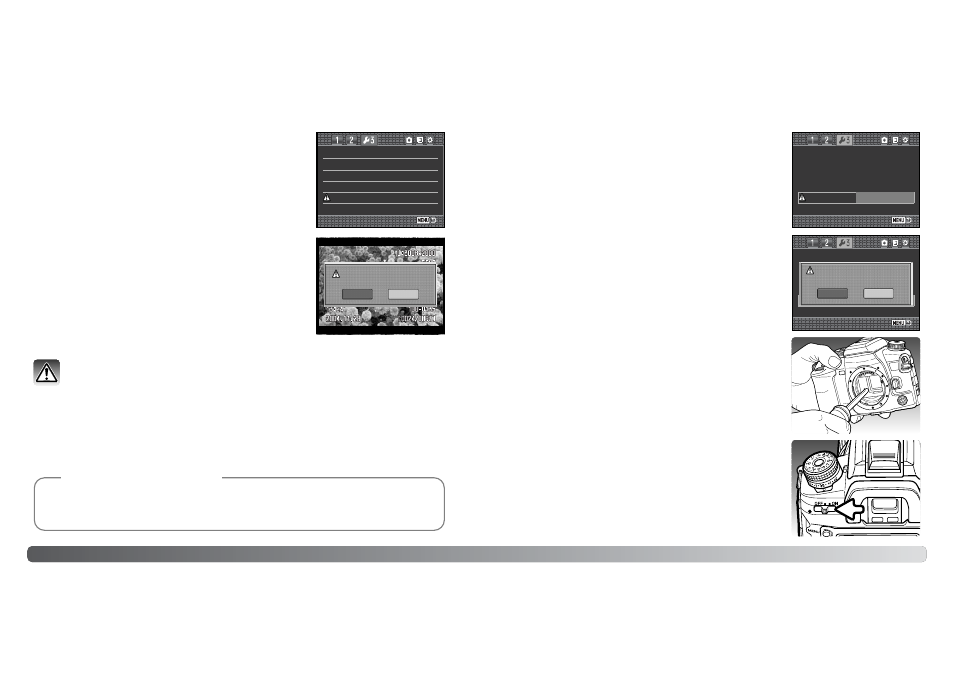
CLEAN CCD
Dust can enter the camera body when changing lenses. The camera should have a lens or body
cap mounted at all times. Confirm the rear of the lens and cap is free from dust before mounting on
the body.
Clean the CCD in a dust-free environment. Use a blower brush to remove the dust - compressed air
can damage the camera.
Only clean the CCD when necessary. Improper cleaning may damage the CCD.
The DiMAGE Master software can remove the affects of dust from RAW images. This is done
by taking a dust reference image before cleaning the CCD. For more on this process, see the
DiMAGE Master manual.
Accessory Notes
L
LC
CD
D b
ba
ac
ck
klliig
gh
htt
E
En
ntte
err
R
Re
es
se
ett d
de
effa
au
ulltt
P
Po
ow
we
err s
sa
av
ve
e
M
Me
en
nu
uS
Se
ec
c..M
Me
em
mo
orry
y
D
De
elle
ette
e c
co
on
nff..
C
Clle
ea
an
n C
CC
CD
D
L
LC
CD
D b
ba
ac
ck
klliig
gh
htt
R
Re
es
se
ett d
de
effa
au
ulltt
A
Afftte
err c
clle
ea
an
niin
ng
g C
CC
CD
D,,
ttu
urrn
n c
ca
am
me
erra
a o
offff.. C
Co
on
nttiin
nu
ue
e?
?
Y
Ye
es
s
N
No
o
The battery should be fully charged before cleaning the CCD. If
battery power is low, this function cannot be used. The use of the
optional AC adapter is recommended over the use of the battery.
Cleaning the CCD without sufficient power will cause permanent
damage.
Highlight “Enter” and press the center of the controller to begin the
cleaning routine.
Before the CCD is exposed, a confirmation screen appears;
choosing “Yes” executes opens the shutter and mirror, “No”
cancels the cleaning operation.
Remove the lens or body cap.
Use a blower brush to clean the CCD. Hold the body so it is
leaning forward to prevent the dust blown from the CCD resettling
in the camera. Do not touch the interior of the camera. If the
camera starts beeping, power is low. Immediately stop cleaning
and turn the camera off.
Turn the camera off to complete the operation. Replace the lens or
body cap.